Wireshark plugin for JGroups
-
Introduction
-
Wireshark is a freely available, open source network protocol analyzer (www.wireshark.org) which permits the capture and analysis of packets exchanged between processes over a network.
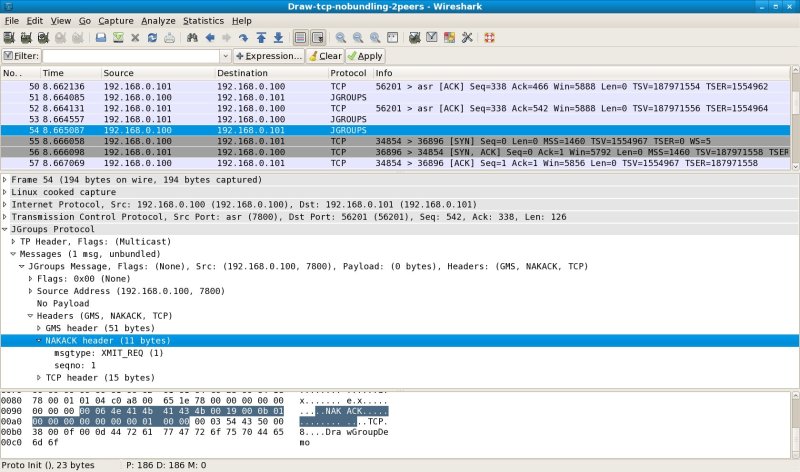
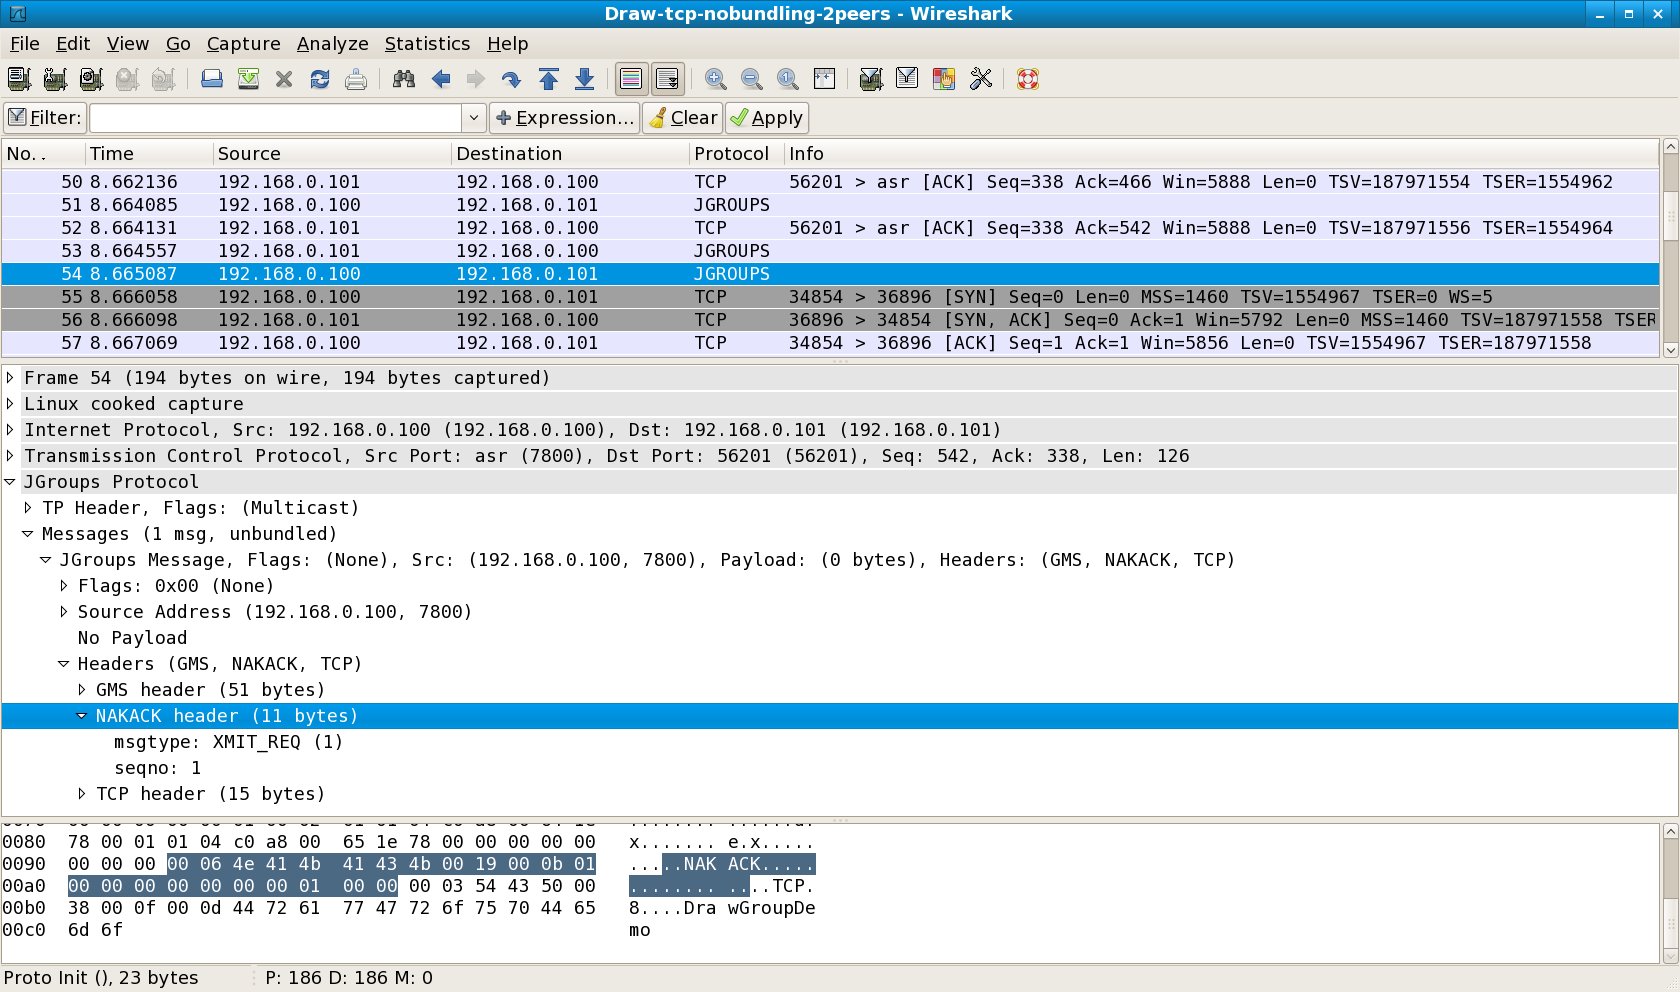
As of August 2008, work is underway to develop a JGroups dissector plugin for Wireshark. Such a dissector plugin allows identifying JGroups-specific messages within a capture session and viewing the JGroups-specific content of those messages. An example screen shot of the plugin in its current state of development (version 0.0.1) appears below:
-
Where to get the plugin
-
The dissector is available in two forms: plugin source code only, or binary versions of wireshark with the plugin installed.
Dissector source
The dissector source, sample JGroups capture files and instructions for installing the plugin into a source version of Wireshark can be downloaded from the JGroups SourceForge cvs server:
> cvs -d:pserver:anonymous@javagroups.cvs.sourceforge.net:/cvsroot/javagroups co -d $PLUGIN_SOURCE wireshark-plugin
Replace the variable $PLUGIN_SOURCE with a directory of your choice. This repository contains dissector source, sample JGroups capture files and instructions for installing the plugin into a source version of Wireshark (downloaded separately).
Binary versions of Wireshark with plugin installed
Binary versions of Wireshark containing the plugin can be obtained at http://sourceforge.net/project/showfiles.php?group_id=6081&package_id=282049
Versions will be made available for Window XP and Fedora. Creating binary versions for other OSs can be achieved using the plugin source.
Windows version:
This version is packed inside a Windows installer. Simply execute the Windows installer to install Wireshark. Wireshark requires the WinPCap library (4.0.2) to be installed - the installer will prompt you for its installation if it is not already installed.
Linux version:
This version is packed as a Fedora version-dependent srpm. The rpmbuild command can be used to rebuild an architecture-specific binary version using the following steps:
1. Set up an rpm directory structure to support the build
Choose a base directory $BASEDIR to which you have write access (e.g. BASEDIR=/home/myuserid) and create the following directory structure:
> mkdir -p $BASEDIR/src/rpm
> cd $BASEDIR/src/rpm
> mkdir BUILD SOURCE RPMS SRPMS SPECS
> mkdir RPMS/i386 RPMS/i486 RPMS/i586 RPMS/i686 RPMS/athlon RPMS/noarch
Once the directory structure is created, create a file in /home/myuserid called .rpmrc containing the line:
%_topdir $BASEDIR/src/rpm
This directs rpm and rpmbuild to use the created directory structure in place of the default /usr/src/redhat (to which you may not have write access!).
2. Use the buildrpm command to build the binary packages from the source package:
For example,
> buildrpm --rebuild wireshark-jgroups-0.99.6-3.fc8.src.rpm
Making use of the created tree structure, this will cause the wireshark sources to be extracted from the srpm, patched with the plugin (amongst other patches) and built on the particular architecture of your machine. After the build has completed, the binary rpms will be copied to the RPMS subdirectory for the particular architecture.
For example, the above command executed on Fedora Core 8 results in the files RPMS/i386/wireshark-0.99.6-3.fc8.i386.rpm, RPMS/i386/wireshark-debug-0.99.6-3.fc8.i386.rpm and RPMS/i386/wireshark-gnome-0.99.6-3.fc8.i386.rpm.
3. Install the binary rpms
> rpm -ivh wireshark-0.99.6-3.fc8.i386.rpm
> rpm -ivh wireshark-gnome-0.99.6-3.fc8.i386.rpm
NOTE: before installing, ensure that previous versions of Wireshark are uninstalled, as the binary version of the plugin will install into the same filespace locations.
-
Using the plugin
-
1. Start Wireshark:
For example, on Fedora:
> wireshark
2. Once the Wireshark UI is displayed, you may set preferences by visiting
Edit->Preferences->Protocols->JGroups
In particular, you may want to allow debugging fields to be displayed in the wireshark session.
3. Use File->Open to open a sample capture file (for example, as included in the plugin source distribution) and view the JGroups packets.

Comments