This article documents how to install ASE 15.0.3 on Fedora Linux 10. It may be useful for later versions as well.
See also jBPM3 on Sybase
Preinstallation tasks
Follow the manual section named Preinstallation for a New Installation (sic). The most relevant steps are highlighted below.
Install required packages
# yum install libaio compat-libstdc++-33
Increase system shared memory
$ sudo -e /etc/sysctl.conf
# 32MB is the default shared memory max size
# Sybase needs at least 64MB
kernel.shmmax=67108864
Be sure to apply the changes.
# sysctl -p
Create sybase account
# useradd --base-dir /opt --create-home --system --comment "Sybase Adaptive Server" sybase
Installation procedure
Download the distribution
Point your browser to ASE 15.0.3 Linux x86
Extract and install
Extract the contents of the downloaded file.
$ sudo -u sybase tar -C /opt/sybase -xf ase1503_linuxx86.tgz
Allow user sybase to connect to the X server, so that the installer can run in graphical mode as sybase.
$ xhost SI:localuser:sybase
Log in as sybase, then run the installer. Do not try to configure the servers, tough. If you do, the installer will report that the servers were configured successfully when, in fact, it does not configure them.
$ sudo -u sybase -i
[sybase]$ ebf16555/setup
Append the following line to .bash_profile in order to set the Sybase environment variables every time user sybase runs a command.
# Get the Sybase environment variables
. ~/SYBASE.sh
Configure Adaptive Server
The srvbuild tool is useful to configure the servers after installation. Unfortunately, the Motif GUI employed by the tool hangs the GNOME desktop when you click a drop down button. The safe alternative is to configure the servers using resource files through the svrbuildres tool.
[sybase]$ srvbuildres -r adaptive_server.rs
Sample resource files for creating servers are included in the ASE-15_0/init/sample_resource_files directory of your Sybase installation. As a reference, the resource file employed by the author is attached to this article. Here are a few notes on this reference configuration.
- If the server name is SYBASE, you will not have to specify the server name in console tools like startserver and isql.
- The /var filesystem contains data expected to continually change during normal operation of the system. If /var is mounted in a separate partition, it is a good idea to place the storage devices there.
Change localization settings
If you would like to change the localization settings, run the sqllocres utility. There is a graphic counterpart called sqlres that, like srvbuild, sports Motif widgets and suffers from the same flaws.
[sybase]$ sqllocres -r sqlloc.rs
The attached resource file specifies Spanish as the default language. Take it as a reference for selecting the language of your choice. Notice the default values are us_english language, iso_1 character set and binary sort order.
Set the system administrator password
A user account called sa is created with the sa_role when you install Sybase. Users with the sa_role can use any database, including master, with full privileges. Immediately after a new installation, there is no password on the sa account. You should log in to the new Adaptive Server as sa and set a password.
[sybase]$ isql -Usa
Password: <enter>
1> sp_password null, <sa_password>
2> go
Database initialization
Make devices
The commands below make a data device of 32MB and a log device of 32MB.
[sybase]$ isql -Usa
Password: <sa-password>
1> disk init name='jbpmdata', physname='/var/lib/sybase/jbpmdata.dat', size='32m'
2> go
1> disk init name='jbpmlog', physname='/var/lib/sybase/jbpmlog.dat', size='32m'
2> go
Create database
1> create database jbpm3 on jbpmdata='32m' log on jbpmlog='32m'
2> go
CREATE DATABASE: allocating 8192 logical pages (32.0 MB) on disk 'jbpmdata'.
CREATE DATABASE: allocating 8192 logical pages (32.0 MB) on disk 'jbpmlog'.
Database 'jbpm3' is now online.
Set database options
- Truncate transactions log on checkpoint (JBPM-1829)
- Abort transaction if the log is full
1> sp_dboption jbpm3, "trunc log on chkpt", true
2> go
Database option 'trunc log on chkpt' turned ON for database 'jbpm3'.Running CHECKPOINT on database 'jbpm3' for option 'trunc log on chkpt' to take effect.
(return status = 0)
1> sp_dboption jbpm3, "abort tran on log full", true
2> go
Database option 'abort tran on log full' turned ON for database 'jbpm3'.
Running CHECKPOINT on database 'jbpm3' for option 'abort tran on log full' to take effect.
(return status = 0)
Add login
1> sp_addlogin jbpm3, jbpm3jbpm3, jbpm3
2> go
Password correctly set.
Account unlocked.
New login created.
(return status = 0)
Change database owner
1> use jbpm3
2> go
1> sp_changedbowner jbpm3
2> go
Database owner changed.
(return status = 0)
Create tables
[sybase]$ isql -U jbpm3 -i jbpm.jpdl.sybase.sql
Password: <jbpm3-password>
The DBMS will emit several warnings like the one below.
Warning: Row size (14372 bytes) could exceed row size limit, which is 4012 bytes.
The liberal usage of the table-per-class-hierarchy mapping strategy in jBPM results in tables with many columns and, in consequence, large row sizes. Nevertheless, each concrete subclass only occupies a subset of the columns. For more details, refer to jBPM3 on Sybase.
Adaptive Server daemon
Download the attached sybase init script. Copy it to the init.d directory and make it executable.
# cp sybase /etc/init.d
# chmod a+x /etc/init.d/sybase
Stopping Sybase requires the shutdown command to be issued with a system administrator account. The init script reads the system administrator password plus the command from a file called stop.in, located in the home directory of user sybase. The contents of the stop.in file should be as follows.
<sa-password>
shutdown
go
quit
With the sybase and the stop.in files in place, you can start, stop, restart and query the status of Sybase Adaptive Server with the service program.
# service sybase {start|stop|status|restart}
Use the chkconfig program to add the runlevel information for the new system service.
# chkconfig --add sybase
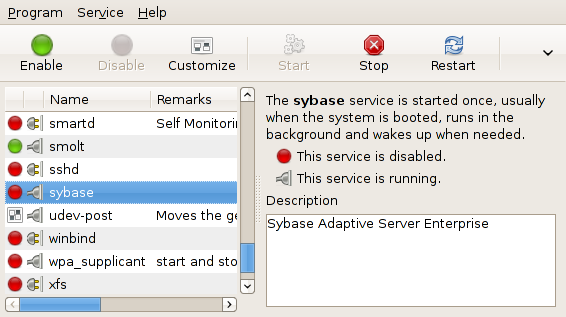
Now you can manage the service from system-config-services.
Comments