Even if you can create, build and deploy your web service application with a simple text editor and a shell console, a properly configured IDE and/or Ant build file might help you and speed up your development.
- JBossWS-CXF Testsuite Eclipse project
- JBossWS user project generator
JBossWS-CXF Testsuite Eclipse project
The JBossWS-CXF Samples testsuite covers the web service functionalities it currently supports. Running the tests in an IDE is an effective way to start your web service training. This article describes how to install a JBossWS-CXF source code distribution as an Eclipse project, build the testsuite, deploy it and run it on a JBoss server configured in the IDE.
1 Prerequisites
1.1 Red Hat JBoss Developer Studio or Eclipse
There are several choices of Eclipse releases. The directions provided here will work for any of these releases. I recommend using the Red Hat JBoss Developer Studio Edition [1]. It is built on Eclipse [2] and includes a broad set of features that will help you quickly get started developing java applications on JBoss. This article uses Red Hat JBoss Developer Studio 8.
Red Hat JBoss Developer Studio 8 (build on Eclipse Luna)
Red Hat JBoss Developer Studio 7 (build on Eclipse Kepler)
Red Hat JBoss Developer Studio 6 (build on Eclipse Juno)
Eclipse (Luna)
Eclipse (Kepler)
Eclipse (Juno)
1.2 JBossWS-CXF source code distribution bundle
Download one of the JBossWS-CXF source code distribution bundles [3]. You must use a version that is compatible with the version of the JBoss server it will be run on [6]. This article uses version JBossWS-CXF 4.3.x.
Each JBossWS-CXF distribution supports more than one JBoss server version. A unique property for each supported version is defined in the build.xml file in the bundle's root directory. Search the build.xml file for the ".home" text. Names such as jboss720.home and wildfly810.home will be found. This means the bundle supports version JBoss AS 7.2.0 and WildFly 8.1.0 respectively.
Compatibility table
| JBossWS-CXF version | Server version / property name |
|---|---|
| JBossWS - CXF 4.3.x | JBoss AS 7.2.0 / jboss720.home WildFly8.0.0 / wildfly800.home WildFly8.1.0 / wildfly810.home |
| JBossWS - CXF 4.2.x | JBoss AS 7.1.2 / jboss712.home JBoss AS 7.1.3 / jboss713.home JBoss AS 7.2.0 / jboss720.home WildFly8.0.0 / wildfly800.home |
| JBossWS - CXF 4.0.x/4.1.x | JBoss AS 7.1.1 / jboss711.home JBoss AS 7.1.2 / jboss712.home JBoss AS 7.1.3 / jboss713.home JBoss AS 7.2.0 / jboss720.home |
| JBossWS - Native 4.0.x | JBoss AS 7.0.1 / jboss701.home JBoss AS 7.0.2 / jboss702.home JBoss AS 7.1.0 / jboss710.home JBoss AS 7.1.1 / jboss711.home |
1.3 JBoss AS or WildFly Community Edition
Download and install the JBoss AS [4] or WildFly [5] version compatible with the installed JBossWS-CXF distribution bundle. This article is using WildFly 8.1.0.
2 Tasks to Setup JBossWS-CXF in Eclipse
There are 3 tasks to setup JBossWS-CXF in Eclipse.
- Import the JBossWS-CXF distribution source code.
- Create a server configuration
- Create 2 "External Tool" commands
2.1. Import the JBossWS-CXF distribution source code
- Start Red Hat JBoss Developer Studio
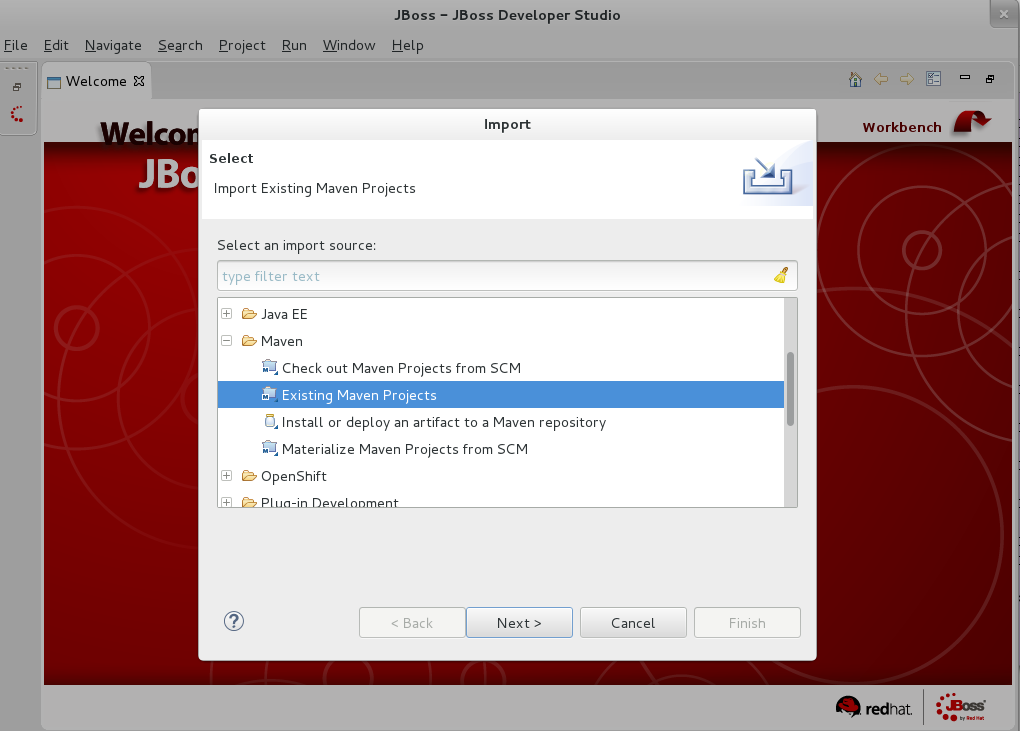
- Select File | Import.. | Maven | Existing Maven Projects
- Click Next
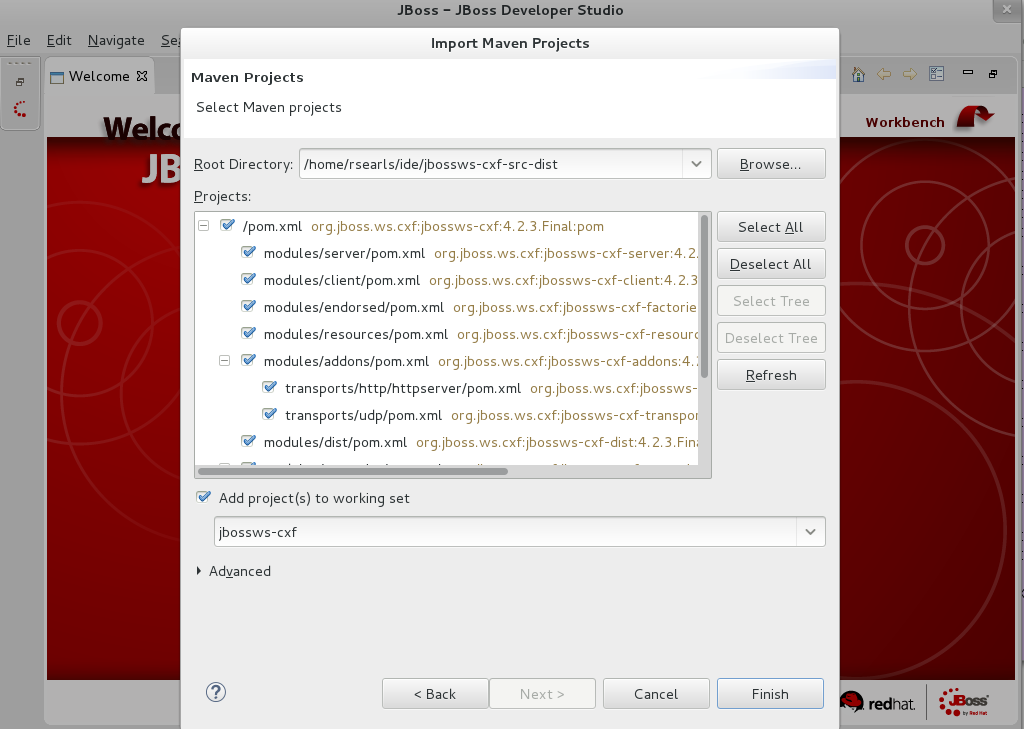
- Browse to the root directory of the JBossWS-CXF source distribution.
- All pom.xml files should be selected.
- I am using the default project name. Set it as you like.
- Click Finish
(This is a large project. It will take time to load. Be patient.)
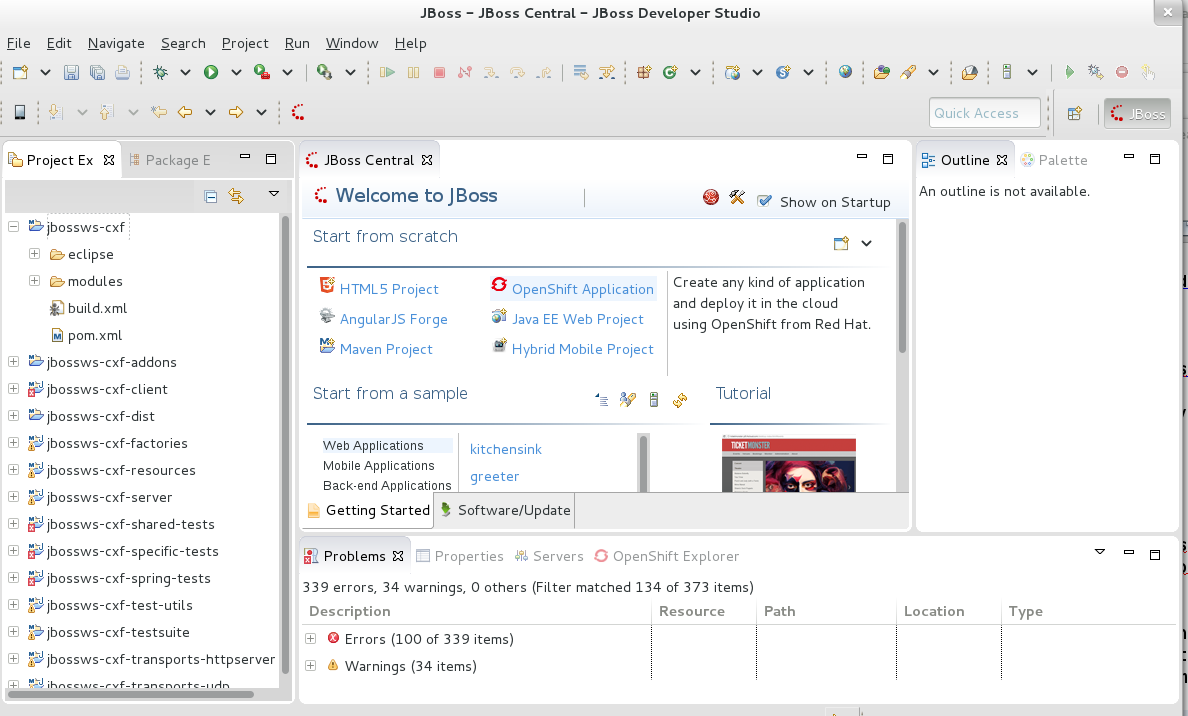
You may notice that Eclipse flags "Problems" ![]() and "Warnings"
and "Warnings" ![]() on some of the modules. Ignore this. JBossWS-CXF is an Apache Maven based project, but it is not a traditional maven project. It does not build with the standard maven goals. Instead JBossWS-CXF defines maven profiles to perform the requisite compile and deployment of tests from the testsuite and ant scripts to configure the server.
on some of the modules. Ignore this. JBossWS-CXF is an Apache Maven based project, but it is not a traditional maven project. It does not build with the standard maven goals. Instead JBossWS-CXF defines maven profiles to perform the requisite compile and deployment of tests from the testsuite and ant scripts to configure the server.
(Optional) Disable automatic build of the project. Uncheckmark the auto build feature.
- Select Project | Build Automatically
2.2. Create a server configuration
- Click the Server tab to configure the JBoss server to use.
- Click the link.
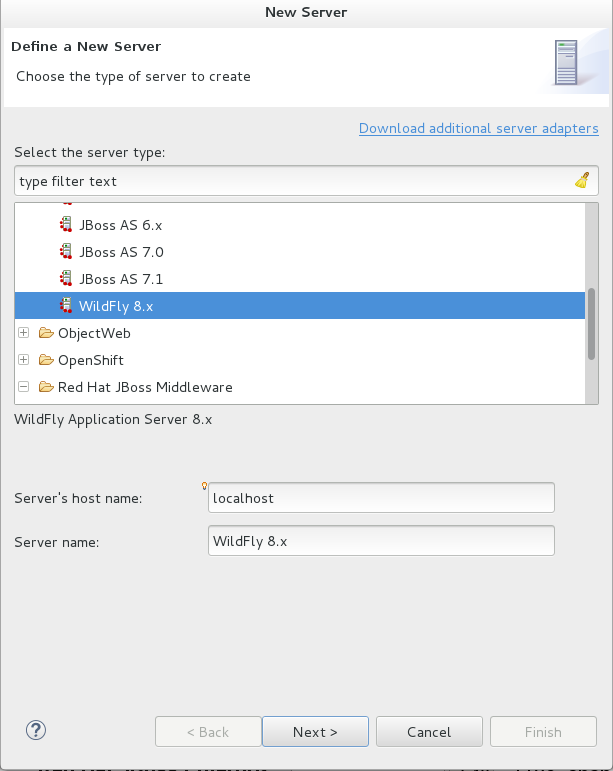
Enlarge the New Server dialog. This makes it easier to scroll through the list of servers. Select the server version you are using. This article is using WildFly 8.1.0.
- Select JBoss Community | WildFly 8.x.
- Click Next
There are no adapter changes.
- Click Next
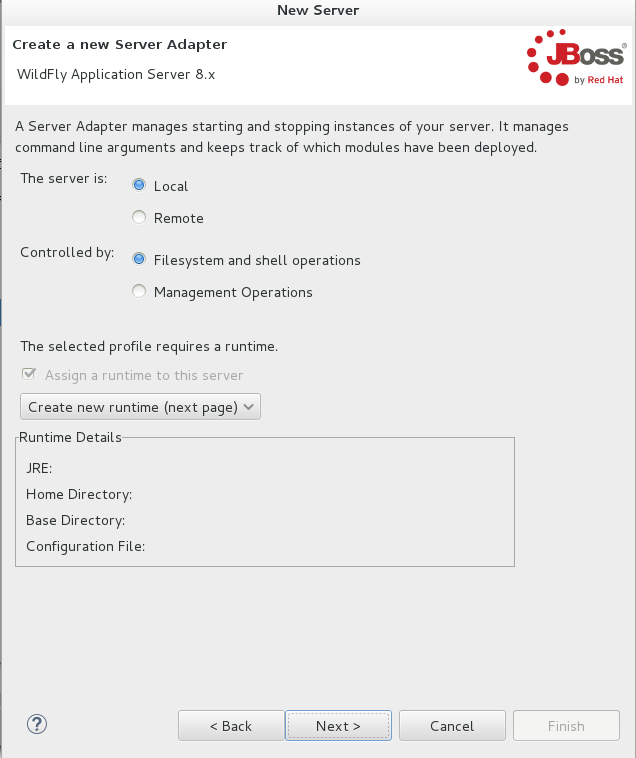
(I've changed the name, to wildfly-8.1.0.Final. This is optional.)
- Set the Home Directory to the installation directory of the JBoss server.
- Click Next

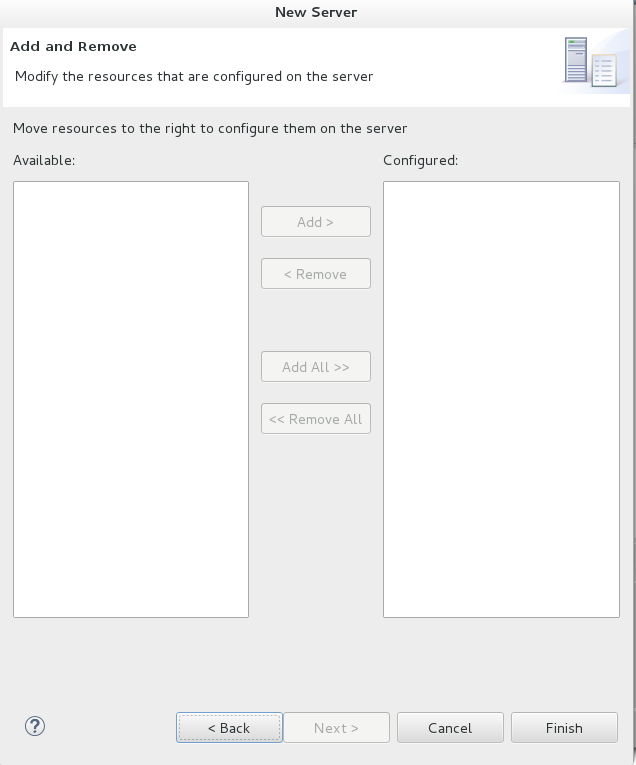
No resources need to be modified.
- Click Finish
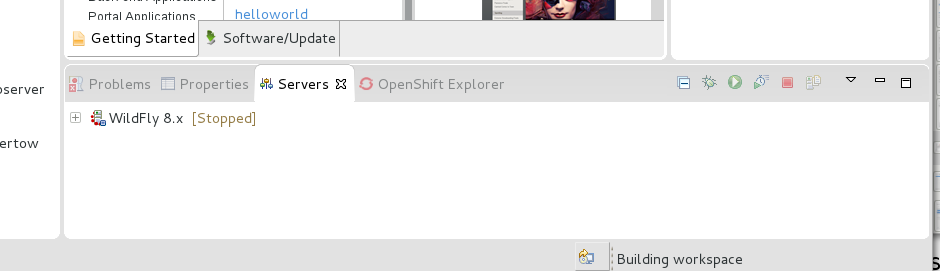
The server is now listed on the Servers tab.
2.3 Create 2 "External Tool" commands
Two external tool commands need to be created. One is an ant commend to install JBossWS-CXF modules in the server and the other is a maven command to run the testsuite. Both commands require input arguments. Several of the arguments are server version specific. See the comment about how to find the supported server versions in the JBossWS-CXF distribution bundle. The ant and maven commands require the designation of the JBoss home directory. It is specified as an ant property/value pair.
-D<server version>.home=<absolute path to the JBoss installation directory>
example
-Dwildfly810.home=/home/rsearls/j1/wfly-8.x/wildfly/build/target/wildfly-8.1.0.Final
2.3.1 Ant command
- Select Run | External Tools | External Tool Configurations ...
- Select "Ant Build" and the "New Launch Configuration" icon.
- Give this command a name. (antWfly810 is being used here.)
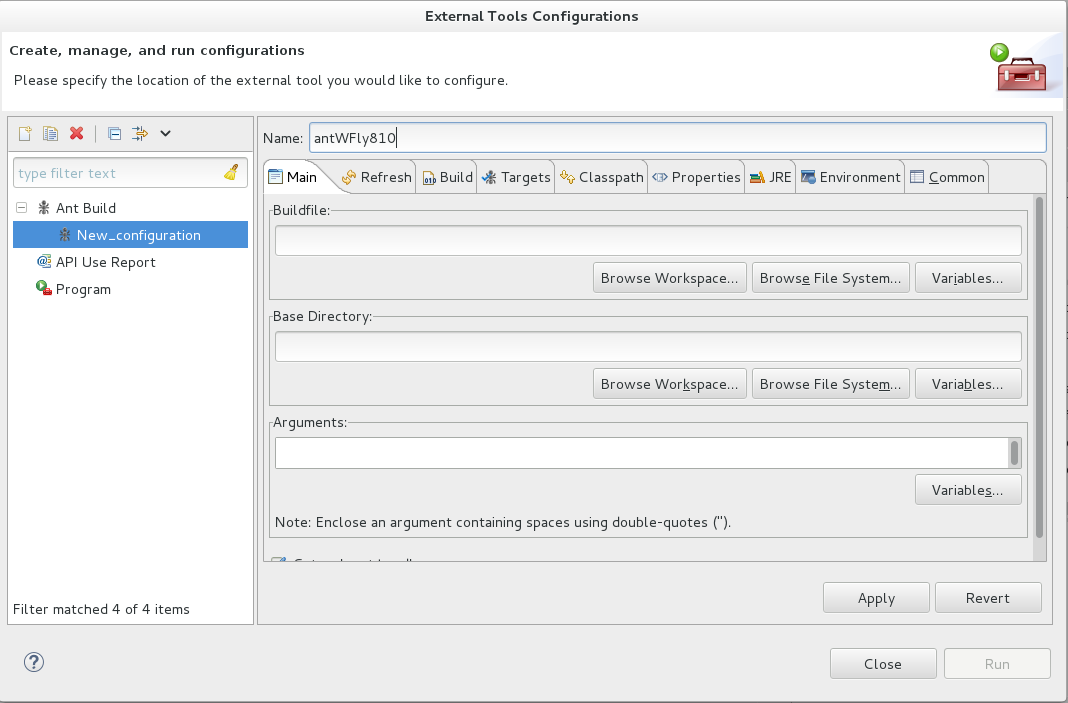
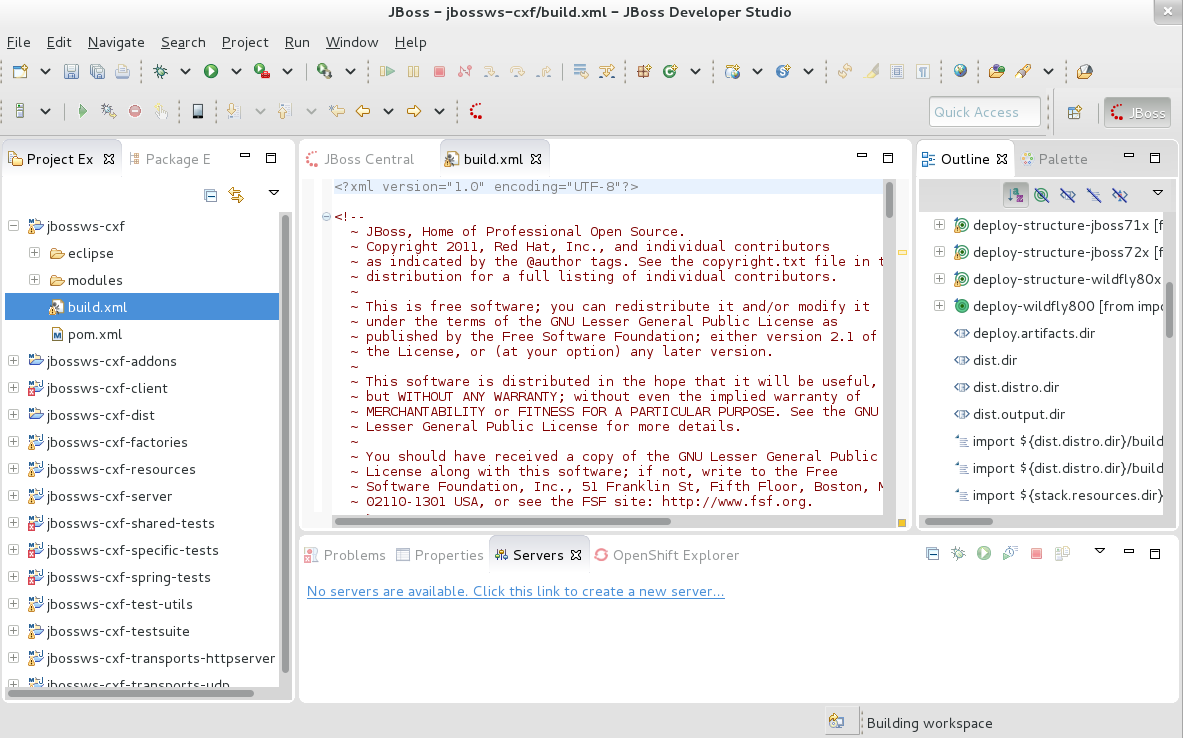
The build.xml file is in the jbossws-cxf module.
- In the "Buildfile" area (see screen shot) select the "Browse workspace" button
- Select build.xml in the right-hand box.
- Click OK.

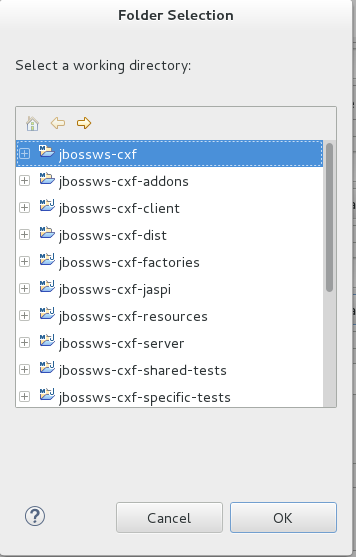
Designate the root directory from which the ant command is to be run.
- In the "Base Directory" area (see screen shot) select the "Browse workspace" button
- Select the jbossws-cxf module name. This is the JBossWS-CXF project root. The ant command must be run from here.
- Click OK
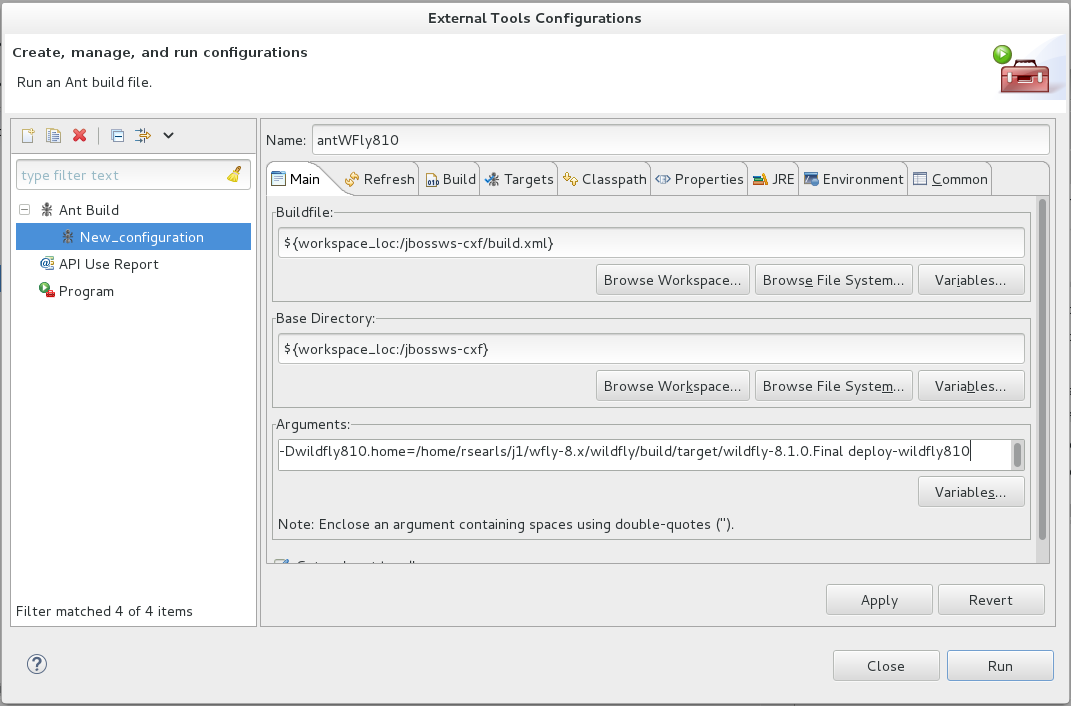
The ant command requires 2 input arguments.
- The JBoss server installation location specified by property <server version>.home (e.g. jboss720.home wildfly800.home)
- The ant target name deploy-<server version>. (e.g. deploy-jboss720 deploy-wildfly800)
1. Copy this text into the "Arguments" text field (see screen shot).
-Dwildfly810.home=/home/rsearls/j1/wfly-8.x/wildfly/build/target/wildfly-8.1.0.Final deploy-wildfly810
2. Click Apply
3. Click Run (This will run the ant command that configures the JBoss server with the needed JBossWS-CXF modules. This command only needs to be run once.)
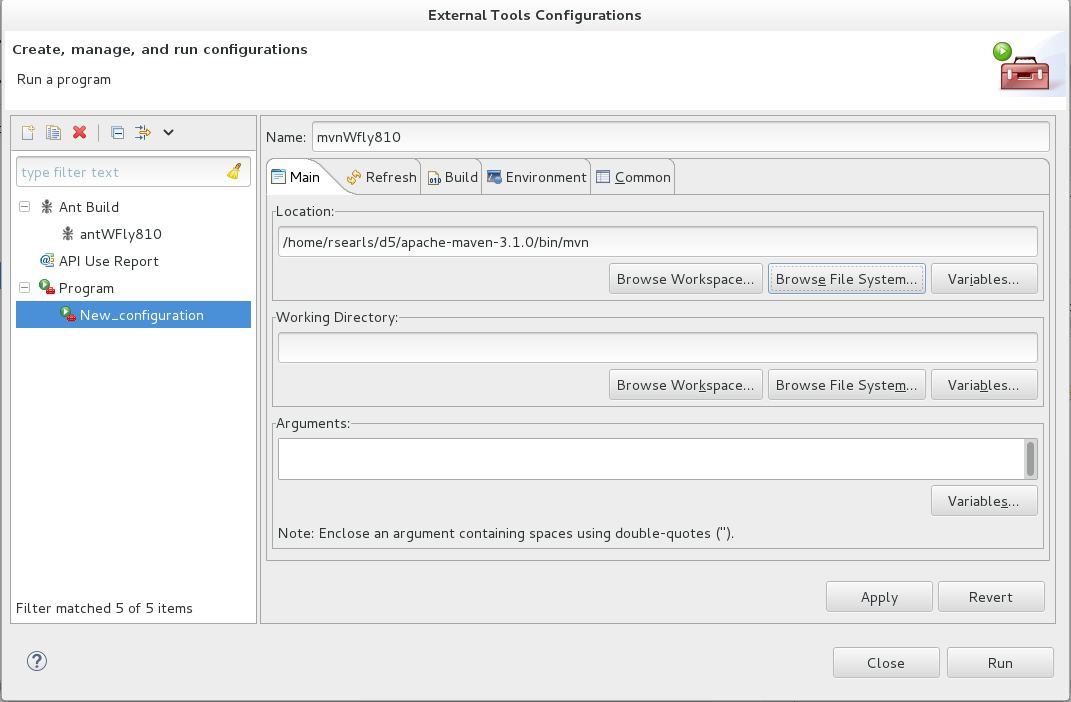
2.3.2 Maven Command
- Select Run | External Tools | External Tool Configurations ...
- Select "Program" and the "New Launch Configuration" icon.
- Give the command a name. (mvnWfly810 is used here.)
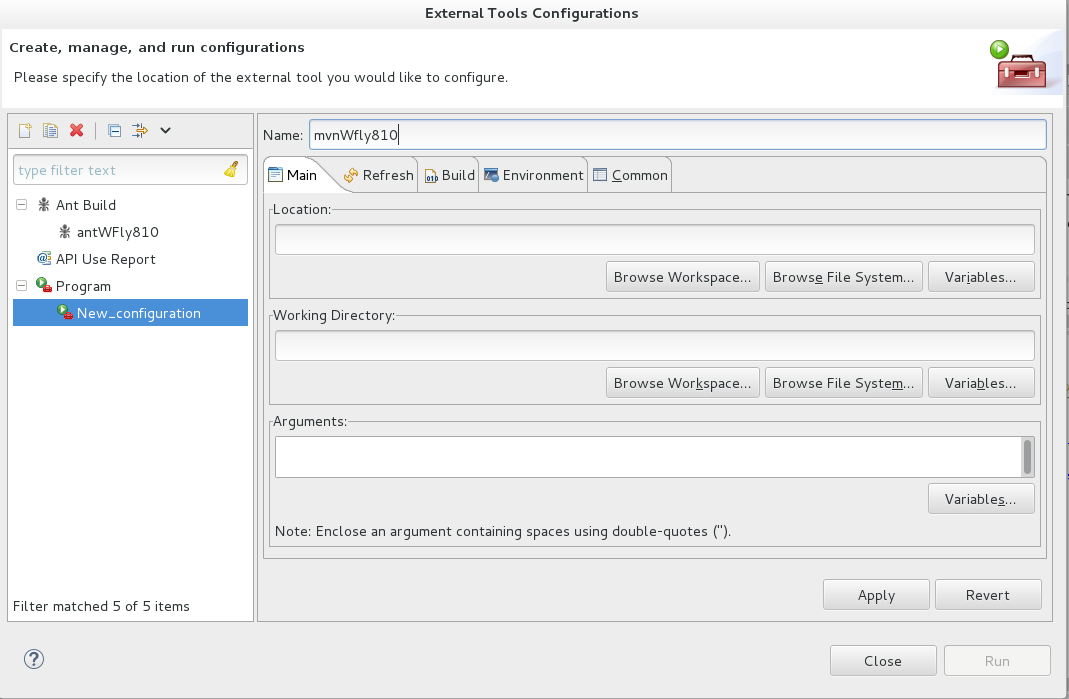
In the Location area designate the absolute path to the localhost's maven command.
- Click "Browse File System" Button
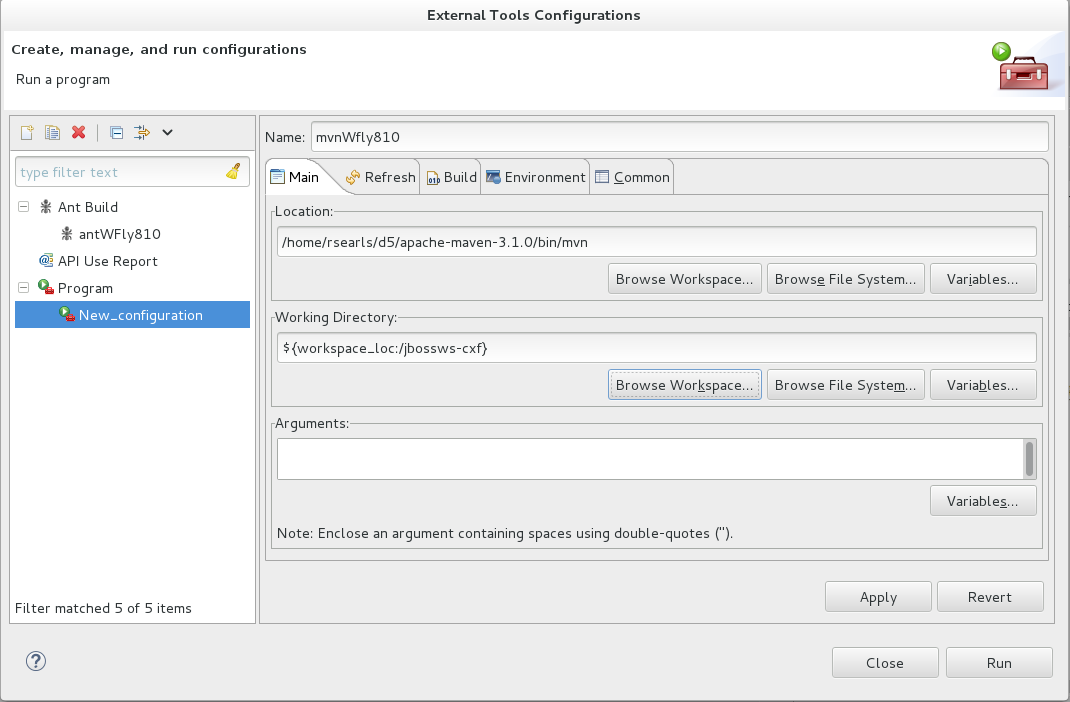
Designate the root directory from which the maven command is to be run.
- In the "Working Directory" area select the "Browse workspace" button
- Select the jbossws-cxf module name. (This is the JBossWS-CXF project root. The maven command must be run from there.)
- Click OK
The maven command requires 3 input arguments. There is an optional fourth argument.
- The JBoss server installation location specified by property <server version>.home (e.g. jboss720.home, wildfly800.home)
- The maven profile to use, -P<server version> (e.g. -Pjboss720, -P jboss701, -Pwildfly800)
- The maven execution path to use, "integration-test"
- (optional) One or more individual tests can be specified to be run. A comma separated list of fully qualified class names within quotation marks are designated via property -Dtest (e.g. -Dtest="org.jboss.test.ws.jaxws.cxf.jbws3827.JBWS3827TestCaseForked,org.jboss.test.ws.jaxws.samples.wsse.policy.oasis.WSSecurityPolicyExamples23xTestCase")
- The testsuite takes quite a while to run. It is suggested to initially run a single test using the -Dtest argument to confirm your setup is working and then run the full testsuite. Copy this text into the "Arguments" text field (see screen shot)
-Dwildfly810.home=/home/rsearls/j1/wfly-8.x/wildfly/build/target/wildfly-8.1.0.Final -Pwildfly810 integration-test -Dtest="org.jboss.test.ws.jaxws.cxf.jbws3827.JBWS3827TestCaseForked"
2. Click Apply
3. Click Close (Do not click Run yet. The JBoss server needs to be started first.)

3 Run the Testsuite
The JBoss server must be started before running the testsuite
- Select the Server tab
- Select server WildFly 8.x
- Click the Start icon
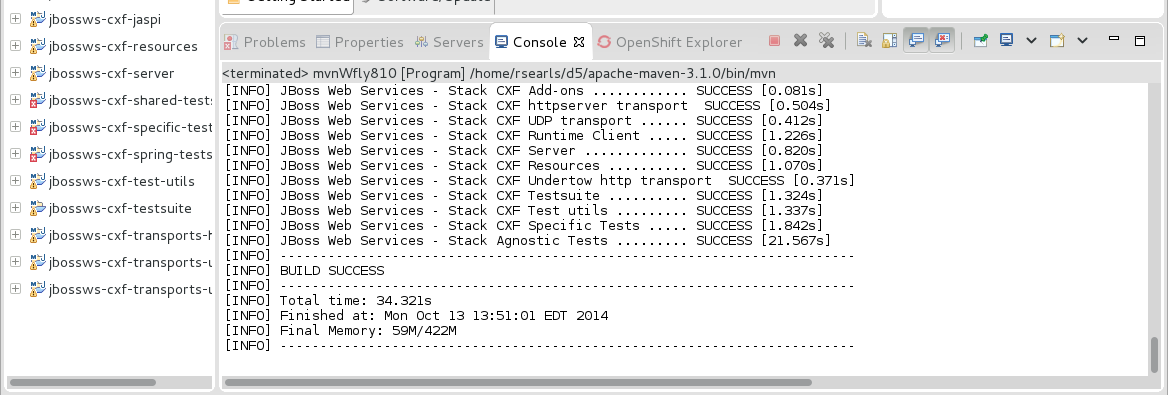
Check that the server started up cleanly in the Console tab.

Run the testsuite using the mvnWfly810 command.
- Select Run | External Tools | External Tool Configurations ...
- Select mvnWfly8100
- Click Run
Now that the basic setup has been confirmed, edit the mvnWfly810 command and remove the -Dtest="org.jboss.test.ws.jaxws.cxf.jbws3827.JBWS3827TestCaseForked" argument and run the full testsuite.
- Select Run | External Tools | External Tool Configuration ...
- Select mvnWfly810
- Edit the Argument field.
- Click Apply
- Click Run (Unless you stopped the server it should still be running, so just run the testsuite.)
JBossWS user project generator
In order to increase the web service user productivity, JBossWS native ships with an Ant-based web service project generator. This can be used to automatically create a simple project along with an Ant build file to compile and deploy it as well as a basic Eclipse configuration (further IDEs might be supported in future). The most commonly required libraries are referenced from the user specified JBoss application server home, so that the user simply needs to code its web service provider / consumer application.
Configuring a new project
The JBossWS user project generator is triggered by the main JBossWS build available in every binary release. You just need to run the setup-new-project target and answer to a few questions about the project you'd like to create:
- project workspace: this is where the generator will create your project directory
- project name
- project type: this can be either jar or war depending on your need for EJB3 components support
[alessio@localhost jbossws-native-dist]$ ant setup-new-project
Buildfile: build.xml

tests-prepare:
     [echo]
     [echo] -----------------------------------------------
     [echo] jboss.home   = /dati/jboss-4.2.2.GA
     [echo] excludesfile = ${excludesfile}
     [echo] java.home    = /usr/java/jdk1.5.0_13/jre
     [echo] jboss.bind   = localhost
     [echo] -----------------------------------------------

tests-classpath-jboss50:

tests-classpath-jboss42:

tests-classpath:

init-project-properties:

setup-new-project:
     [echo] -------------------------------------------------
     [echo]   Welcome to the JBossWS user project generator
     [echo] -------------------------------------------------
     [echo]
    [input] Enter your Java project workspace (the directory that contains your projects)  [C:/Projects]
/dati/project/ws
    [input] Enter the project name  [myproject]
TestProject
    [input] Is this project deployed as an JAR (with EJB3 components) or a WAR (with no EJB3 support)  ([jar], war)
jar
[propertyfile] Creating new property file: /home/alessio/dati/jbossws/stack/native/trunk/output/jbossws-native-dist/user-project.properties
     [echo]
     [echo] Your project settings have been saved in file 'user-project.properties'.
     [echo] Please type 'ant create-project' to create the new project.

BUILD SUCCESSFUL
Total time: 32 seconds
Once this has been executed, the generator writes your settings to the user-project.properties file (it creates it during the first run). As you can see the script gets the JBoss installation home and the configuration/instance to use from the current ant.properties file.
[alessio@localhost jbossws-native-dist]$ cat user-project.properties
#Generated by JBossWS user project setup
#Fri Mar 14 10:05:47 CET 2008
project.name=TestProject
project.jboss.home=/dati/jboss-4.2.2.GA
project.type=jar
workspace.home=/dati/project/ws
project.jboss.conf=default
Creating the project
Given your settings, creating the project is straightforward. You just need to run the create-project target of the JBossWS main build:
[alessio@localhost jbossws-native-dist]$ ant create-project
Buildfile: build.xml

tests-prepare:
     [echo]
     [echo] -----------------------------------------------
     [echo] jboss.home   = /dati/jboss-4.2.2.GA
     [echo] excludesfile = ${excludesfile}
     [echo] java.home    = /usr/java/jdk1.5.0_13/jre
     [echo] jboss.bind   = localhost
     [echo] -----------------------------------------------

tests-classpath-jboss50:

tests-classpath-jboss42:

tests-classpath:

init-project-properties:

validate-settings:

configure-project:
    [mkdir] Created dir: /dati/project/ws/TestProject/src/main/java
    [mkdir] Created dir: /dati/project/ws/TestProject/src/main/resources
     [copy] Copying 1 file to /dati/project/ws/TestProject
     [copy] Copying 1 file to /dati/project/ws/TestProject

create-project:
     [echo] A basic webservice project named 'TestProject' has been created in the /dati/project/ws directory.
     [echo] It includes a simple Ant build file and references the required libraries.
     [echo] Please refer to http://jbws.dyndns.org/mediawiki/index.php?title=JBossWS for the authoritative documentation.
     [echo]
     [echo] If you are an Eclipse user, import the project into Eclipse: right click in
     [echo] 'Package Explorer -> Import...' and select 'General -> Existing Projects into Workspace'.
     [echo] Then click on 'Next' and set the root directory browsing to your workspace directory.

BUILD SUCCESSFUL
Total time: 0 seconds
The generator simply creates a new project according to the settings in the user-project.properties file; the right libraries are referenced from the currently configured JBoss AS installation.
Please note that different AS versions require different sets of libraries, thus it's important to carefully set the jbossws.integration.target properties in the ant.properties file before running this script.
Using the project
The new project comes with a simple Eclipse configuration you might want to import: right click in 'Package Explorer -> Import...', select 'General -> Existing Projects into Workspace', then click on 'Next' and set the root directory browsing to your workspace directory.
An Ant build.xml file is also created and can be used both from command line and from Eclipse; it has the following targets:
- compile: compiles the Java source code
- copyclasses: copys the classes that were compiled by Eclipse
- deploy: deploys to JBoss AS
- dist: creates the application distribution archive
- undeploy: undeploys from JBoss AS
You're most probably going to need deploy and undeploy only.
Your new basic project is ready; you can start creating your web service endpoint or client. Of course both the build file and the Eclipse configuration are meant to be the starting point for a common WS-enabled project; you may want to edit them according to your business requirements and/or fine setting preferences. For instance, one of the most common changes you're probably going to do is adding some proprietary libraries to the build: take a look at the generated libraries.xml file that is imported by the generated build.xml.
References:
[1] JBoss Developer Studio - Downloads
[3] JBossWS Downloads - Latest (4.x) - JBoss Community
Comments