It should be noted that JBoss EAP ships with a supported, enterprise-grade messaging implementation of it's own. As of version 5.0.0, EAP includes JBoss Messaging 1.4 and also a tech preview of HornetQ 2.0 (f.k.a. JBoss Messaging 2.0). These implementations include powerful features such as intelligent message redistribution, a POJO-based design, a high performance journal, and more. Visit the HornetQ project page or see the JBoss Messaging User Guide in the EAP Documentation to find out more.
With that said, there are many organizations who still need to integrate JBoss EAP with WebSphere MQ. Fortunately, WebSphere MQ ships with a JCA adapter that JBoss can utilize in order to meet that requirement. This article will walk through a sample configuration to get the integration working.
- Credits and Other Resources
- High-Level Steps
- Versions, Environment, and Assumptions
- Step 1: Configure WebSphereMQ
- Step 2: Deploy the WebSphere MQ JCA Resource Adapter Archive
- Step 3: Configure and Test Inbound Messaging Using an MDB
- Step 4: Configure and Test Outbound Messaging
- Step 5: Update the MDB to use JNDI
- Next up
Credits and Other Resources
Much of the content in this wiki is based on an IBM developerWorks article written for previous versions of JBoss and WebSphere MQ. This article will be very similar to the developerWorks article but will include steps specific to working with the newer versions, including implementing EJB3 MDBs with annotations.
There are also other resources on the JBoss.org wiki which cover parts of this guide. Some of the information in them is the same as what appears here. You can see them here:
- WebsphereMQIntegration - kind of an FAQ on this topic
- How to configure EJB3 MDBs for IBM Websphere MQ - EJB3 MDB configurations with minimal RAR -ds.xml config
- IntegrationWithWebSphereMQSeries - A list of other articles, mostly for older versions
- UsingWebSphereMQSeriesWithJBossASPart4 - A compact version of this article, minus the annotation-based configuration, admin console info, JBoss Developer Studio, and other info...
High-Level Steps
- Configure WebSphere MQ per the requirements for your application
- Install the WebSphere MQ resource adapter archive (rar) into JBoss
- Configure the resource adapter to integrate with your WebSphere MQ implementation
- Configure your application to utilize the WebSphere MQ resources
Versions, Environment, and Assumptions
The specific software versions used for these instructions and testing are below. This information most likely applies to future and prior versions as well (especially because it relies on Java EE standards), but version differences will cause your implementation to vary.
- JBoss EAP 5.0.0 Beta2
- WebSphere MQ 7.0.1-0.i386 for Linux (Trial)
- JBoss Developer Studio 2.1.0.GA
The environment used for testing was the following:
- Fedora 11
- OpenJDK 1.6
Step 1: Configure WebSphereMQ
For the most part, we'll assume you already have WebSphereMQ running. But in case you don't, here a quick script that got a trial of WebSphere MQ running realtively easily:
sudo useradd mqm -d /var/mqm -s /sbin/nologin  -m
sudo passwd mqm
cd /tmp
mkdir wmq
cd wmq
tar -xzf ~/Packages/WebSphereMQ-7.0.1-Trial-Linux-x86.tar.gz
sudo ./mqlicense.sh -accept -jre /usr/bin/java
sudo rpm -i MQSeriesServer*.rpm MQSeriesClient*.rpm MQSeriesTXClient*.rpm MQSeriesConfig*.rpm MQSeriesRuntime*.rpm MQSeriesJava*.rpm MQSeriesEclipse*.rpm MQSeriesJRE*.rpm
sudo /opt/mqm/bin/amqiclen -x
cd
rm -rf /tmp/wmq
 We'll set-up a very simple configuration using all the default settings just to run some basic testing:
- ExampleQM queue manager
- EXAMPLE.REQUESTS queue
- EXAMPLE.RESPONSES queue
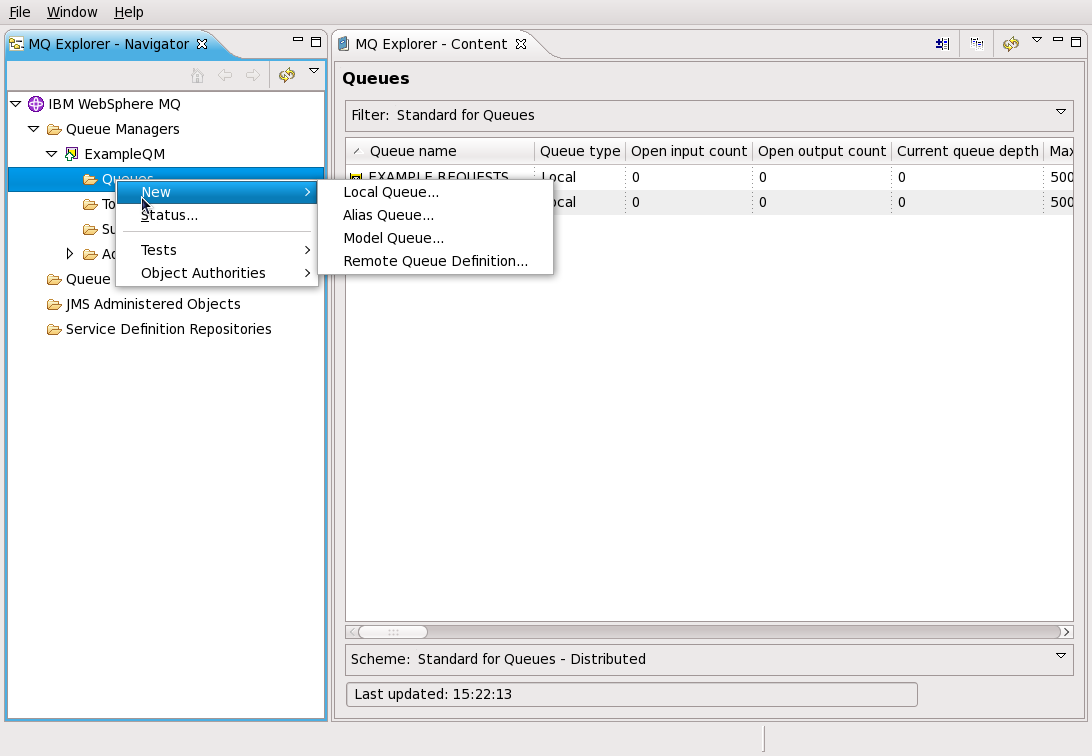
The Eclipse-based WebSphere MQ Explorer is a good tool to make these changes. Note that you might have to run the tool as mqm in order for your commands to succeed. To launch the tool, you run the command:
/opt/mqm/bin/strmqcfg
Using the tool, set-up the resources per what is outlined above. For detailed instructions, refer to IBM's documentation.
Step 2: Deploy the WebSphere MQ JCA Resource Adapter Archive
This is a key component that provides the integration code between the application server and the message broker. The JCA adapter is available in the WebSphere MQ installation. In the Linux distribution, the location is:/opt/mqm/java/lib/jca/wmq.jmsra.rar
Deploying using the Filesystem
The JBoss application server has always had very easy content deployment features. As of EAP 5, there is the new option of using the Admin Console, as outlined in the next section. Using the filesystem for deployment is also very easy though. For example, you could simply create a soft link to that rar within the deploy directory of your server (assuming you've set a $JBOSS_HOME environment variable):
ln -s /opt/mqm/java/lib/jca/wmq.jmsra.rar $JBOSS_HOME/server/default/deploy
Depending on your administration preferences, you might prefer to copy the rar into the deploy directory instead of creating a link.
You can confirm the deployment by finding a message similar to the following in the logs:
19:29:23,684 INFO [RARDeployment] Required license terms exist, view vfszip:/home/pmcdonou/opt/jboss-eap-5.0/jboss-as/server/default/deploy/wmq.jmsra.rar/META-INF/ra.xml
Deploying using the Admin Console
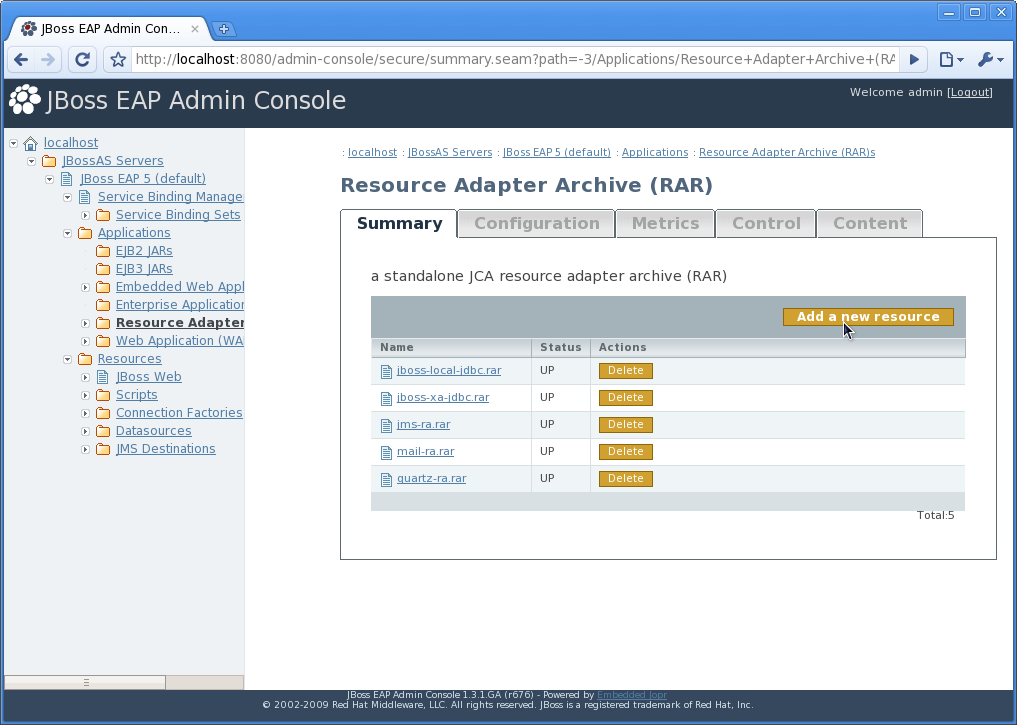 As an alternative to using the filesystem (which is outlined above), the new admin console helps you deploy resource archives. Under a default installation, the admin console's URL is: http://localhost:8080/admin-console/.
Make sure you've enabled the Admin login, e.g. by editing the file in:
$JBOSS_HOME/server/default/conf/props/jmx-console-users.properties
Using the tree menu on the left-hand side, click on the Resource Adapter Archive (RAR)s link [localhost > JBossAS Servers > JBoss EAP 5 (default) > Applications > Resource Adapter Archive (RAR)s].
You can see from the screenshot (click on it to zoom in) that the admin console provides a link to Add a new resource. Click that link and it will bring you to the deployment page where you will:
- browse the filesystem to find the rar
- select the appropriate options for your deployment
- and click Continue.
Step 3: Configure and Test Inbound Messaging Using an MDB
Now that the resource archive has been deployed, we'll create and deploy an MDB to confirm we can read messages from the queue. Using JBoss Developer Studio, we'll create an EJB3 MDB and use annotations.
Note that this method is the easy way, which skips and JNDI-registered queues and connection pools. In order to implement those changes, refer to #Step4 and #Step5.
Create a new EJB Project
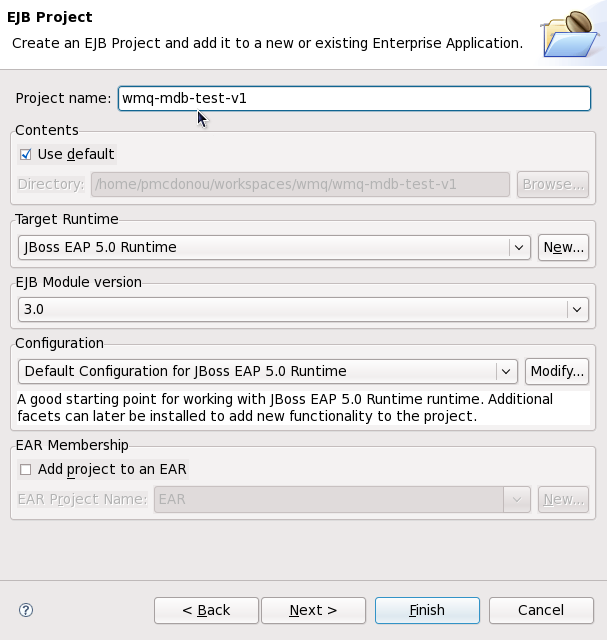 In JBoss Developer Studio, go to File > New > Project... > EJB > EJB Project. In the wizard, we'll stick to default options by selecting the following (click on the screenshot for a first-hand look):
- Project name: Whatever you'd like to name it (e.g. wmq-mdb-test-v1)
- Contents: Use Default
- Target Runtime: Choose an EAP 5 Runtime
- Configuration: Default...
- EAR Membership: don't do it
Click Finish.
Create the Message Driven Bean
There is now a skeleton project where we'll add the Message Driven Bean to test reading messages from WebSphereMQ. Select the EJB project you created in the last step, then go to File > New... > Other... > EJB > EJB3 Message Driven Bean. In the wizard, use the following options:
- Source Folder: This should point to the projects EJB directory (e.g. wmq-mdb-test-v1/ejbModule)
- Enclosing Type: none
- Package: Whatever you like (e.g. com.jboss.example)
- Name: Whatever you like (eg. WMQMDBTest)
- Leave the Modifiers, Superclass, and Interface fields as defaults
Now we'll add a little logging for our test, and add the annotations to read form the queue. The source code is below:
public @MessageDriven(name = "test/mdb", activationConfig = {
        @ActivationConfigProperty(propertyName = "messagingType", propertyValue = "javax.jms.MessageListener"),
        @ActivationConfigProperty(propertyName = "destinationType", propertyValue = "javax.jms.Queue"),
        @ActivationConfigProperty(propertyName = "destination", propertyValue = "EXAMPLE.REQUESTS"),
        @ActivationConfigProperty(propertyName = "queueManager", propertyValue = "ExampleQM"),
        @ActivationConfigProperty(propertyName = "transportType", propertyValue = "CLIENT") })
@ResourceAdapter("wmq.jmsra.rar")
class WMQMDBTest implements MessageListener {

    private static final Logger LOGGER = Logger.getLogger(WMQMDBTest.class
            .toString());

    public void onMessage(Message message) {
        LOGGER.log(Level.INFO, message.toString());
    }

}
Those annotations are the bare minimum, which results in falling back on several defaults. For example, note that there is no hostName property, which results in a connection to localhost. For more details on other properties you may need, see the WebSphere MQ documentation on Configuration for inbound communication
Deploy the Application
Select the EJB project, then go to File > Export... > EJB > EJB JAR file. Rename the JAR file if you'd like (or just leave it alone) and choose the deploy directory of your server as the Destination (e.g. $JBOSS_HOME/server/default/deploy). Choose your EAP5 runtime for optimization, then click Finish.
You should see something similair to the following for confirmation:
00:26:33,644 INFO [EJBContainer] STARTED EJB: com.jboss.example.WMQMDBTest ejbName: test/mdb
You could alternatively have chosen to export the JAR locally then deploy the using the Admin console via clicking Add a new resource at localhost > JBossAS Servers > JBoss EAP 5 (default) > Applications > EJB3 JARs.
Send a Test Message
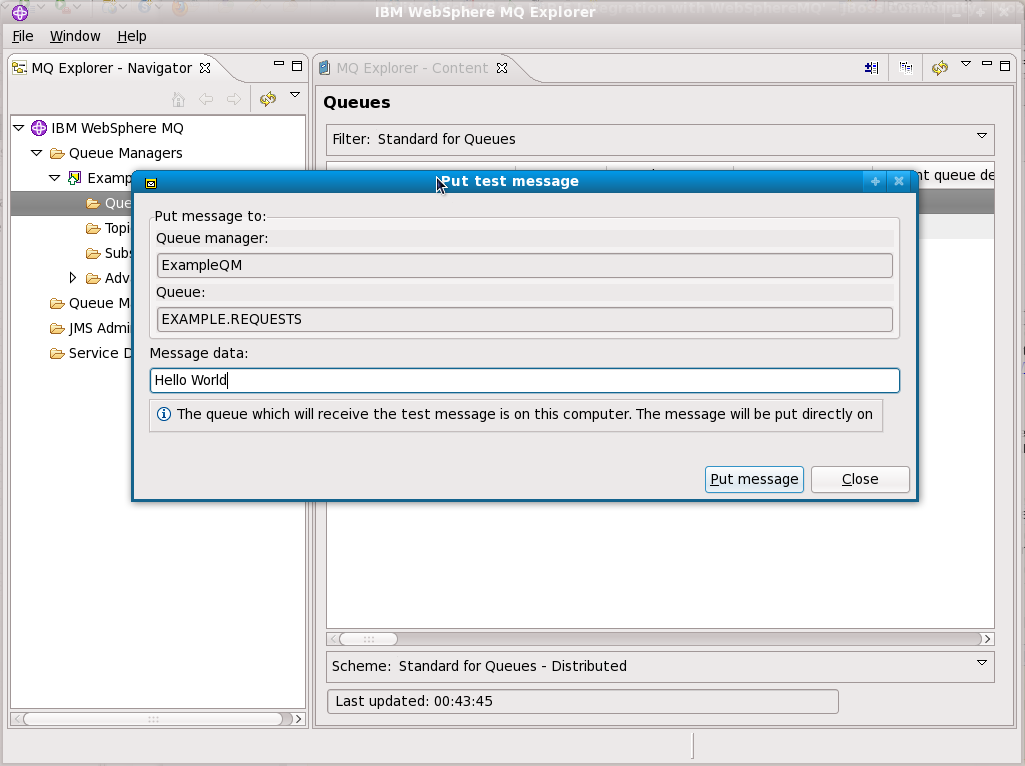
We'll use the WebSphere MQ Explorer to send a message to the queue. Navigate to and expand the queue manager in use (eg. ExampleQM), select the Queues folder, right-click on the queue used in the MDB (eg. EXAMPLE.REQUESTS), and choose Put Test Message....
In the dialog that pops up, type any message in the Message Data field (10:1 odds say you were thinking "Hello World") and click Put Message.
You should see the message logged in the JBoss logs from our MDB. This confirms that inbound messaging is working.
Step 4: Configure and Test Outbound Messaging
Now that the resource adapter has been deployed, we can configure connections to the broker.
Enabling Distributed Transactions
WebSphere MQ requires an additional jar to be available on the classpath for distributed transactions. The extended transactions jar must be added to the application server shared lib directory. In the Linux distribution, the jar is in the following location:
/opt/mqm/java/lib/com.ibm.mqetclient.jar
The connection pooling will require the jar to be on the classpath, so we'll copy or link it it to the server's shared lib directory, for example:
ln -s /opt/mqm/java/lib/com.ibm.mqetclient.jar $JBOSS_HOME/server/default/lib/
The server will have to be restarted after the change is made.
You can verify whether distributed transaction are enabled by installing and running the Installation Verification Test program, which is an EAR available in the WebSphere MQ installation, e.g. in:
/opt/mqm/java/lib/jca/wmq.jmsra.ivt.ear
Refer to IBM's help documentation for more information on the IVT program. We will just wait to confirm this worked during a later step.
Create a connection factory using the Admin Console
 Connection factories can be defined and modified using the Admin Console. Navigate to localhost > JBossAS Servers > JBoss EAP 5 (default) > Resources > Connection Factories > Tx ConnectionFactories and click the familiar link to Add a new resource. On the next screen, choose the XATransaction and click Continue.
For the most part, we will stick to the defaults. In the Connection Information section, set the following values:
- JNDI Name - wmqcf
- RAR Name - wmq.jmsra.rar
- Connection Definition - javax.jms.ConnectionFactory
- XA Transaction - Yes
To set the security domain, scroll down to the Security Settings section and set the following:
- Domain - JmsXARealm
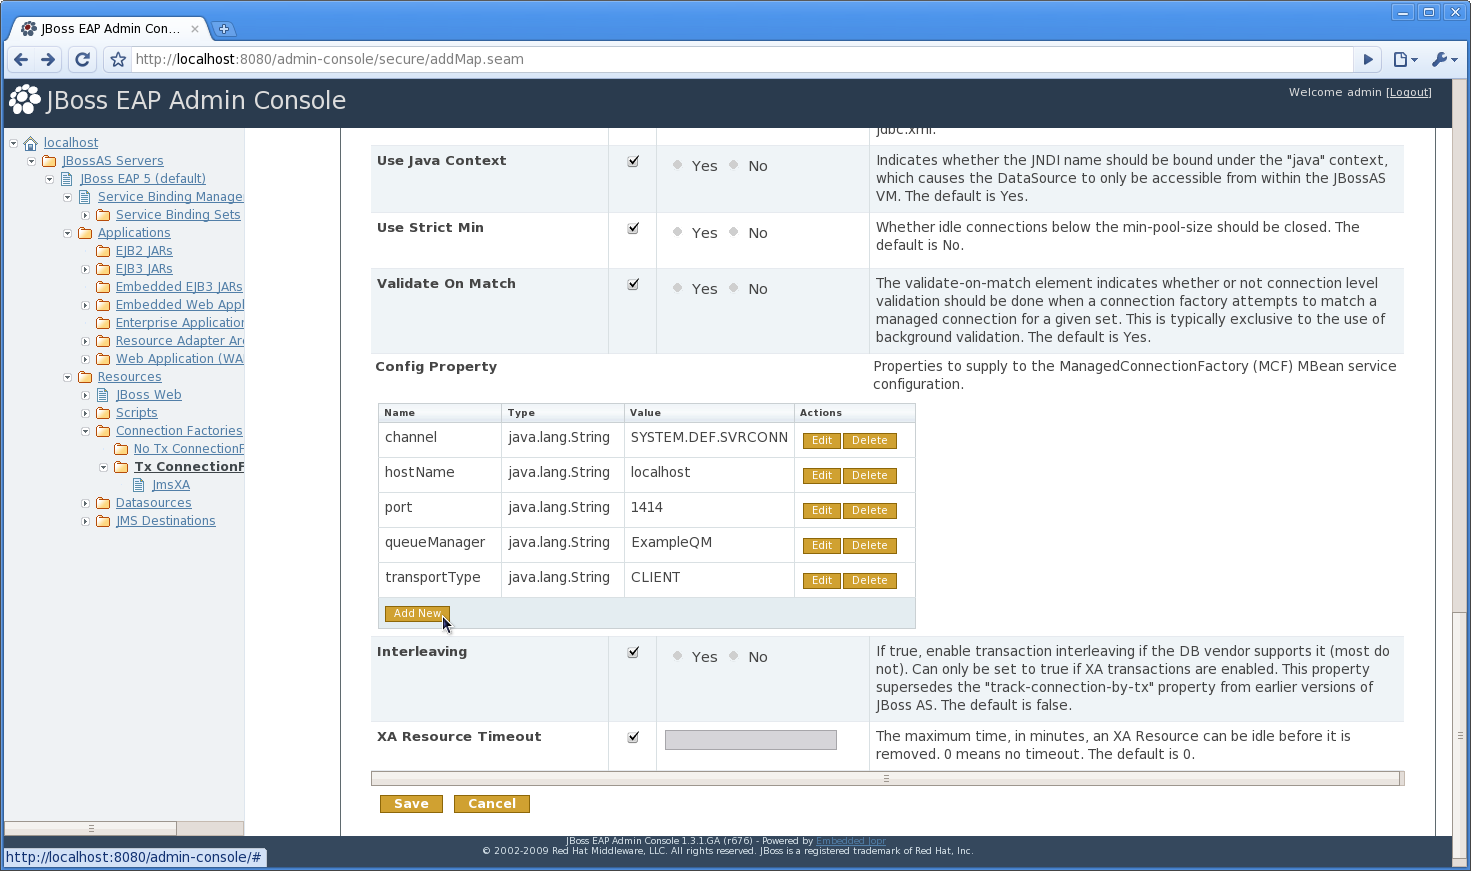
We'll also need to add a few properties to integrate with the WebSphere MQ broker. Scroll down to the Config Property section towards the bottom of the form. Click on Add New and enter the correpsponding information for each of the following (which are all java.lang.String):
- channel - SYSTEM.DEF.SVRCONN
- hostName - localhost
- port - 1414
- queueManager - ExampleQM
- transportType - CLIENT
Click Save and your new connection factory will be created.
Create the connection factory using the Filesystem
This is probably gettting repetitive, but you also have the option to create your connection factory by deploying using the filesystem. In fact, the work performed in the Admin Console actually created a deployment file and, just like before, deploying and undeploying can be accomplished by adding or removing that file. If you followed the admin conosle section above, you can review the file in:
$JBOSS_HOME/server/default/deploy/wmqcf-ds.xml
Likewise, the XML fragment below would inplement the same changes we made in the GUI above, although this one is a bit cleaned up from what the Admin Console gave us:
<?xml version="1.0" encoding="UTF-8" standalone="yes"?>
<connection-factories>
  <tx-connection-factory>
    <jndi-name>wmqcf</jndi-name>
    <rar-name>wmq.jmsra.rar</rar-name>
    <connection-definition>javax.jms.ConnectionFactory</connection-definition>
    <config-property type="java.lang.String" name="channel">SYSTEM.DEF.SVRCONN</config-property>
    <config-property type="java.lang.String" name="hostName">localhost</config-property>
    <config-property type="java.lang.String" name="port">1414</config-property>
    <config-property type="java.lang.String" name="queueManager">ExampleQM</config-property>
    <config-property type="java.lang.String" name="transportType">CLIENT</config-property>
    <security-domain-and-application>JmsXARealm</security-domain-and-application>
    <xa-transaction />
  </tx-connection-factory>
</connection-factories>
Test the Connection Factory in the Admin Console
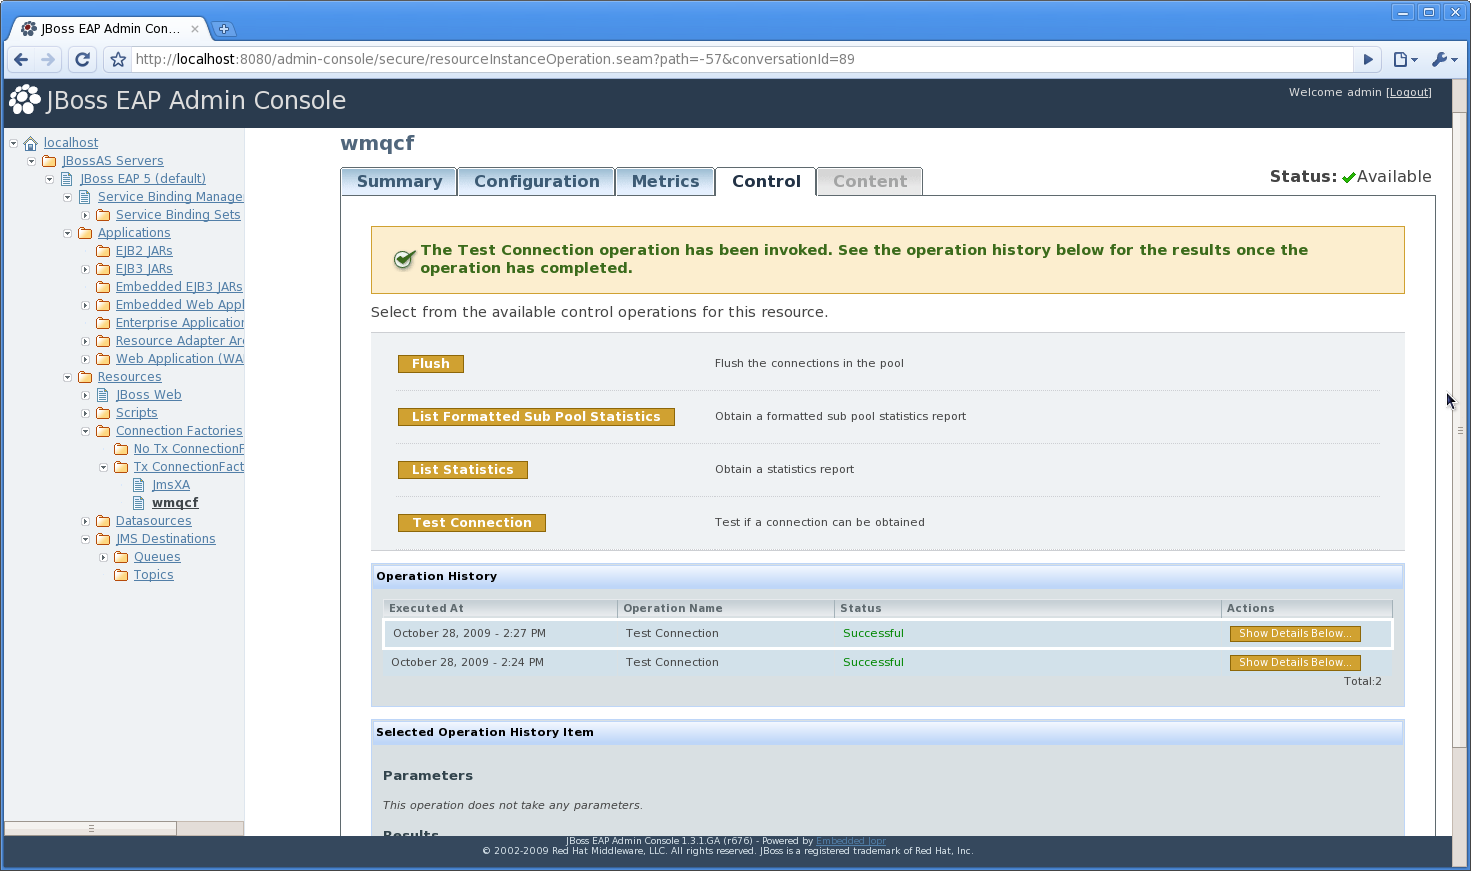 Navigate to your new connection facotry (localhost > JBossAS Servers > JBoss EAP 5 (default) > Resources > Connection Factories > Tx ConnectionFactories > wmqcf). The status in the top right-hand corner should show Available.
Now click on the Control tab. You'll see that one of the operations available is to Test Connection. Click on that operation and the output will be listed at the bottom of the screen (it may take a few seconds the first time). That status should indicate that it was Successful.
Configure JCA AdminObjects that point to your queues
In order to access your queues from JNDI, you will need to configure JCA Admin Objects that point to them. We'll deploy a new file to define these objects.
[MORE to COME]
Step 5: Update the MDB to use JNDI
[MORE to COME]
Next up
- JBossWS SOAP over JMS on WebSphereMQ
Comments