This document is meant to provide some simple, straightforward steps to illustrate how to create a JSR 181 web service that you can then mediate in the ESB.
- In the JBT/JBDS tooling, open the JBoss AS Perspective.
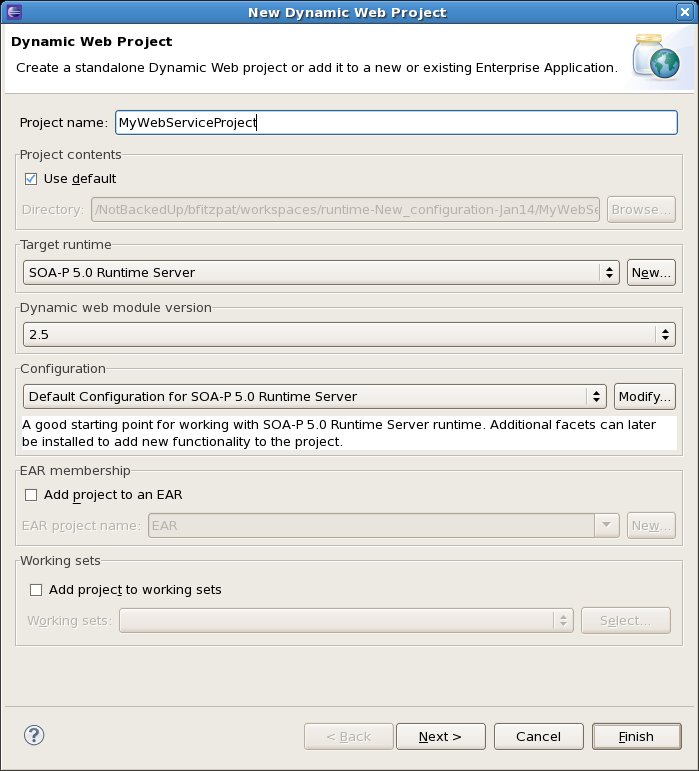
In the Package Explorer view, right-click and select New->Dynamic Web Project or use the File menu and select File->New->Dynamic Web Project.

- Type "MyWebServiceProject" as the Project name.
- If the Target Runtime is set correctly, just click Finish. Otherwise, specify an appropriate Target Runtime.
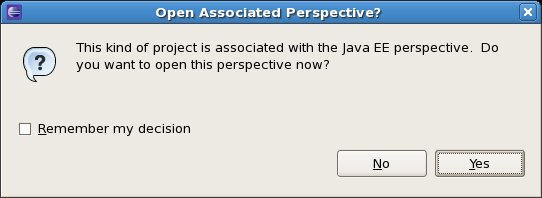
The "Open Associated Perspective?" dialog will appear if you are in the JBoss AS perspective. You can switch to the Java EE perspective if you want, but for now we'll stay in the Java AS perspective for these steps, so click "No."
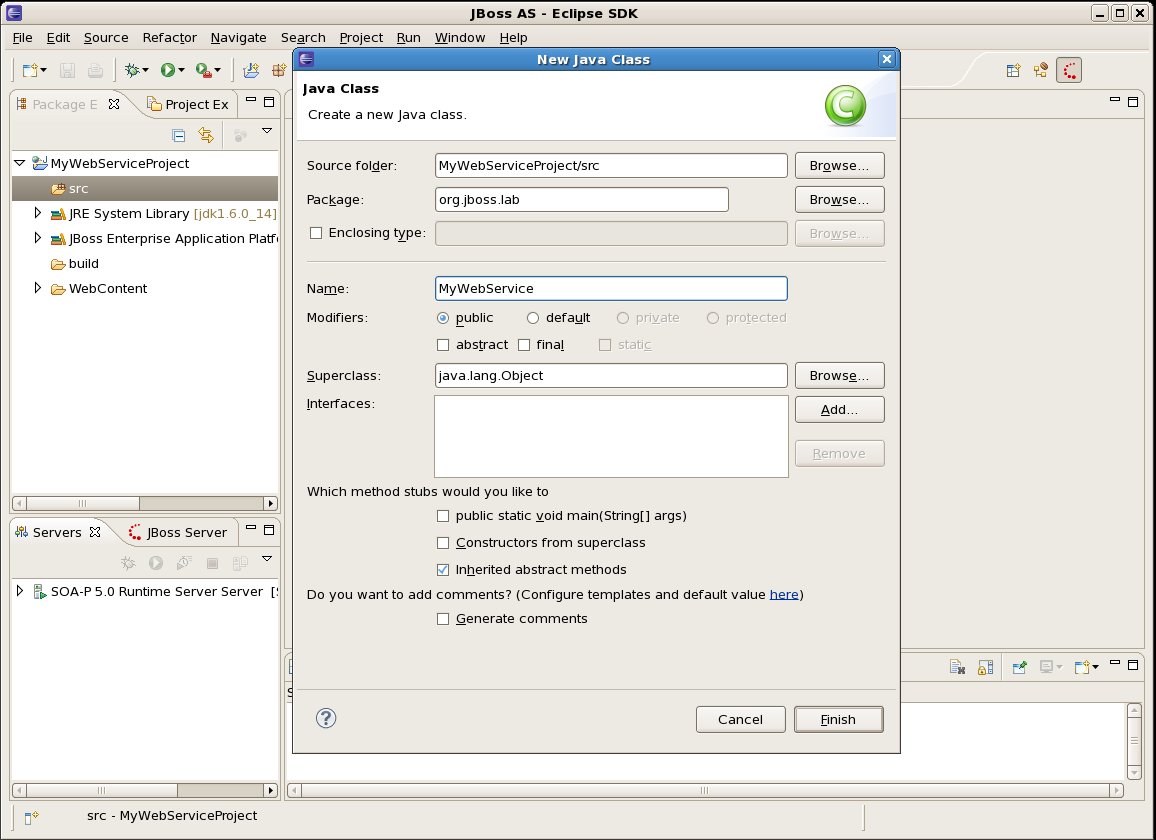
- Now we want to create our web service java class in our project. In the "src" folder of your new project, right-click and select New->Class.
Give the class an appropriate package, such as "org.jboss.lab" and the name "MyWebService". Then click Finish.

- The code for the class is pretty simple:
package org.jboss.lab;
import javax.jws.WebMethod;
import javax.jws.WebService;
@WebService()
public class MyWebService() {
@WebMethod()
public String sayHello ( String name ) {
return "Hello " + name + "!";
}
}
- Save your class and go to the "WebContent/WEB-INF" folder in your project. Double-click on web.xml.
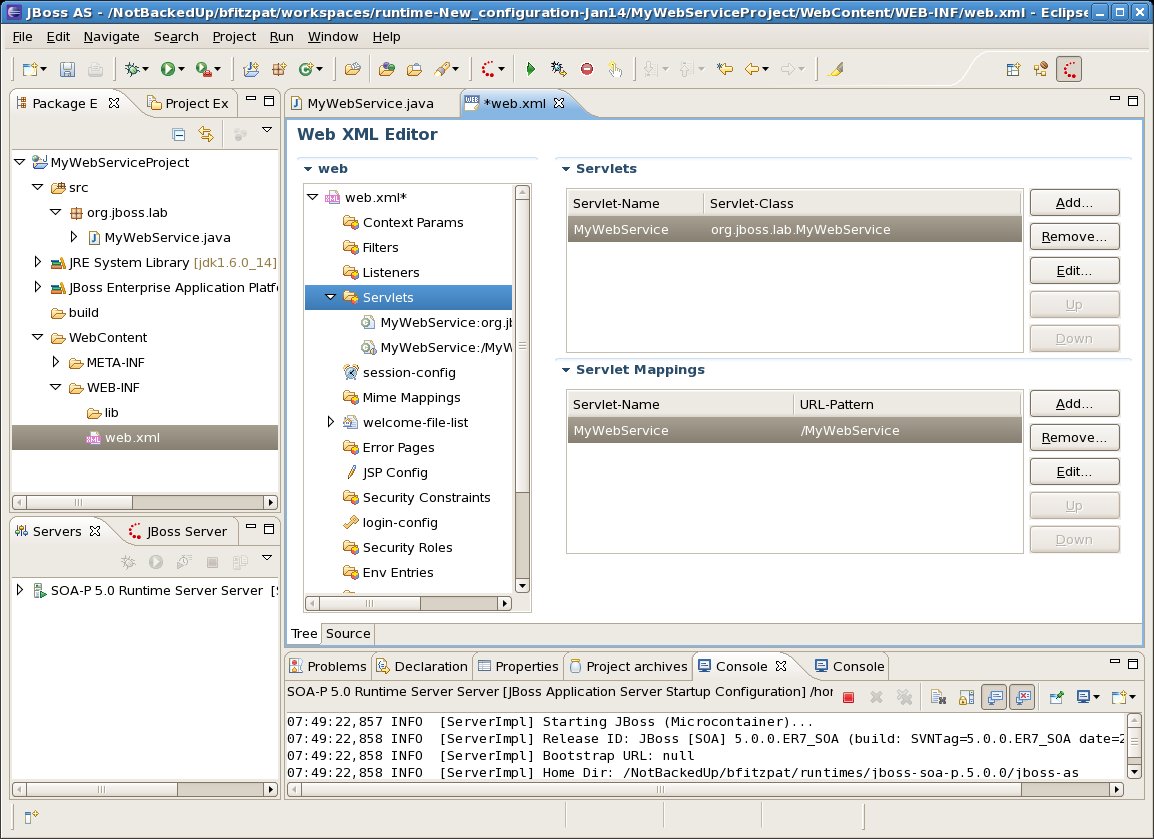
In the navigator on the left of the Web XML Editor, find and select Servlets.

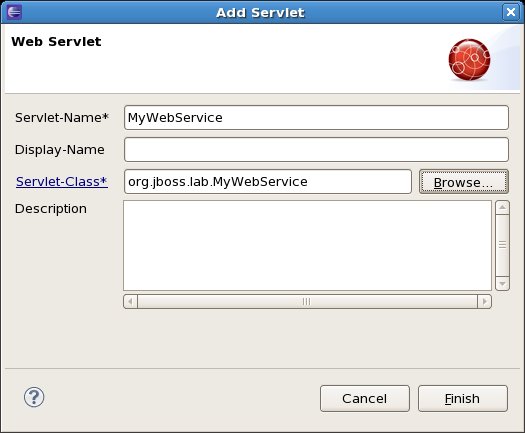
Click "Add..." in the Servlets section and in the dialog that appears, give it the name "MyWebServiceServlet" and give it the fully-qualified class name for our web service class - org.jboss.lab.MyWebService. Click Finish.

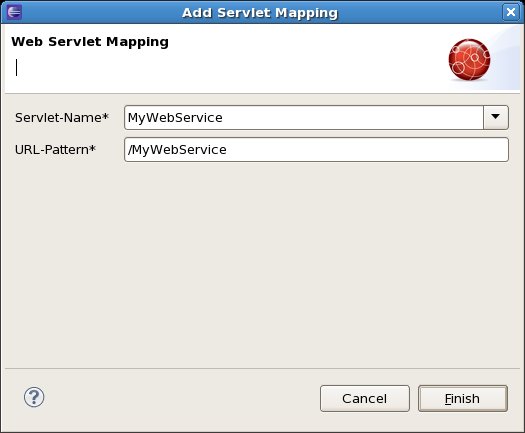
Now click "Add..." in the Servlet Mappings section. In that dialog, give it the name "MyWebServiceServlet" and the URL-pattern "/MyWebService".

- Make sure everything is saved (go to the File menu and select Save All if it's enabled) and now we'll deploy our web service to the server.
In the Servers view or JBoss Server View (deprecated in JBT 3.1/JBDS 3), right-click on your runtime server and select "Add and Remove Projects..."
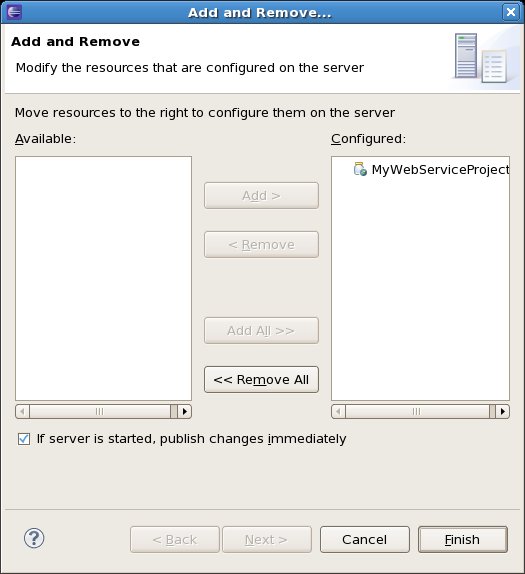
- In the dialog that appears, select your web service project and click "Add>" to move it to the "Configured Projects" list. Then click Finish.
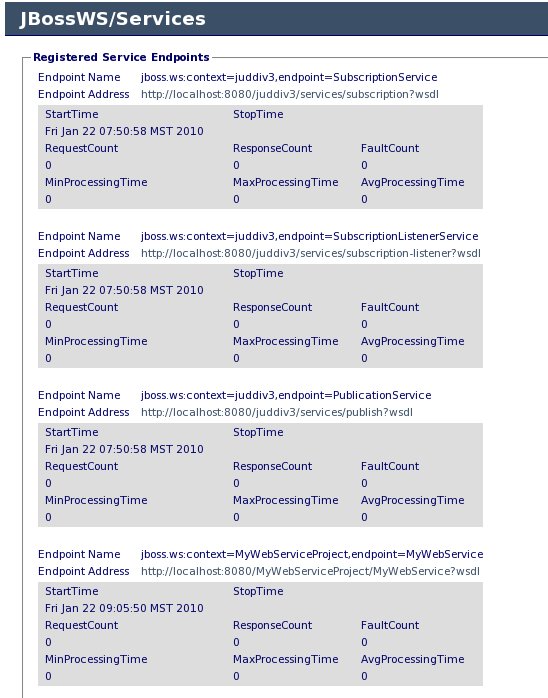
- If everything goes well, we should see in the console that our web service was deployed and a WSDL was created in the file system.
To verify that it deployed properly, open your web browser and direct it to URL - http://localhost:8080/jbossws/services. (You may need to log in.) Once it comes up, you can see all the web services deployed on the server. Look for your web service "MyWebService" in the list.

- Now you can use a separate tool such as soapUI to try invoking your web service or the Web Services Explorer from WTP.
- To use the Web Services Explorer...


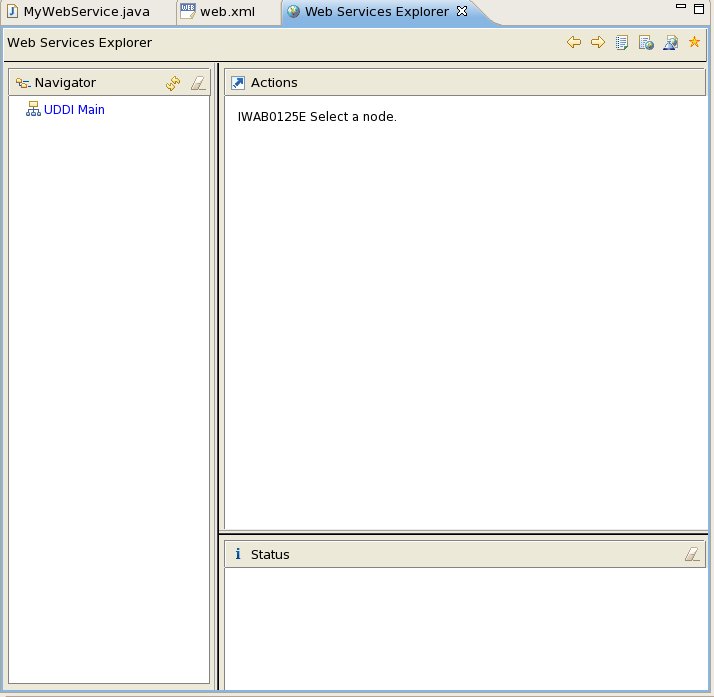
Make sure you are in the J2EE perspective, in the menubar, select "Run -> Launch the Web Services Explorer"

The Web Services Explorer opens. There is a small toolbar in the upper right corner of the window. Click the "WSDL Page" button.

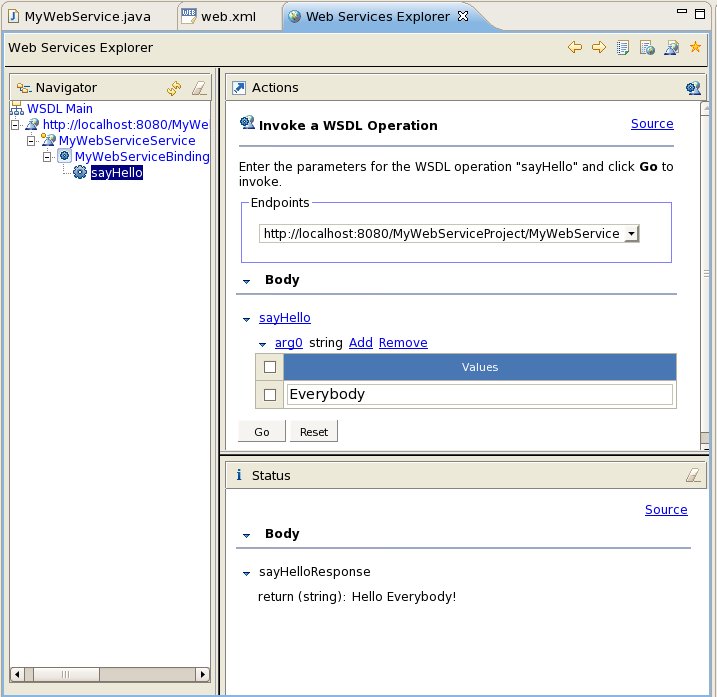
- When the WSDL Page opens, you will see a tree on the left with "WSDL Main" at the root. When you select the "WSDL Main" item in the tree, you will see a panel with "Open WSDL" to the right. Here you can provide a WSDL URL or WSDL file location. When you are finished, click on the 'Go' button.
Now on the left, you will get a web service tree under the "WSDL Main" root. When you drill in and select your web service operation, you will see "Invoke a WSDL Operation." In the Body section, you'll see a list of arguments where you can provide values. Click Add to provide a value, input the value, and click the "Go" button when you are complete. (If your web service operation needs to input many arguments, you can click the 'Source' menu on the right-top of the right. Then you can give a soap message to the web service.)

In the "Status" pane, you will see the reply message from the web service.
Comments