Starting from JBoss Tools 3.1 and forward, we added a new wizard called "Create a Sample Web Service." This wizard, when used in conjunction with a new Dynamic Web Project, will create a sample annotated JAX-WS class and update the project's web.xml to make a deployable web service sample project you can start with.
In JBoss Tools 3.2, we are adding another sample wizard - the "Create a Sample RESTful Web Service" wizard - which creates a JAX-RS (REST) service that will run when deployed to a runtime that uses RESTEasy. And we are also adding a new wizard - the "Simple Web Service" wizard - which creates a new web service from an existing JAX-RS or JAX-WS annotated class to jumpstart your web service development.
Note: These wizards appear in the following milestones:
| Wizard Name | Milestone |
|---|---|
| Create a Sample Web Service | JBoss Tools 3.1 |
| Create a Sample RESTful Web Service | JBoss Tools 3.2 M2 |
| Simple Web Service | JBoss Tools 3.2 Beta (Upcoming) |
Create a Sample Web Service
The newer version of the "Create a Sample Web Service" wizard merges the two pages of the original version into a single page for simplicity.
To use the wizard, we must first have a Dynamic Web Project to use as the container for the new service.
Step 1: Create a Dynamic Web Project
- From the menu bar at the top, select File->New or use Ctrl+N in the Project Explorer or Package Explorer views.
- Select "Dynamic Web Project" from the list of available wizards.
- Provide a name for your new project and click Finish.
Step 2: Use the Create a Sample Web Service Wizard
- From the menu bar at the top, select File->New->Other or use Ctrl+N in the Project Explorer or Package Explorer views.
- Drill down to the JBoss Tools or Web Services category and look for the "Create a Sample Web Service." (Note: You can type "Sample" in the textbox at the top to narrow down your choices.)
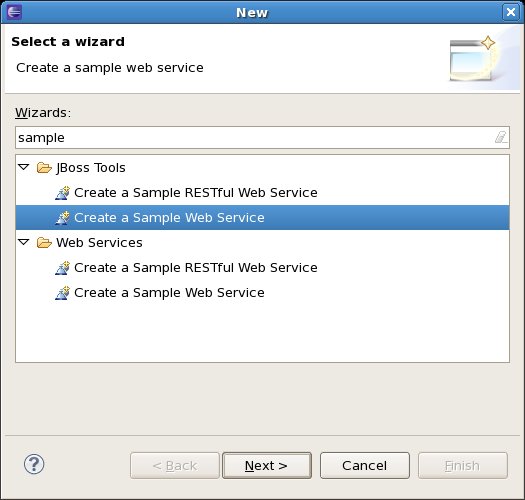
- Click Next.
- If you had your new project selected, the "Dynamic Web Project" drop-down will already be populated. If not, select your new project in the list.
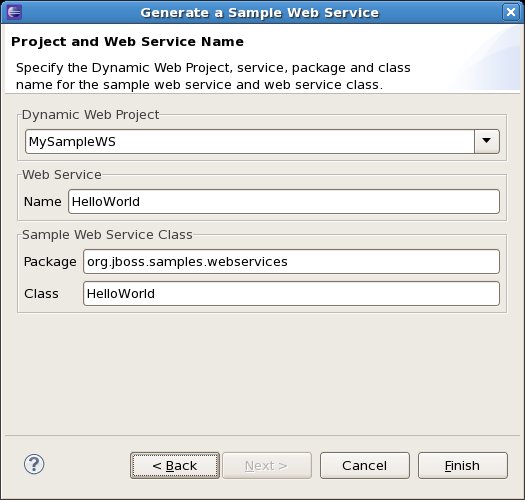
- Choose a name, package, and class name for your new service or go with the defaults you are given.
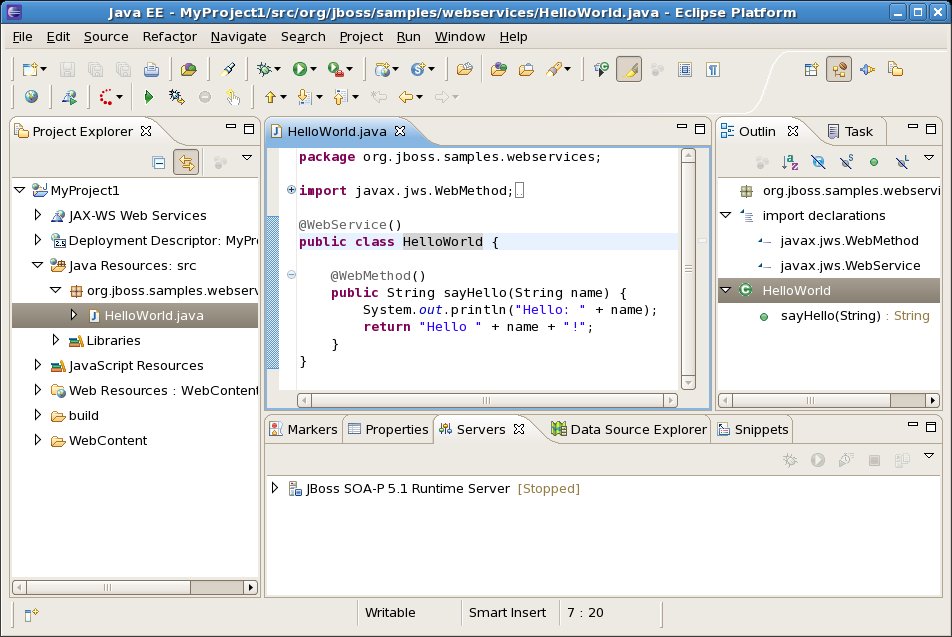
- Click Finish. Your new web service class will be open and you can then modify it or deploy to your server to see it in action.

Create a Sample RESTful Web Service
In JBoss Tools 3.2, we've added a new wizard - the "Create a Sample RESTful Web Service" wizard. The RESTful wizard will create a sample JAX-RS (REST) web service in the selected Dynamic Web Project and bring in the necessary RESTEasy libraries from the runtime.
Note: The one requirement is that the Target Runtime associated with the project has RESTEasy installed. If not, this wizard doesn't work.
The first step is to create a new Dynamic Web Project, as in Step 1 of "Create a Sample Web Service" earlier in this document.
The next step is to actually use the "Create a Sample RESTful Web Service"...
- From the menu bar at the top, select File->New->Other or use Ctrl+N in the Project Explorer or Package Explorer views.
- Drill down to the JBoss Tools or Web Services category and look for the "Create a Sample RESTful Web Service." (Note: You can type "Sample" in the textbox at the top to narrow down your choices.)

- Click Next.
- If you had your new project selected, the "Dynamic Web Project" drop-down will already be populated. If not, select your new project in the list.

- Choose a name, package, class name, and application class name for your new service or go with the defaults you are given.
- Click Finish. Your new web service class will be open and you can then modify it or deploy to your server to see it in action.

Using the "Simple Web Service" Wizard
In JBoss Tools 3.2, we've added a new wizard - the "Simple Web Service" wizard. This wizard does the following:
- If an existing JAX-WS annotated class is selected, it will set the service up in the selected Dynamic Web Project.
- If an existing JAX-RS (REST) annotated class is selected, it will set the service up in the selected Dynamic Web Project and bring in the necessary RESTEasy libraries.
- If the specified class name does not exist, it will create a JAX-WS or JAX-RS sample and set it up in the Dynamic Web Project as if you had gone through one of the other two sample wizards.
Note: The one requirement for JAX-RS services is that the Target Runtime associated with the project has RESTEasy installed. If not, this wizard doesn't work.
The first step is to create a new Dynamic Web Project, as in Step 1 of "Create a Sample Web Service" earlier in this document.
The next step is to actually use the "Simple Web Service" wizard...
- From the menu bar at the top, select File->New->Other or use Ctrl+N in the Project Explorer or Package Explorer views.
- Drill down to the JBoss Tools or Web Services category and look for the "Simple Web Service." (Note: You can type "Simple" in the textbox at the top to narrow down your choices.)
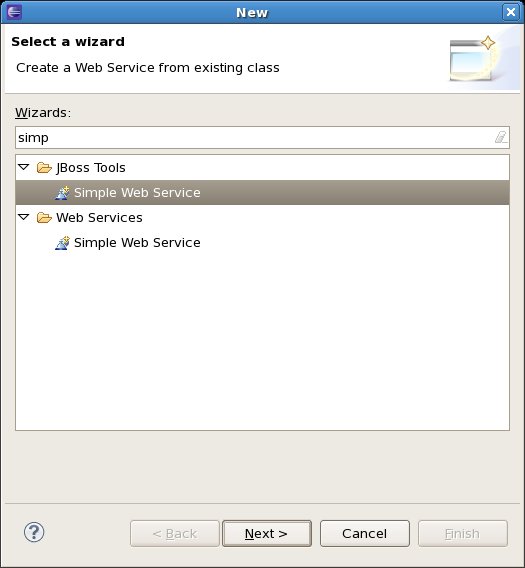
- Click Next.
- If you had your new project selected, the "Dynamic Web Project" drop-down will already be populated. If not, select your new project in the list.
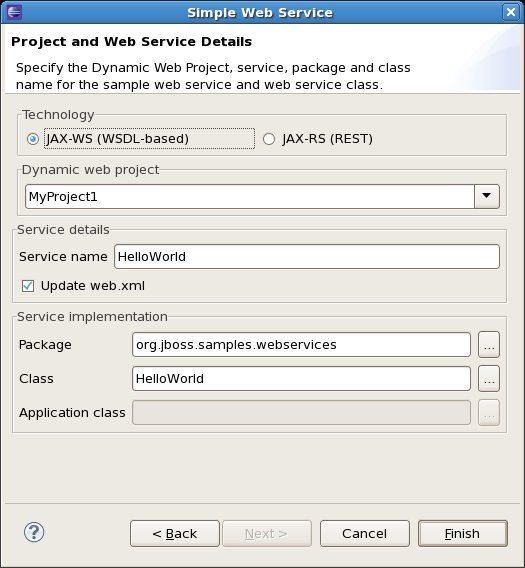
- Choose the web service technology (JAX-WS or JAX-RS) and the project name, then specify a name, package, class name, and application class (for JAX-RS) name for your new service or go with the defaults you are given.
- Click Finish. Your new web service class will be open and you can then modify it or deploy to your server to see it in action.
Final Thoughts...
The "Update web.xml" checkbox is checked by default and will add your new service to the web.xml in your project. Some runtimes, such as JBoss AS 6 or RESTEasy 2.0 may not require this step, and you can turn it off to avoid changing the web.xml during the process.
- When creating the sample RESTful web service, if you leave the defaults as is, the full URI comes from the server URL (i.e. http://localhost:8080) + servlet mapping (i.e. /rest-services/*) or resteasy.servlet.mapping.prefix (i.e. /rest-services) + project name (i.e. simple) + path annotation in JAX-RS annotated class (@Path("/customers")) - so you end up with something like this: http://localhost:8080/rest-services/simple/customers.
Note that sometimes the URL seems to be flipped, like http://localhost:8080/simple/rest-services/customers. So if you get a 404 error, try both variations. - When you are doing web service development, be sure to take a look at the new Web Service Tester, which is also included in JBoss Tools 3.2. More details are here: http://community.jboss.org/wiki/UsingtheWebServiceTester

Comments