Release 7.6 was targeted for bug fixes, usability improvements and a replacing the EMF-based Model Extension metamodel with a non-emf extension framework.
Features
- XML Source Data File Importer
- Improved Flat File Importer
- New Relational Table Wizard
- New Model Extension Definition Framework
- New XML Format Relational Model Importer
XML Source Data File Importer
In 7.5, we introduced an Flat File import option which simplified the process of constructing the source and view models (including generated transformation SQL) necessary for querying the flat file as a source. In 7.6, we've added an importer which follows the same import steps as the flat file importer but with a backing XML data file. Since this importer is file-based, it utilizes the same specific Data Tools Flat File Connection Profile as the Flat File importer option, but filters on *.xml files instead of *.txt and *.csv.
The importer will create a source model containing the three standard text file procedures supported by Teiid. Namely:
- getFiles()
- getTextFiles()
- saveFile()
The importer will also create a new view model containing a view table for each of your selected xml source files. Within these view tables will be generated SQL transformations containing the "getTextFiles()" procedure from your source model as well as the column definitions and parameters required for the Teiid TEXTTABLE() function used to query the data file. You can also choose to update an existing view model instead of creating a new view model.
The XMLTABLE function, as defined in the Teiid documentation, processes xml input to produce tabular ouptut.
XMLTABLE([<NSP>,] xquery-expression [<PASSING>] [COLUMNS <COLUMN>, ... )] AS name
Teiid Designer will construct the full SQL statement for each view table in the form:
SELECT
title.pmid AS pmid, title.journal AS journal, title.title AS title
FROM
(EXEC getMeds.getTextFiles('medsamp2011.xml')) AS f,
XMLTABLE('$d/MedlineCitationSet/MedlineCitation' PASSING
XMLPARSE(DOCUMENT f.file) AS d
COLUMNS pmid biginteger PATH 'PMID', journal string PATH 'Article/Journal/Title', title string PATH 'Article/ArticleTitle') AS title
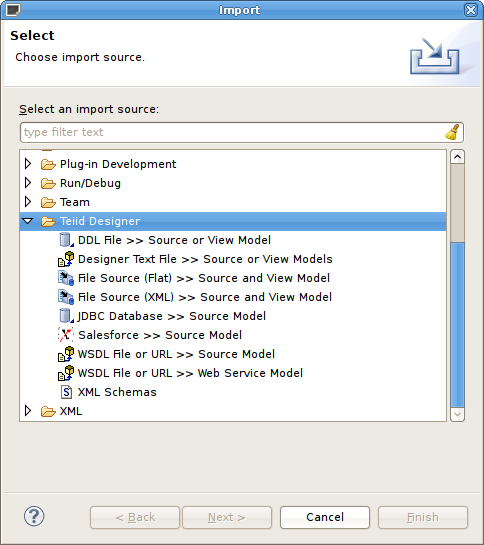
The import option is labeled File Source (XML) >> Source and View Model and is shown below in the Import wizard's first page under the Teiid Designer category.
{anchor:test}
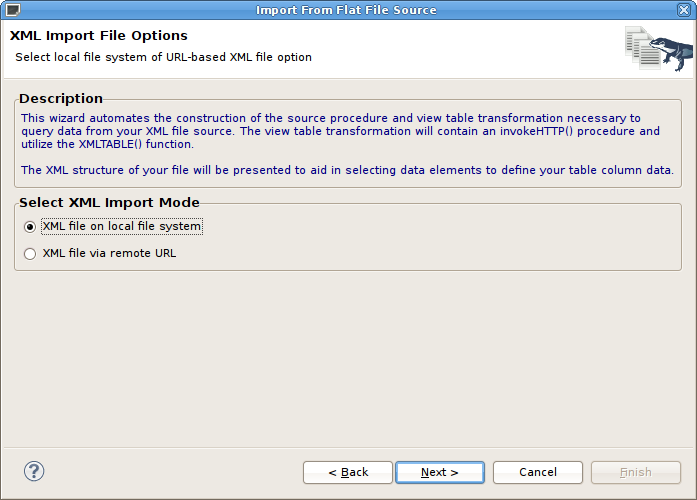
The second page includes options to select either the XML file on local file system or XML file via remote URL format.
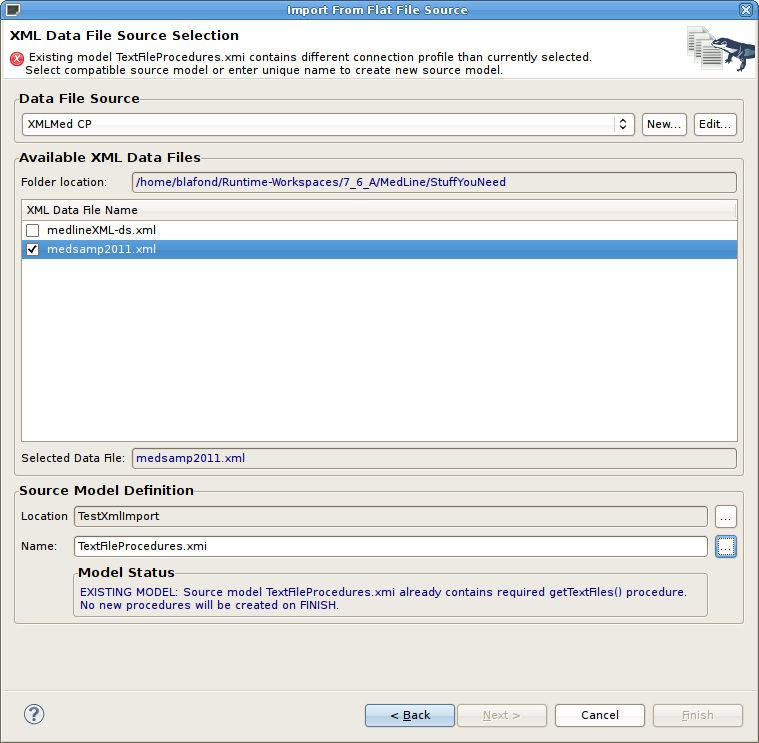
The third page of the wizard, titled XML Data File Source Selection, requires selection of an existing Flat File Source connection profile in order to locate the designer source file folder. Once selected (or created view "New..." button) the available data files will be displayed in the table.
Check/select the xml data file you wish to use to define your view tables. The lower section, Source Model Definition, allows defining or selecting a target source model and location. Note the Model Status sub-section where the status of a source mode (new or existing) will be displayed as well as the action that will be performed on completion of the wizard.
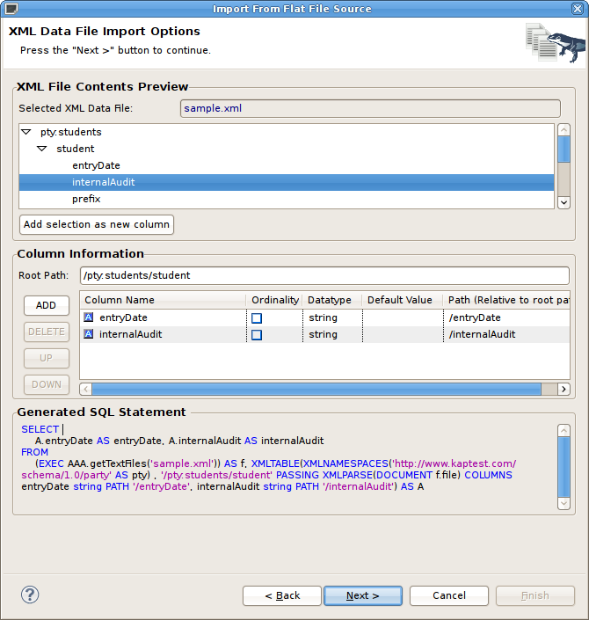
The fourth page, XML Data File Import Options, shown below, contains the various parser settings and XMLTABLE() method and parameter options. The XML File Contents Preview section displays a portion of the raw xml file contents.
The Columns Information panel contains a Root Path entry and Add/Delete/Up/Down buttons which allow customizing the Generated SQL Statement shown in the bottom panel.
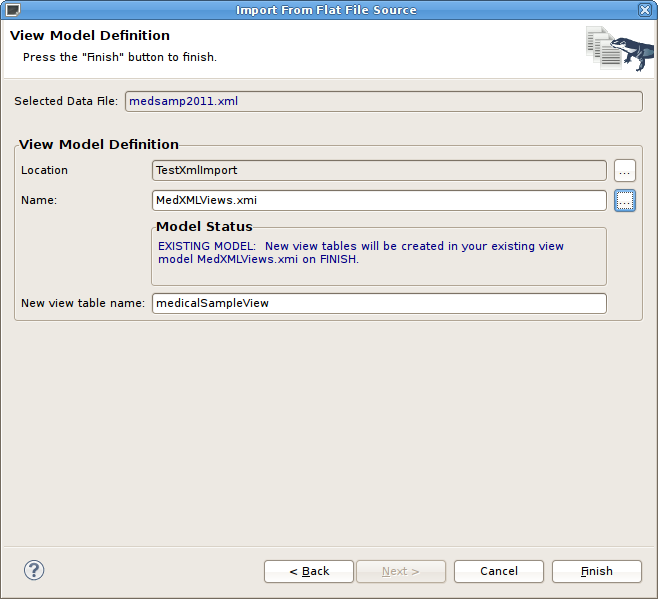
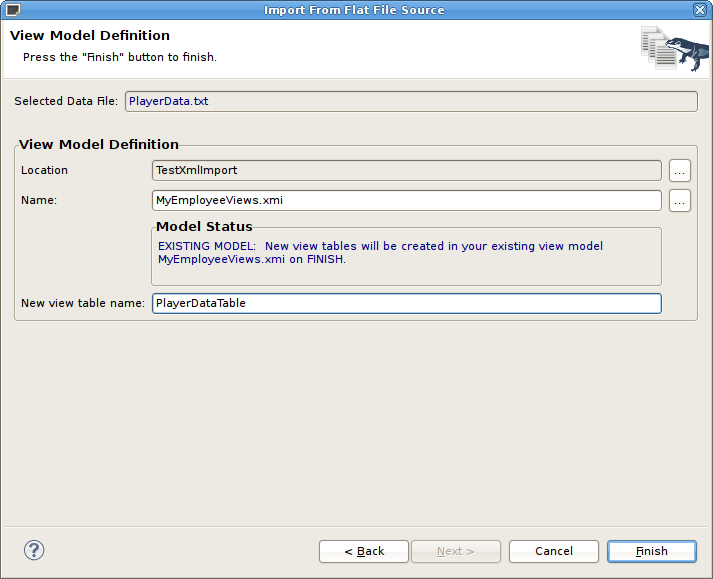
When finished configuring your import settings for your XML data file, click Next > to show the View Model Definition page. You can change the target location and target view model and specify a unique name for your new view table.
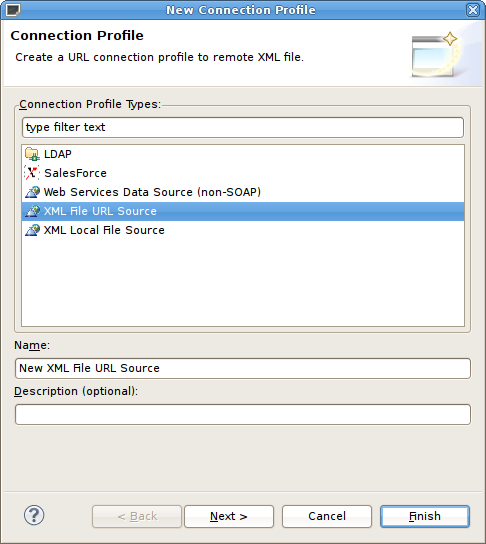
This importer utilizes two new Data Tools connection profiles tailored to work with Teiid Designer. In the Database Development perspective, select the Teiid Importer Connections folder and right-click select New... action. The following dialog will display the new connection profile options which include: XML File URL Source and XML Local File Source which correspond to the XML import options shown previously.
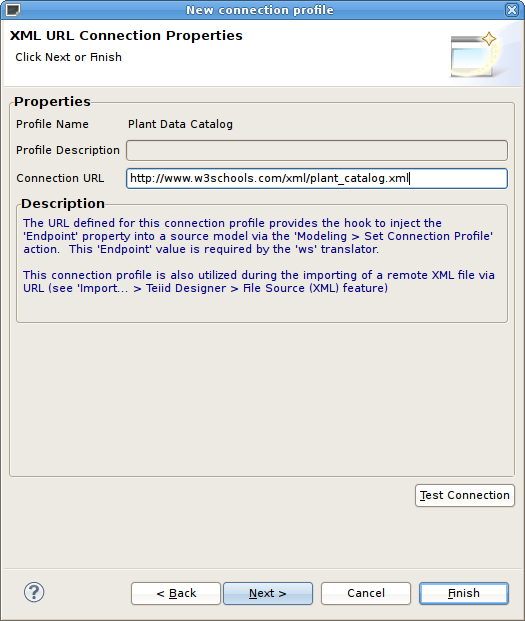
The New Connection Profile dialog for the XML URL Connection is shown below and includes a XML Local File Source field as well as a description of how and where this profile can be used in Teiid Designer.
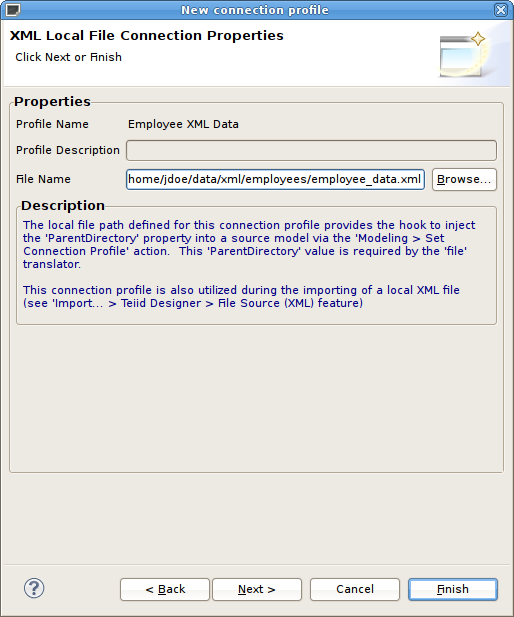
The New Connection Profile dialog for the XML Local File Source is shown below and includes a File Name field as well as a description of how and where this profile can be used in Teiid Designer.
While architecting the XML Data File importer, the Flat File import wizard was also modified and improved.
The import option is now labeled File Source (Flat) >> Source and View Model and is shown below in the Import wizard's first page under the Teiid Designer category.
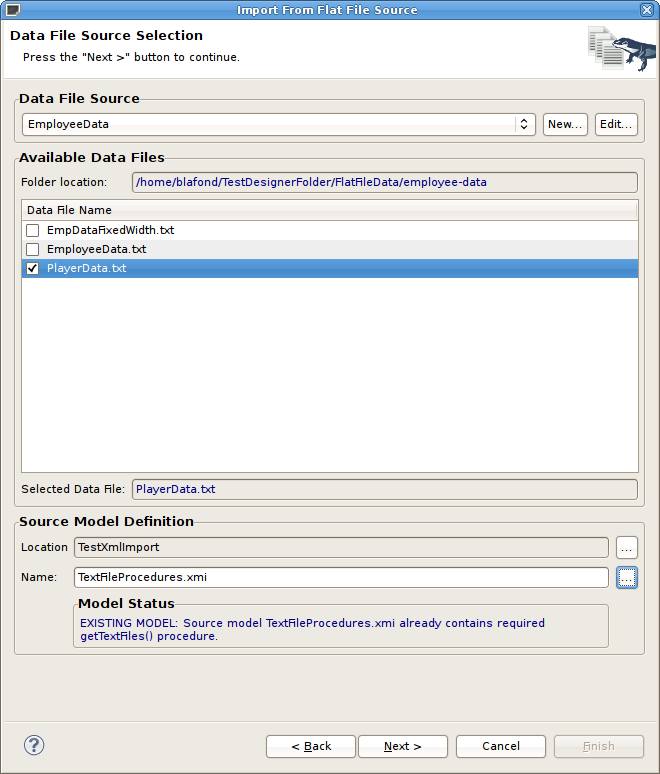
The second page, labeled Data File Source Selection, allows selecting/creating/editing a valid connection profile which in this case contains the relevant folder contain your flat files. Select a single flat file to target for this import by checking an entry in the Available Data Files table.
The lower section, Source Model Definition, allows defining or selecting a target source model and location. Note the Model Status sub-section where the status of a source mode (new or existing) will be displayed as well as the action that will be performed on completion of the wizard.
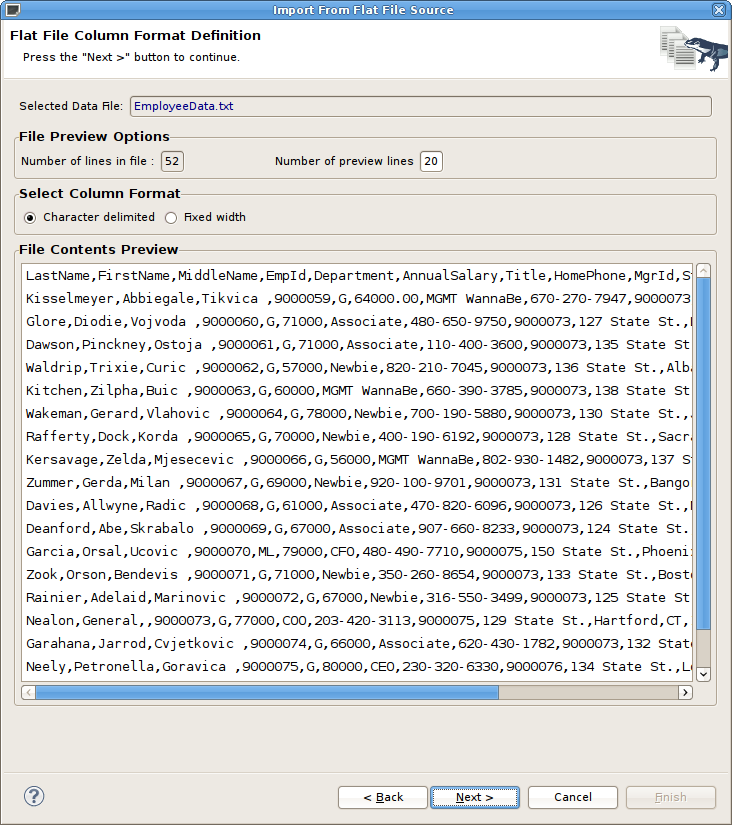
The third page, Flat File Collumn Format Definition, provides a preview of your data file and allows specifying that the data file contains Character delimited or Fixed width format. The selection will determine the details of the next page.
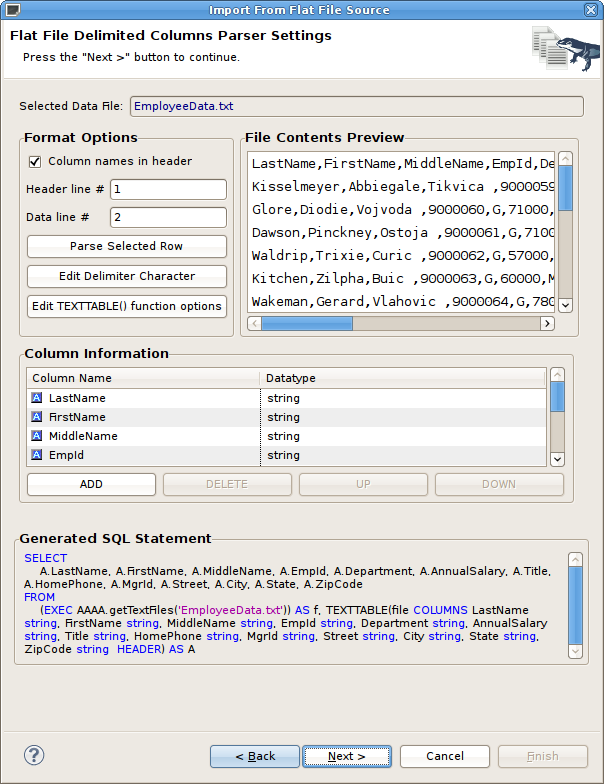
If the Character delimited option is checked, the fourth page will contain options to specify the delimited character as well as to view and edit the specific column information which allow customizing the Generated SQL Statement shown in the bottom panel.
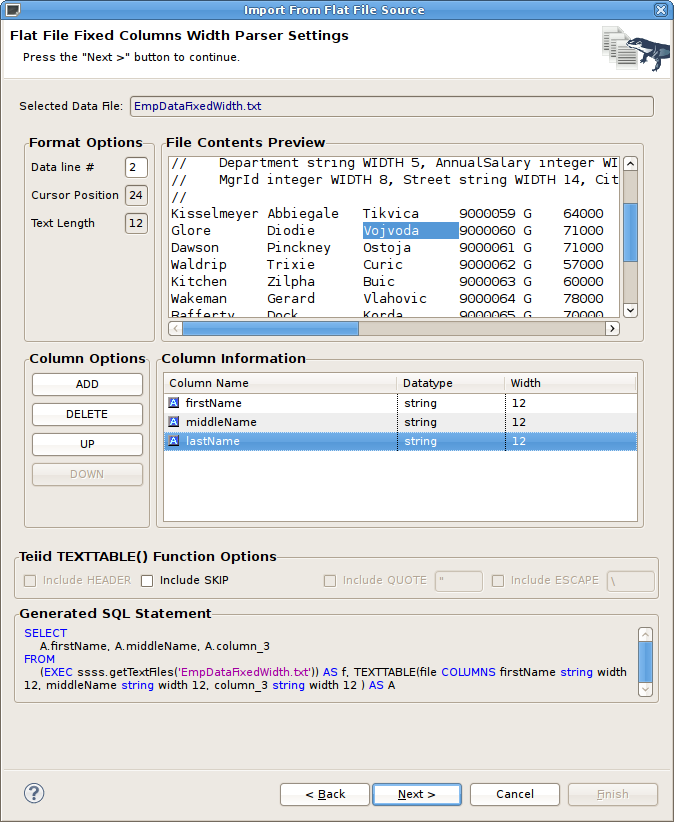
If the Fixed width option is checked, the fourth page will contain options to edit the specific column information which allow customizing the Generated SQL Statement shown in the bottom panel. The Format Options panel in the upper left contains Cursor Position and Text Length values which can assist you in determining your actual column widths in conjunction with the file contents preview to the right.
When finished configuring your import settings for your flat data file, click Next > to show the View Model Definition page. You can change the target location and target view model and specify a unique name for your new view table.
There is a new wizard designed to improve creating relational tables complete with column definitions as well as specifying unique keys and foreign key references.
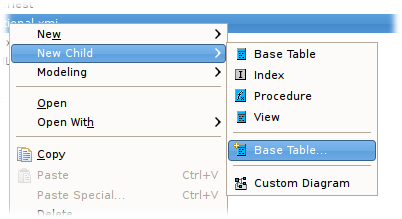
To access the new wizard, select a relational model in your workpace and right-click select the New Child > Base Table... action as shown below. Note that you can also launch this wizard by selecting a relational model child (table, view, procedure or index) and right-click select New Sibling > Base Table...
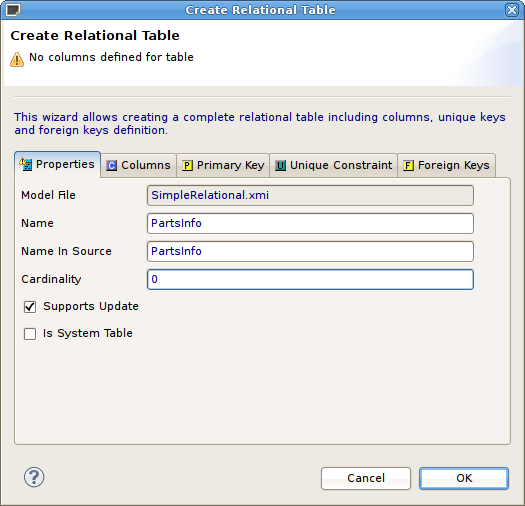
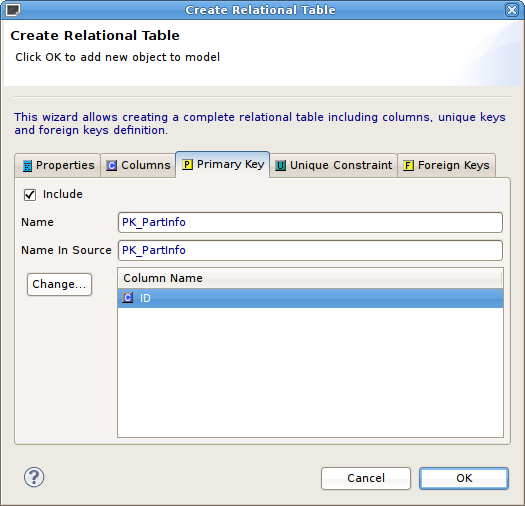
The Create Relational Table wizard contains 5 tabbed panels representing the various properties and components that make up the possible definition of a relational table. This wizard is designed to provide feedback as to the completeness of the relational table information as well as the validation state of the table and it's components. Note that although errors may be displayed during editing, the wizard is designed to allow finishing with the construction of an incomplete table containing errors.
The first tab labeled Properties contains the input for the simple table properties including name, name in source, etc...
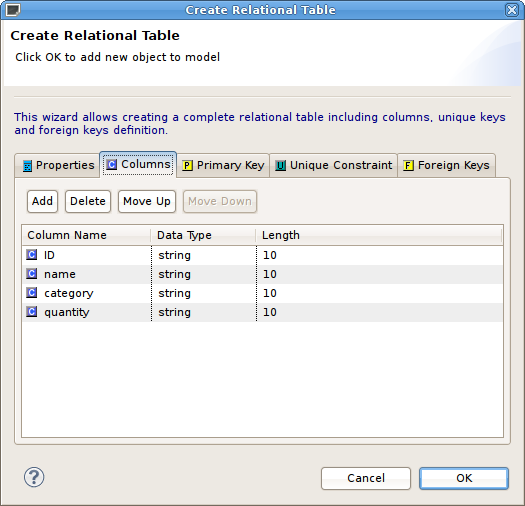
The Columns tab allows creation and editing of basic relational columns. This includes adding, deleting or moving columns as changing the name, datatype and length properties.
The Primary Key tab contains basic name, name in source and column definition editing. If wish to include a primary key for your table, check the Include box and begin editing.. Note that unchecking the box will clear the data. The Unique Constraint tab contains the identical information.
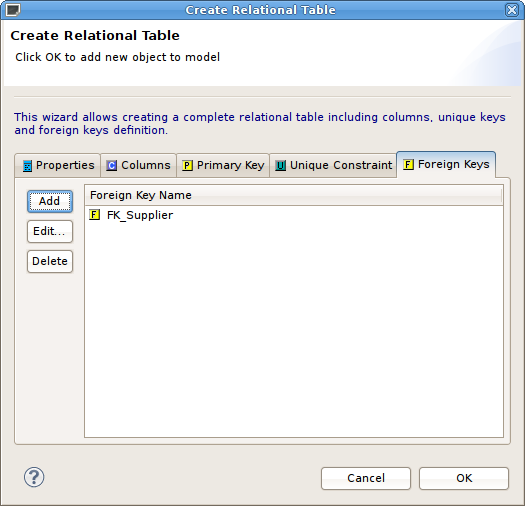
The Foreign Keys tab allows creating, editing and deleting multiple foreign keys.
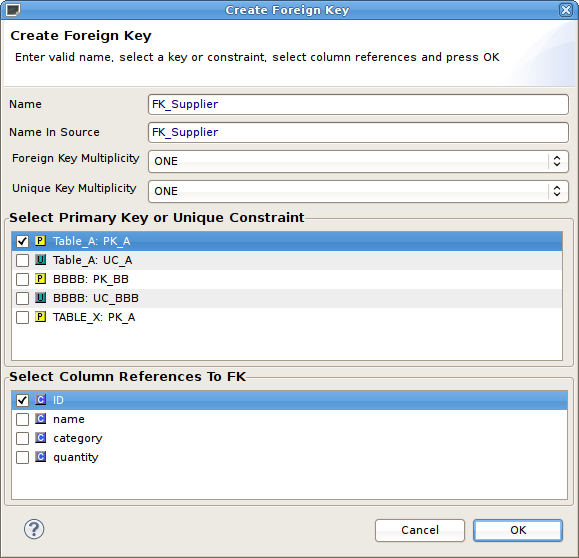
To create a new Foreign Key, select the Add button and enter/select the properties, key references in the tables shown below. Note the Select Primary Key or Unique Constraint table will display any PK/UC existing in the selected relational model. If no tables in that model contain a PK or UC, then the table will be empty.
When finished, click OK and your new relational table will be created and added to your relational model.
New Model Extension Definition Framework
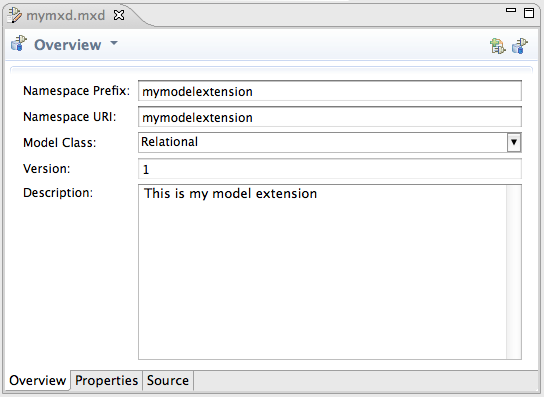
For 7.6, Teiid Designer introduces a new Model Extension Definition (MED) framework. This framework is designed to replace the old way of extending Teiid Designer's models by creating EMF-based Extension models and applying an extension model to a relational, relational view, xml document or web services model. In this way users can design and apply additional metadata to their model objects (tables, columns, etc...). This metadata is indexed along with the model objects and is available to translators through the Teiid VDB metadata.
The new framework was designed to help:
- reduce Designer's dependency on EMF and it's verbose and specific language and terminology.
- allow models to be extended by more than one extension model.
- simplify the creation and management of the extensions.
The MED Editor and accompanying Model Extension Registry View are shown below. Details on this new feature can be found at New Model Extension Definition Feature page.
New XML Format Relational Model Importer
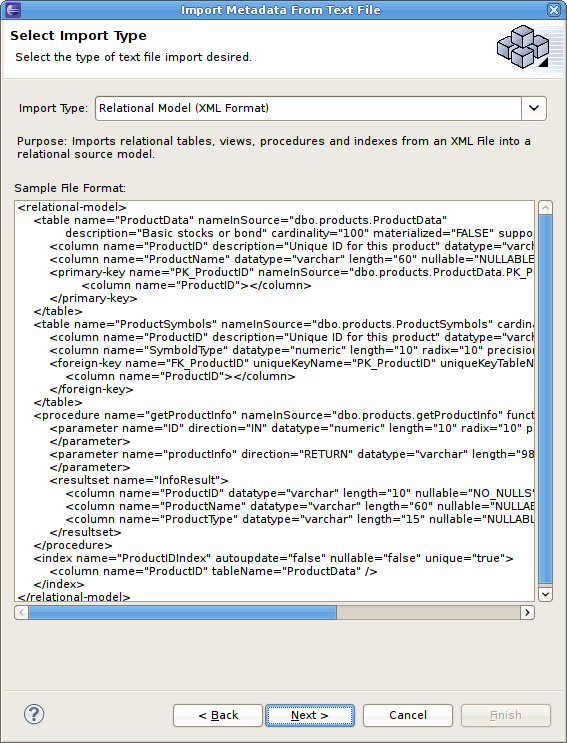
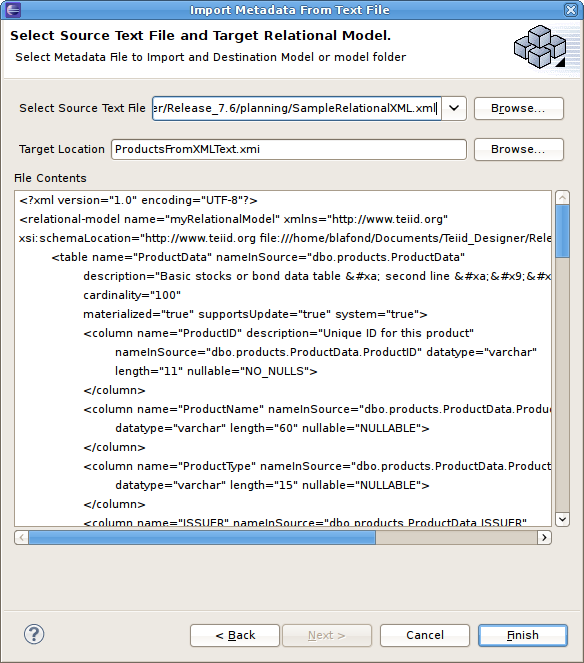
For 7.6, Teiid Designer introduces a new importer which allows contructing relational objects (tables, columns, keys etc...) from XML-based model definitions. If your XML file is based on Teiid Designer's RelationalModel.xsd schema, then you can import via Import > Teiid Designer > Designer Text File >> Source or View Models option.
On the first page of the wizard, select the Relational Model (XML Format) option.
On the next page, browse and select your XML file on your local file system, browse and select or create a target model for your new relational objects and click Finish.


Comments