A 30 minute tour of Teiid, using Teiid Designer
This article provides step-by-step instructions that you can use to try out Teiid and Teiid Designer, to see it's capabilities first-hand. We will walk throught a simple example, which will result in a unified view of two distinct data sources:
- A comma delimited file on the file sytem (Climate Zone Information)
- An XML document which is accessed over HTTP (Plant Catalog)
Using Teiid Designer we will
- Import the metadata (structure) of the Climate Zone file, and access it as a relational table
- Import the metadata (structure) of the remote XML Plant Catalog, and access it as a relational table
- Add a view layer on top of the two sources, joining data across them into a unified view table - a plant catalog view with corresponding zone descriptions.
Let's Begin!
- Install Teiid Server
- Follow the Teiid Installation Instructions. First you will download and install JBoss AS 5.1. Next, you will download and extract the Teiid Runtime.
- Start Teiid Server
- For a default JBoss AS installation, cd into <INSTALL_DIR>/jboss-5.1.0.GA/bin. Then start the server using ./run.sh
- Install and launch Teiid Designer
- Follow the Teiid Designer installation instructions. First you will install Eclipse 3.7, then use Eclipse Update to install Teiid Designer as instructed.
- Launch Teiid Designer to continue to the next step.
- Import the flat file source structure (Climate Zone Information)
- Follow the instructions in Connect to a Flat File using Teiid. This will import the structure of the Climate Zones flat file, and allow you to query it as a relational table.
- Import the remote XML document structure (Plant Catalog)
- Follow the instructions in Connect to XML over HTTP using Teiid. This will import the structure of the Plant Catalog XML over HTTP document, and allow you to query it as a relational table.
- Integrate the sources
Next we will show how to join the data from the two sources into a single view.
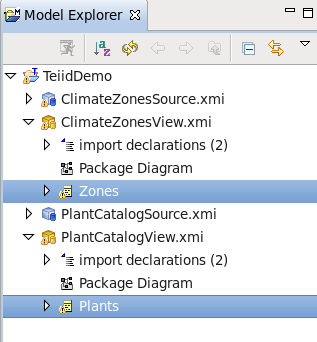
After import of the Climate Zones flat file and Plant Catalog XML document sources, your Model Explorer view should look like this:
- We will now add a view which joins the two different sources so that it appears like a single relational table. First, create a new Model which will contain the view, then add a view to the model as follows:
- In Model Explorer, select the TeiidDemo project, then 'Rt-click > New > Teiid Metadata Model'.
- On the 'New Model Wizard' page,
- enter 'MasterModel' for the 'Model Name'
- select Model Class: 'Relational'
- select Model Type: 'View Model'
- leave 'Model Builder' de-selected
- click 'Finish'. You have now created a new MasterModel, into which you will create your new custom view.
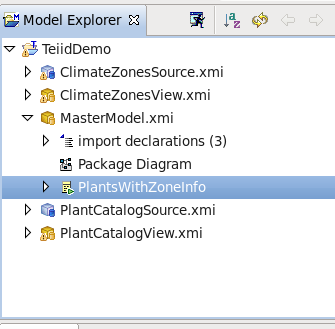
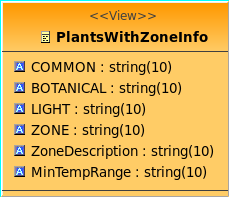
- In Model Explorer, select 'MasterModel', then 'Rt-click > New Child > View'. A new View is created under MasterModel. Name it 'PlantsWithZoneInfo'.
- Your Model Explorer view should look like this:
- Next, define the transformation which will join the data from the flat file and XML sources into a single view.
- Double-click 'Transformation Diagram' to open the transformation diagram.
- On the transformation diagram, 'double-click'
 to open the transformation editor.
 - Paste the following SQL into the transformation editor:
SELECT
PlantCatalogView.Plants.COMMON, PlantCatalogView.Plants.BOTANICAL, PlantCatalogView.Plants.LIGHT, PlantCatalogView.Plants.ZONE, ClimateZonesView.Zones.Description AS ZoneDescription, ClimateZonesView.Zones.MinTempRange
FROM
PlantCatalogView.Plants, ClimateZonesView.Zones
WHERE
PlantCatalogView.Plants.ZONE = ClimateZonesView.Zones.Zone
- After pasting the SQL, click the
 icon in the Editor toolbar to save the changes.
Teiid Designer will now look something like this:
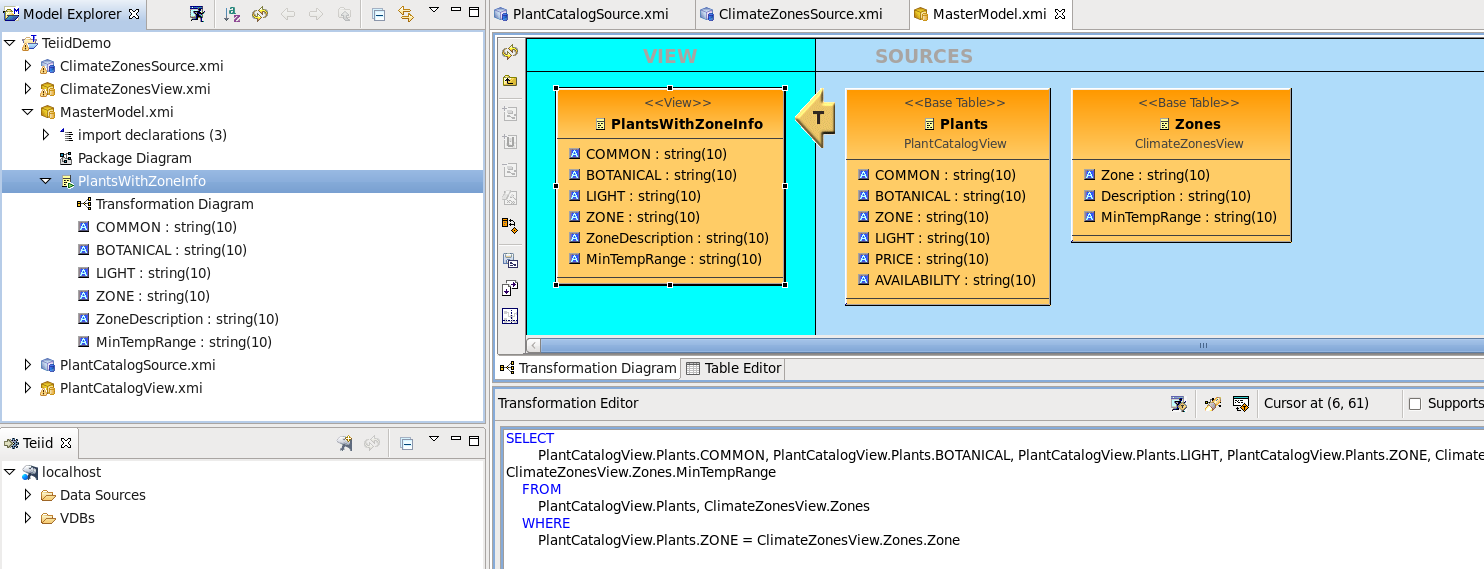
The two distinct source have been combined via the SQL transformation to create a new view:
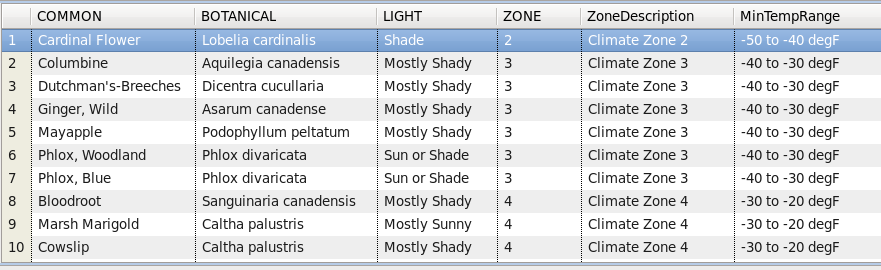
- Finally, test your new view.
- In Model Explorer, select the 'PlantsWithZoneInfo' view. Then click the 'running man' icon.
- You should see the sample data show up in the Results view, like this:
Congratulations, you've completed the demo!
This is a very simple example, and we have just scratched the surface of the full capabilities of Teiid and Teiid Designer. Teiid is an amazing product which can bring together many different types of data sources, treating them as if they were a single database. In this example, we've joined a flat file and a XML document over HTTP for simplicity, but the possibilities are endless. See the Supported Data Sources list for Enterprise Data Services platform for a full listing of sources.
Comments