Release 7.7 was targeted for bug fixes, usability improvements, addition of Guides, Status and Cheat Sheet Views, plus significant improvement to the Web Service Importer
Features
- Guides and Status Views
- Designer Cheat Sheets
- Improved Web Service Importer
- Added SQL Templates Dialog
- Improved access to Execution Plan
- Improved View Table Creation
Guides and Status Views
In 7.7, we've added new views which provide assistance for many common modeling tasks. The new views inlude:
- Guides View - provides categorized Modeling Actions and links to 'Cheat Sheets' for common processes.
- Status View - provides a quick status overview of the selected Designer Project.
Guides View:
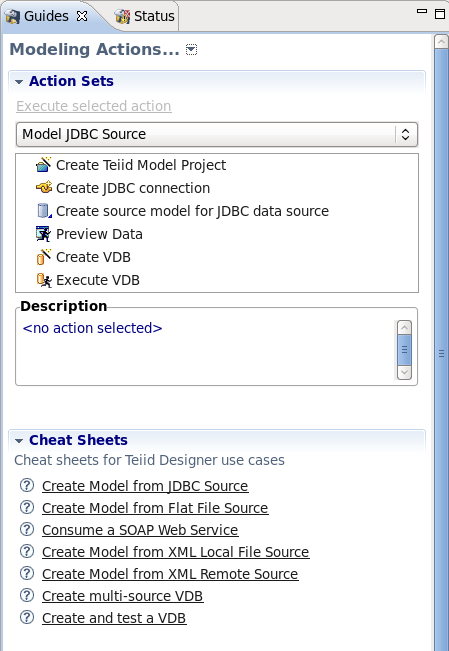
The Guides View provides categorized Modeling Actions and links to Designer 'Cheat Sheets'.
The upper 'Action Sets' section provides categorized actions - just select the desired category in the dropdown. The related actions for the selected category are then shown in the list below it. The actions can be executed by clicking the 'Execute selected action' link or double-clicking the action.
The lower 'Cheat Sheets' section provides a list of available 'Cheat Sheet' links, which will launch the appropriate Cheat Sheet to guide you step-by-step through the process.
Status View:
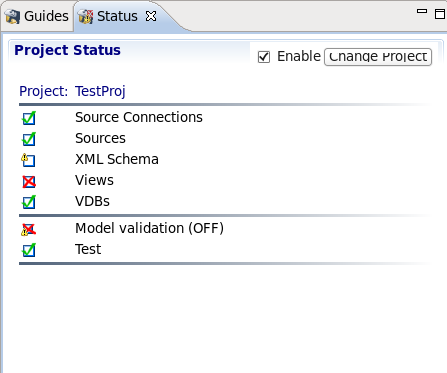
The Status View is located adjacent to the Guides View by default. It provides a quick status view of the selected project. A green check indicates OK, a red 'x' indicates errors and a 'warning' icon indicates potential problems. The project can be changed by selecting the 'Change Project' button.
Designer Cheat Sheets
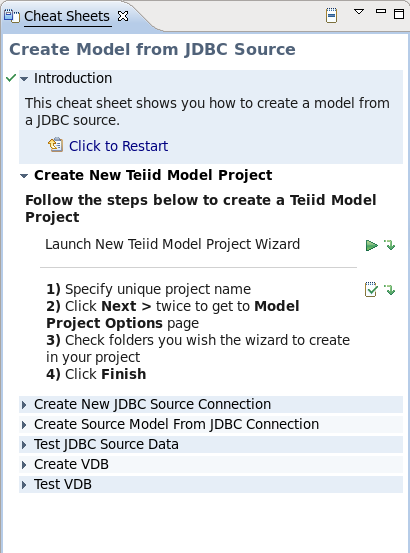
In 7.7, we've added several 'Cheat Sheets' for some of the most common Designer use cases. Cheat Sheets essentially guide you step-by-step through a process workflow. In each step, the appropriate wizard or dialog is launched. Then at the successful completion of each step, the next step is made available and previous data selections are passed along where possible.
The 'Create Model from JDBC Source' Cheat Sheet is shown below as an example.
Improved Web Service Importer
One of the usability improvements in 7.7 is a re-vamped Web Services importer.
This importer results in the creation of queryable relational procedures that represent your desired request and response web service structure defined through your WSDL's schema definition.
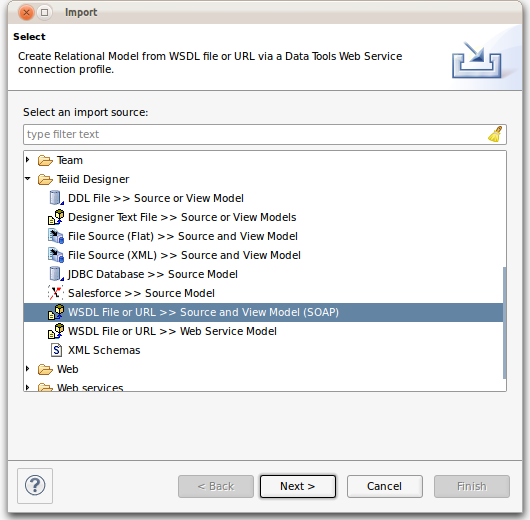
This importer is accessed by lanching Eclipse's "Import..." action and selecting the "Teiid Designer > WSDL File or URL >> Source and View Model (SOAP)" option.
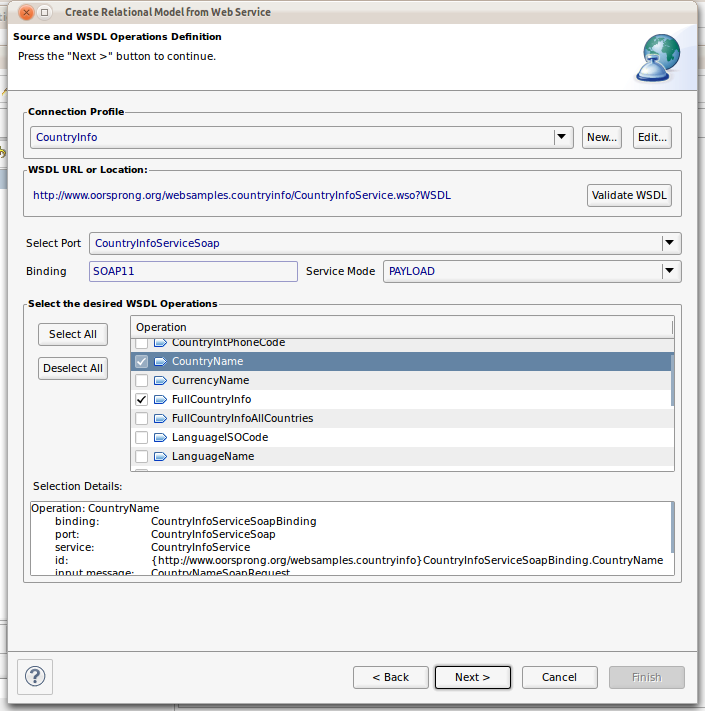
The first page, titled Source and WSDL Operations Definition, involves defining your WSDL source connection profile. (See section on New Web Services Source SOAP connection profile)
On this page, select your connection profile, port (if multiple available), service mode (PAYLOAD vs MESSAGE) and check the operations you wish to use to generate your queryable relational procedures.
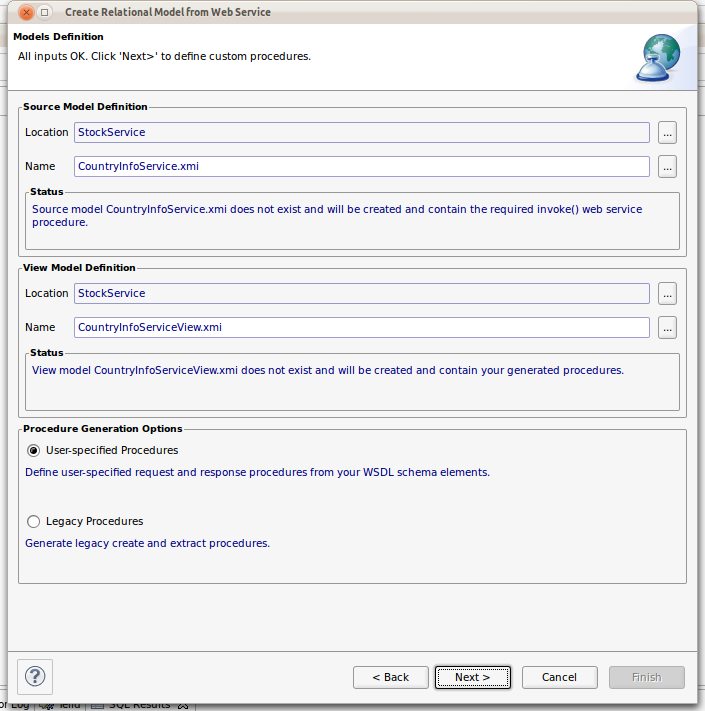
The next page, Models Definition, allows defining the source and target models where the generated procedures will be defined in.
Based on initial workspace selection, the location for these models may be pre-set but changeable and the source and view model names will be generated based on the service name defined in your WSDL. Select the browse button (...) to select locations and existing models in your workspace.
This wizard generates both request and response procedures that are used in the queryable wrapped procedure. If you wish to generate Designer's legacy create and extract procedures choose the Legacy Procedures option in the lower section and click Finish.
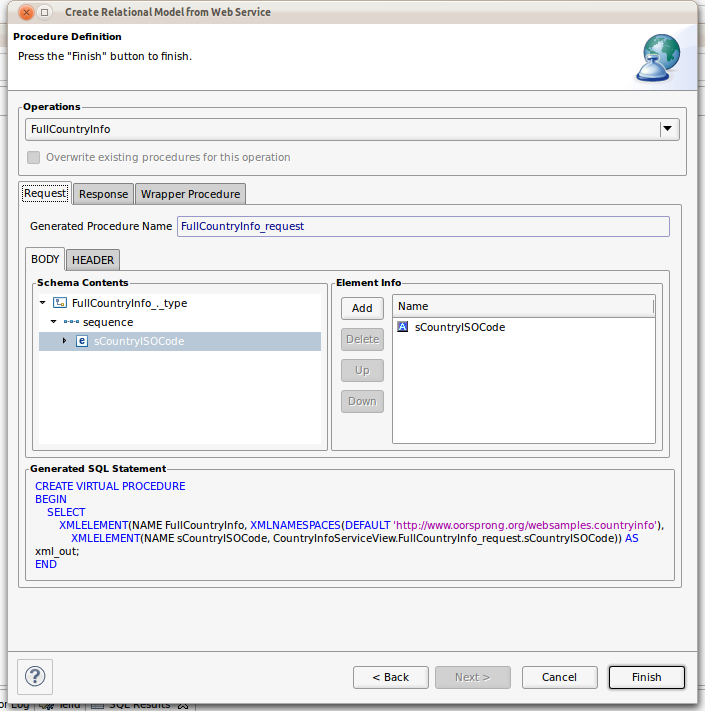
The Procedure Definition page enables defining the details of your request and response structures.
In the Request tab, select and double-click the schema elements you wish to set as input parameters for your request. These will be added to the Element Info panel and the resulting generated SQL statement will be updated to reflect the new element. Note the BODY and HEADER tabs which exist on both the Request and Response tabs. If the selected service mode for this procedure is set to MESSAGE, the HEADER tab will be enabled and allow you to define the SOAP header variables utilizing the same schema tree.
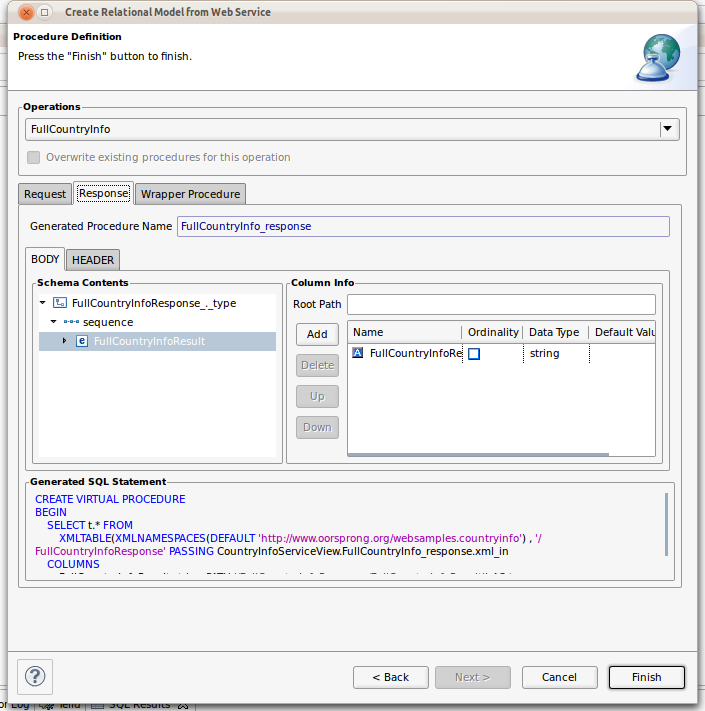
Select the Response tab and create the response procedures result set columns in the same way.
Repeat this process for all operations by changing the selection target operation via the Operations selector at the top.
Follow the same logic on the Response tab to define the XMLTABLE column elements in your response procedure generated SQL statement.
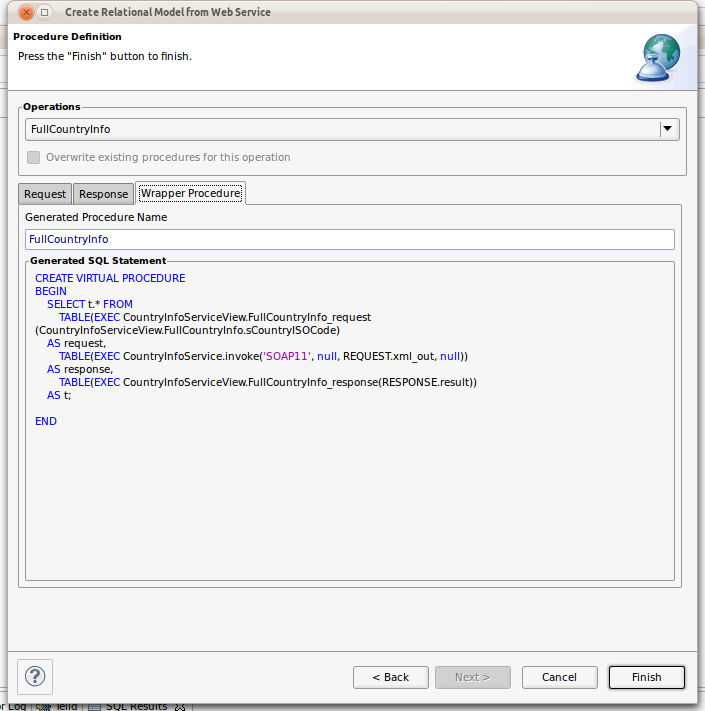
The Wrapper Procedure tab displays the generated SQL that creates the queryable procedure defined with your input request parameters and your output response result set.
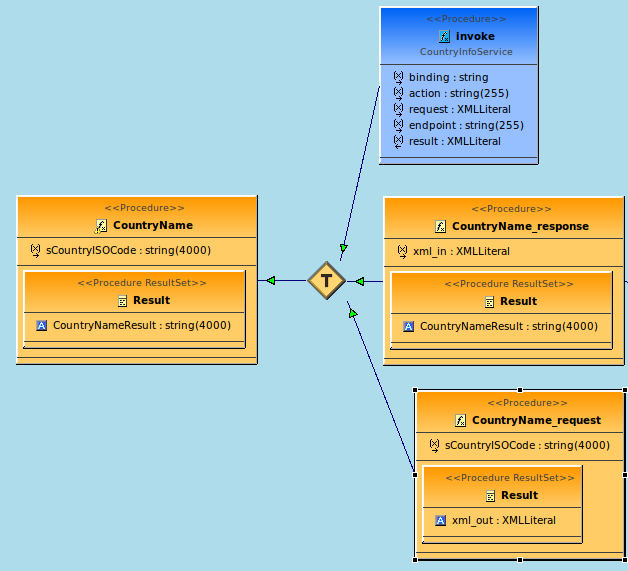
On Finish your three procedures will be created along with the required source invoke() procedure. Below is an exmaple of a dependency diagram for these procedures.
Added SQL Templates Dialog
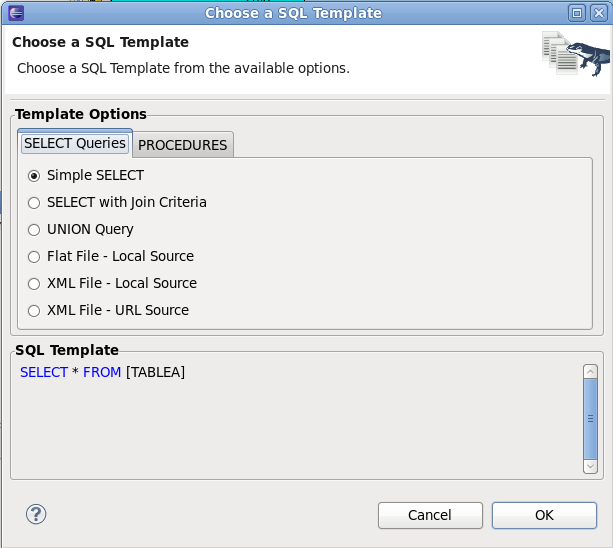
In 7.7, we've added a Choose a SQL Template Dialog which allows several of the most common SQL Templates to be used as a starting point for developing your transformations.
There are a couple of places where the new dialog can be accessed:
- In the Create View Table Wizard (SQL Tab)
- In the Transformation Editor (Rt-click Context Menu)
The Choose a SQL Template Dialog is shown below with the SELECT Queries tab visible. Depending on usage context, the PROCEDURES tab may also be available.
Improved access to Execution Plan
In 7.7, we've improved access to the Teiid Execution Plans. The Execution Plan can be obtained in the following ways:
- Upon execution of 'Preview Data', the Execution Plan is now available
- In ModelExplorer, select a previewable item, then Rt-click > Modeling > Show Execution Plan
- In SQL Scrapbook, the Execution Plan is available after each query execution
- In SQL Scrapbook, Rt-click > Teiid_7.x > Get Execution Plan
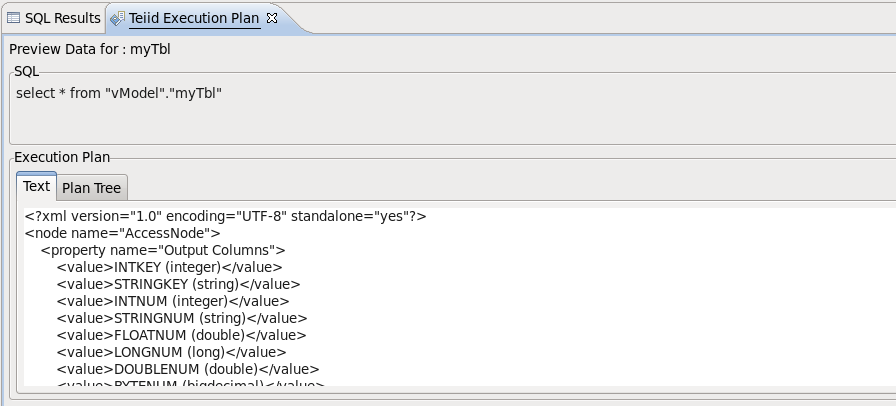
The Teiid Execution Plan view is shown below. The 'Text' form or 'Plan Tree' form of the plan can be displayed by selecting the desired tab.
In addition, the plan can be saved to the file system by selecting the 'Save' icon on the toolbar.
Improved View Table Creation
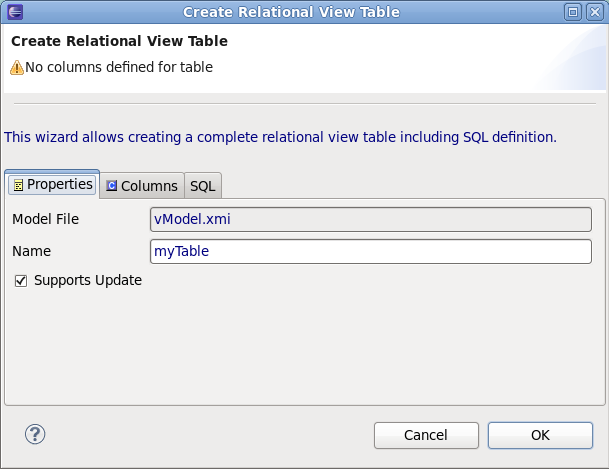
In 7.7, we've introduced a new dialog which improves the process of creating new Relational View Tables. Now, when creating a new Relational View Table the following dialog (shown below) will be displayed. The user can supply as much (or as little) of the table definition as desired - the dialog can be 'finished' at any time.
On the 'Properties' tab, the desired 'Name' and 'Supports Update' properties can be supplied.
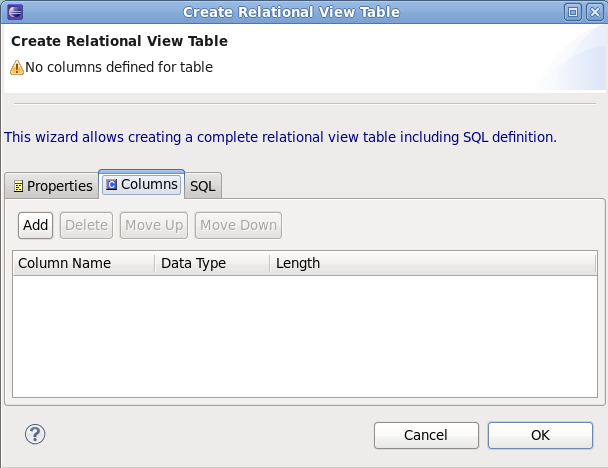
On the 'Columns' tab, the view table columns can be defined:
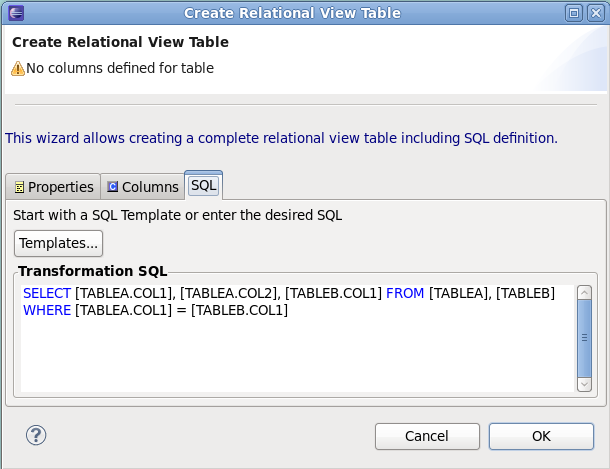
And finally, on the 'SQL' tab, the transformation SQL can be defined. On this tab, the user can choose a SQL template (via the Templates... button) or can type any SQL into the Transformation SQL text area.
Comments