Overview
Over the past few years I've often used soapUI to do basic testing of web services. Overall it's a very competent tool (despite the look & feel!) and has worked very well for me. However, I've only ever really used it for SOAP based web services (mostly what I've implemented). For the S-RAMP project we need to be able to test REST (Atom API) based services, so I figured it was time to learn how! Of course, there's just something wrong about using a tool called soapUI to test REST services, but what can you do?
This article strives to walk through setting up soapUI to test a live S-RAMP server using the REST based S-RAMP Atom API binding.
Requirements
Obviously you will need to have the following for this guide to work:
- Installed soapUI
- Running S-RAMP server
Before you move on to the next section, you should ensure that you can launch soapUI successfully and that you can point your browser to your s-ramp server (e.g. http://localhost:8080/s-ramp-atom/s-ramp/servicedocument).
Outline
First I'll list out the high level outline of what we're going to do in soapUI. You can read through the steps here to get an understanding of what you'll be doing, then jump down to Step by Step (the next section) to go through it in more detail.
- Launch soapUI
- Create a New soapUI Project (name it S-RAMP)
- Create a New REST Service (name it Atom API)
- Add your S-RAMP server's Atom API endpoint to the Service (e.g. http://localhost:8080/s-ramp-atom/s-ramp)
- Add a New Resource (name it Service Document with path /servicedocument)
- Configure the method to use (name it getServiceDocument)
- Rename the soapUI auto-created Request (rename it to default)
- Run the request - it should hit the server and return an XML document to you
- Profit!
Step by Step
1. Launch soapUI
I'm certain you can already do this - just run the soapui.sh script found in the soapUI package's bin directory.
2. Create a New soapUI Project
The first thing to do is create a new Project in soapUI. You can do this by selecting New soapUI Project from the File menu. You'll see the New soapUI Project dialog:
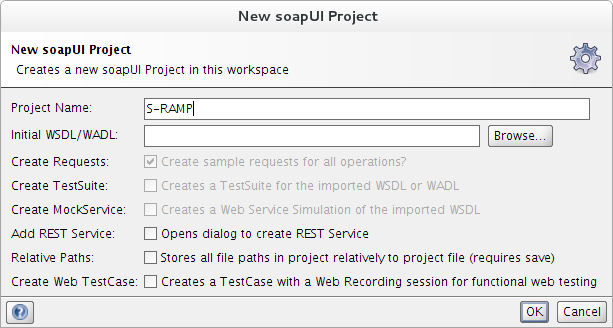
As shown in the above screenshot, name your new project S-RAMP. Leave all other options as defaults - we won't include a WSDL here because we don't have one for the S-RAMP api.
3. Create a New REST Service
Now that you have a project, you can go ahead and create a new REST Service for the S-RAMP Atom API. Do this by right-clicking on your new S-RAMP project and choosing New REST Service. The following dialog will appear:
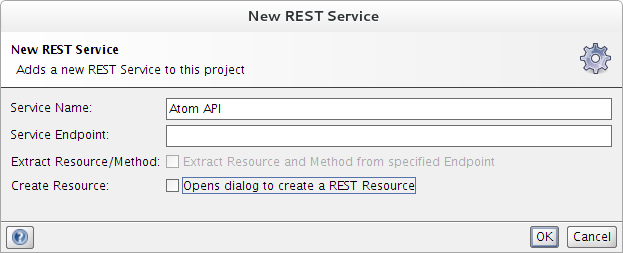
As shown above, name the new service Atom API. This makes sense when you consider that Atom is just one binding for S-RAMP.
Note: make sure that you uncheck the Opens dialog to create a REST Resource checkbox. There's a step we need to take before we do that.
4. Add your S-RAMP server's Atom API endpoint to the Service
Next you need to set the default endpoint for your new REST service. To do this, double-click on the Atom API REST service in the Navigator and switch to the Service Endpoints tab.

Make sure to enter your S-RAMP Atom API endpoint in the list of Service Endpoints as shown above. I usually make sure that the final trailing '/' is omitted from the endpoint, which becomes important later.
5. Add a New Resource
Next, you need to add a new Resource to the service your REST service. To do this, right-click on the Atom API REST Service in the Navigator and choose New Resource. The following dialog will appear:
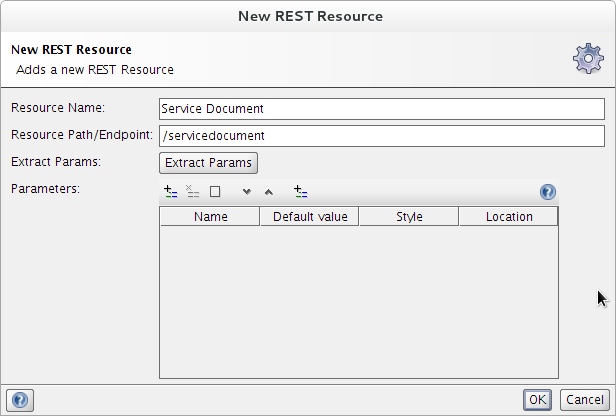
Fill out the dialog as shown above, specifying Service Document and /servicedocument as the resource name and path, respectively. This particular resource is very simple and requires no parameters. Once you click OK, another dialog will appear allowing you to set the method - see the next step for details.
6. Configure the method to use
Next you need to configure a new method for the resource. In this case we're going to add a simple http GET method, because the servicedocument resource only supports a simple GET. The following dialog is used to configure the method (you can add multiple methods to resources that support additional methods by right-clicking on the resource and choosing New Method).

In this case, we'll name the method getServiceDocument and ensure that the HTTP Method is GET. This method requires no parameters. Leave the Creates and opens request checkbox checked so that you are automatically taken to the next steps below.
7. Rename the soapUI auto-created Request
By default, soapUI will name the automatically generated request "Request 1". You'll almost always want to rename this to something more informative. In this case I typically rename the request to default because it's a very simple GET method.
To rename the Request, select it in the Navigator and press F2 (or right-click on it and choose Rename).
8. Run the request
You should now be all set to test your service. To do that, simply click the Submit request button in the toolbar (it looks like a little green Play icon).
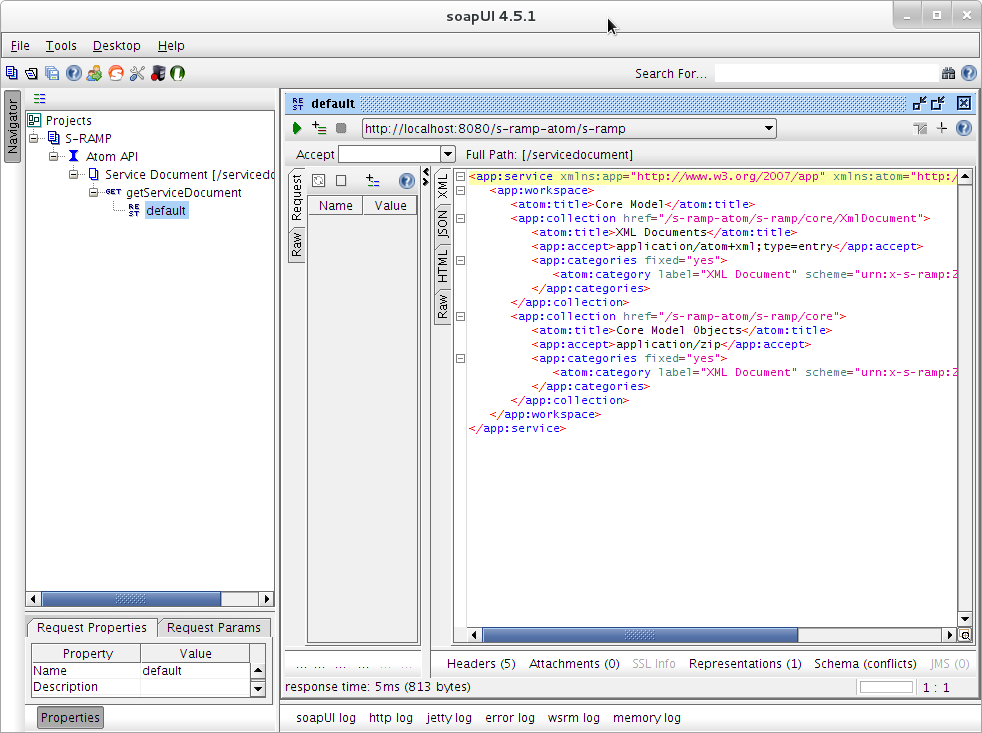
Clicking on the Submit button should result in soapUI making an http GET requst to your S-RAMP Atom API. If all is working (your server is running and your endpoint is configured properly) then you should see a valid Atom response XML document in the response window.
9. Profit!
Next Steps
The instructions above should be a starting point for creating tests for simple resources. Note that things get more interesting when you need to test POSTing a resource. It's pretty straightforward to create a new method that uses HTTP POST (instead of GET). When you do this, soapUI gives you an opportunity to set the body of the request in addition to parameters. I'm confident you won't have any trouble figuring it out!
Comments