Connect to a Hadoop Source using Hive2
This article will guide you through an example of connecting to a Hadoop source via the Hive2 driver, using Teiid Designer. It is assumed that you have already installed Teiid Designer version 8.3 or higher. In this example we will demonstrate connection to a local Hadoop source. We're using the Hortonworks 2.0 Sandbox for our source, but you can connect to another source if you wish using the same steps.
1. Setup a local source
- For our test source, we are using the Hortonworks 2.0 Sandbox VM , but you can use any source. If using the VM, start it now and verify that its up-and-running.
2. Configure the Hive2 driver on your DataVirtualization/Teiid instance
- You will need to add the Hive2 driver into your server instance. See the /docs/teiid/datasources/hive folder in your server installation. The steps are also included here.
- Download TeiidModule-Hive12.zip . Copy it into your server installation in the /jboss-eap-6.1/modules folder. unzip it
- Now edit standalone.xml, located in /jboss-eap-6.1/standalone/configuration . In the 'datasources' subsystem, add the following under the drivers section
<driver name="hive12" module="org.apache.hadoop.hive12">
<driver-class>org.apache.hive.jdbc.HiveDriver</driver-class>
</driver>
- Save standalone.xml.
2. Start your local teiid server instance
- Teiid Designer requires a running Teiid server for Data Preview. We will use the Data Preview capability to test our Hadoop source.
3. In Teiid Designer, create the Hadoop source model
Normally in Designer, we'd use the Hive2 jdbc driver directly and import metadata directly using the JDBC importer. However, the Hive2 driver is incomplete at the time of this writing in terms of the metadata calls that are required for our JDBC importer. Therefore, we will use the 'Teiid Connection' importer:
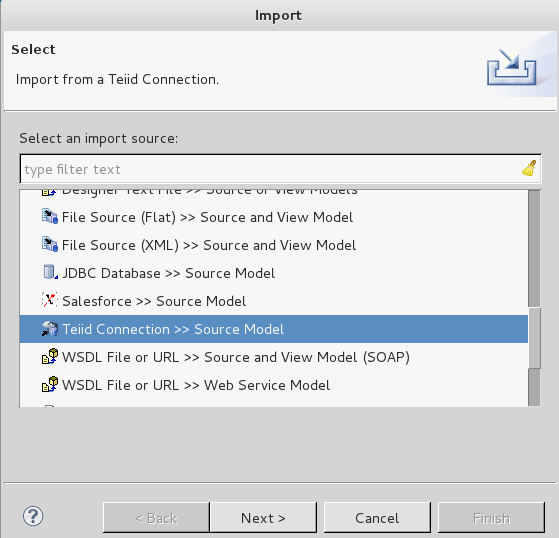
- Select File > Import... > Teiid Connection >> Source Model , then click Next
- On the first page of the wizard, click New... to create a new Data Source
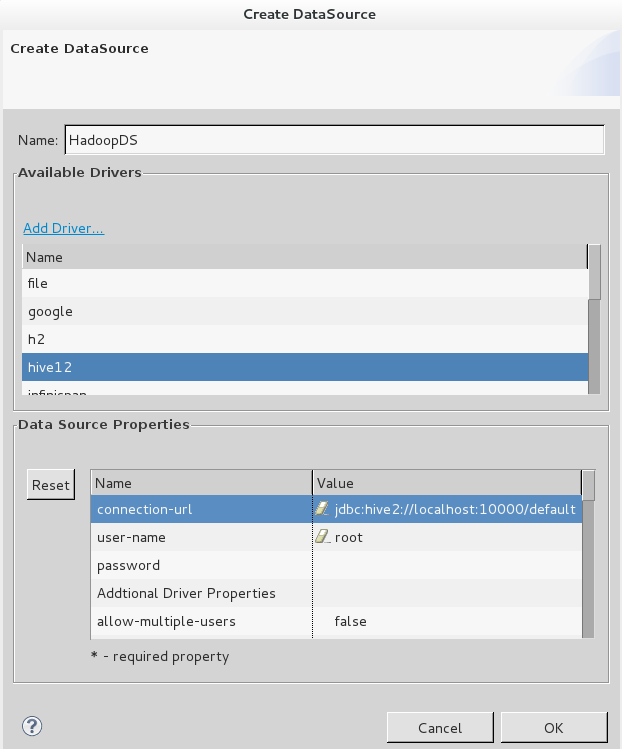
- On the 'Create DataSource' dialog:
- Enter HadoopDS for Name:
- In the Available Drivers list, select hive12 (we set this up in the standalone.xml previously)
- For the connection-url property, enter jdbc:hive2://localhost:10000/default
- For our source, user-name is root and password is unset.
- click OK
- Back on the first wizard page, the HadoopDS should show up in the data sources list. Select it, then click Next
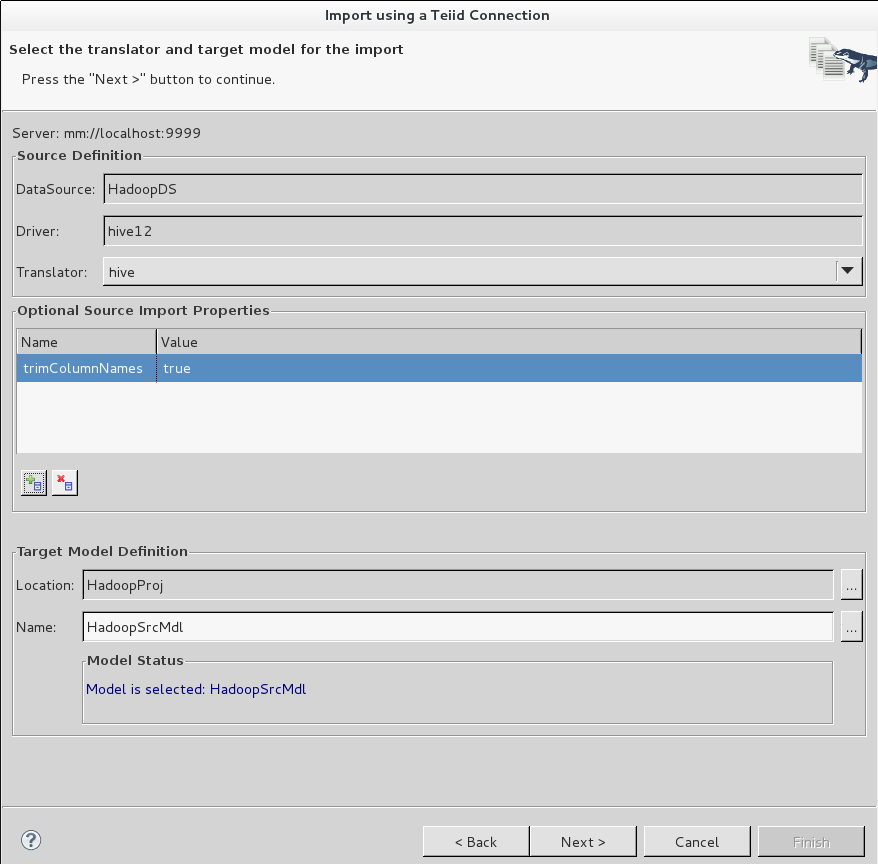
- On the next page of the Teiid Connection import wizard
- Select hive for the translator
- In the Optional Source Import Properties, add a property
- Name = trimColumnNames, value = true
- Enter HadoopSrcMdl for the target Model Name
- click Next
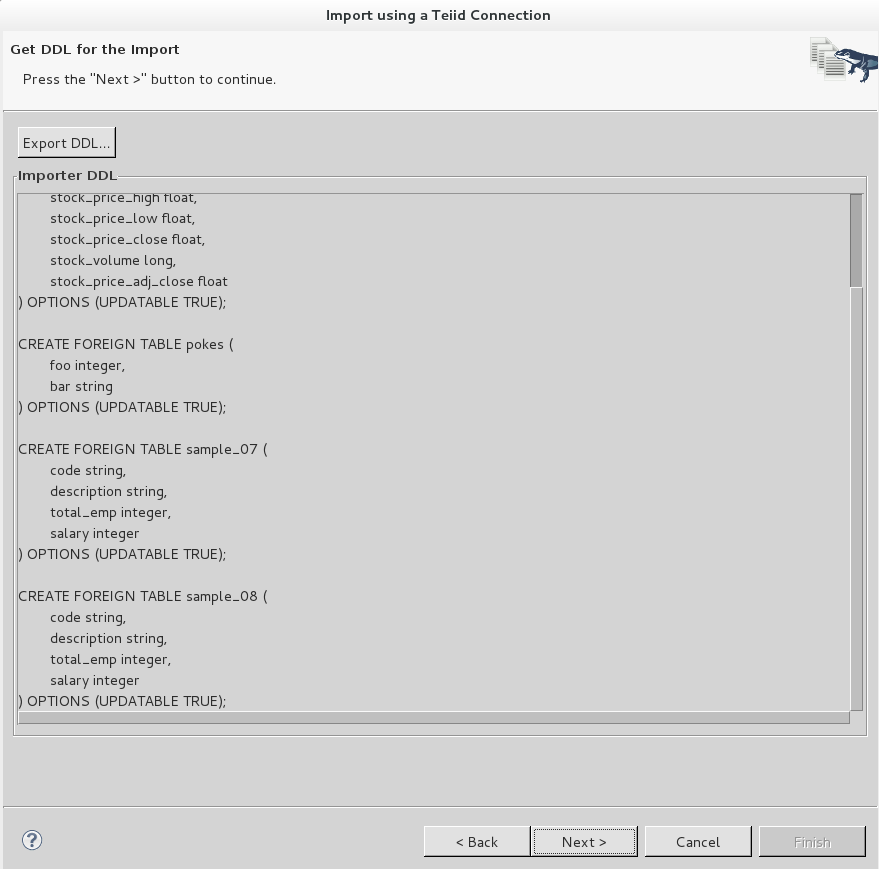
- The next page of the wizard should display the schema DDL. click Next
- The final page of the wizard shows the table to be created, and allows you to select which tables will be imported. Leave all tables selected. Click Finish.

- The relational model HadoopSrcMdl should now be created in the ModelExplorer view
3. Preview the Hadoop source tables
- In ModelExplorer, expand the model and select one of the tables in the HadoopSrcMdl. Click the 'Running man' icon in the ModelExplorer toolbar. The preview query should execute, with results displayed in the SQL Results View.
4. Conclusion
This concludes our Hadoop Source example. Please consult the Teiid documentation if you have further questions regarding the hive translator.
Comments