Connect to a Google Spreadsheet Source
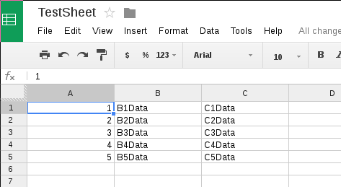
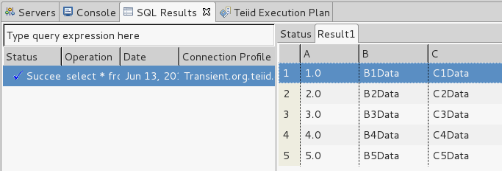
This article will guide you through an example of connecting to a Google Spreadsheet source, using Teiid Designer. It is assumed that you have already installed the latest Teiid Designer. For this example, we will consume a simple Google Spreadsheet as a source. The spreadsheet in this example is TestSheet. It has three columns (A, B and C) with 5 rows of data - as shown below:
IMPORTANT: If you have a google spreadsheet containing only string data, please add a dummy numeric column. At time of this article update, we have an open issue - TEIID-2998 . Problems have been observed with sheets containing only string data. For now, the workaround is to add a dummy non-string column to the sheet.
1. Start your local teiid server instance
- Teiid Designer requires a running Teiid server for Data Preview. We will use the Data Preview capability to test our Google Spreadsheet source.
2. In Teiid Designer, use the 'Teiid Connection' importer to create a source model
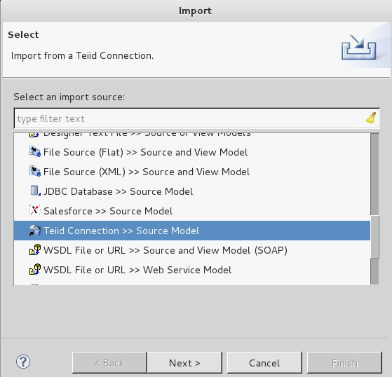
- Select File > Import... > Teiid Connection >> Source Model , then click Next
- On the first page of the wizard, click New... to create a new Data Source
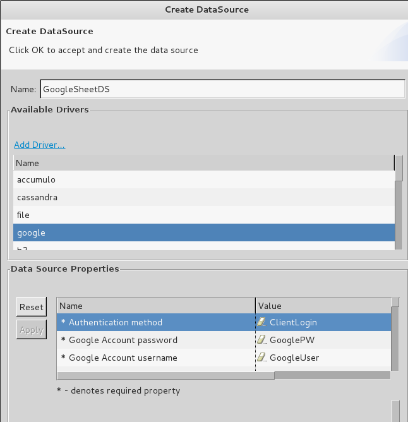
- On the 'Create DataSource' dialog:
- Enter GoogleSheetDS for Name:
- In the Available Drivers list, select google
- For the Authentication Method property, enter ClientLogin
- For the Google Account Username and Google Account Password properties, enter the username and password of the google account.
- For the Name of the Spreadsheet... property, enter TestSheet
- then click OK
Note: The OAuth2 Authentication method is also allowed (if preferred). Please see Teiid Docs for more information.
- Back on the first wizard page, the GoogleSheetDS should show up in the data sources list. Select it, then click Next
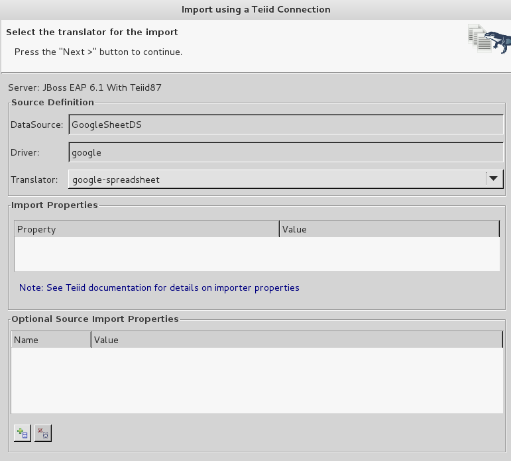
- On the next page of the Teiid Connection import wizard
- Select google-spreadsheet for the translator
- NOTE: If the google-spreadsheet translator is not available, stop the server. Then edit the server's standalone-teiid.xml configuration file, adding this line in the 'translators' section:
<translator name="google-spreadsheet" module="org.jboss.teiid.translator.google"/>
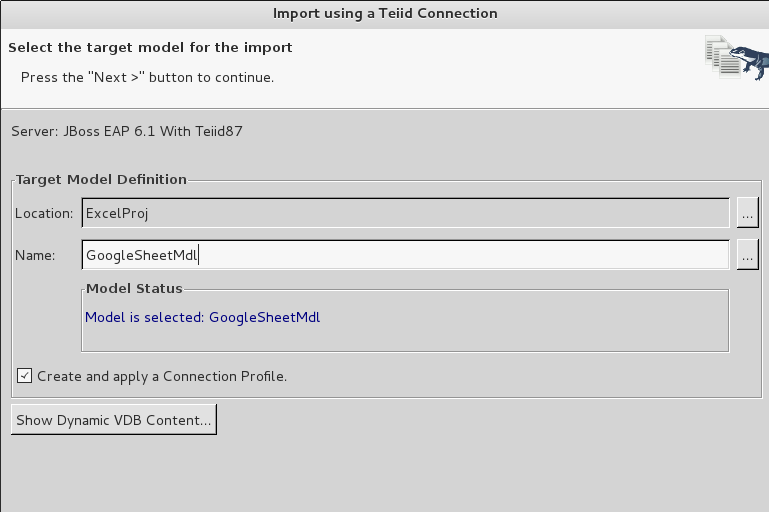
- On the next page of the wizard, enter GoogleSheetMdl for the target model Name. click Next
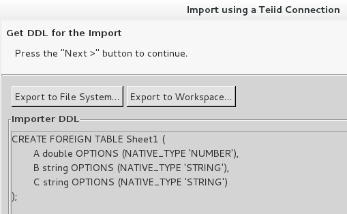
- The next page of the wizard should display the schema DDL. click Next
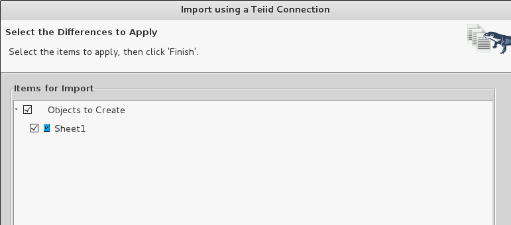
- The final page of the wizard shows the table to be created, and allows you to select which tables will be imported. Leave the Sheet1 table selected. Click Finish.
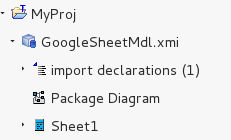
- The relational model GoogleSheetMdl should now be created in the ModelExplorer view
3. Preview the Google Spreadsheet table
- In ModelExplorer, expand the model and select the Sheet1 table. Click the 'Running man' icon in the ModelExplorer toolbar. The preview query should execute, with results displayed in the SQL Results View.
Comments