Deploy to any cloud by using Deltacloud Tools
If you want to deploy webapps to the cloud you'd have to choose what cloud to use in a first step. By chance there's Deltacloud that offers a common interface to the different cloud providers. It allows you to freely choose and switch among providers at any time. JBoss Deltacloud tools offers Eclipse based tooling that spares you from switching between Eclipse and your browser when developing and deploying in the cloud. It furthermore allows you to deploy to cloud instances as if they were classic remote hosts.
Preface
The current cloud landscape is partitioned among different solution providers. All of them offer distinct tools and interfaces. Deltacloud offers a common interface to a large amount of cloud providers and helps to avoid vendor lock ins. Deltacloud, a server application, offers a web UI to work with. If you develop an application for the cloud you'd have to switch between Eclipse, your browser and an scp client when deploying.
Solution
JBoss Deltacloud tools now offers you Eclipse tools that allow you to stick to your favorite IDE while developing and deploying to the cloud. JBoss Deltacloud tools allow you to start and stop instances at will, deploy to them seamlessly and even access them by terminal. Our Eclipse WTP server adapter allows remote deployments to Deltacloud instances in a way that you already know from common setups with remote hosts.
This blog will help you to set your environment and show you the steps involved when deploying.
Create an account at Amazon EC2
Deltacloud may be installed locally but there's already a public Deltacloud server that you may use to skip any further installation. It is provided by the steamcannon project and may be reached at http://try.steamcannon.org/deltacloud. This Deltacloud server runs on EC2 drivers and provides an API to work against EC2 resources.
To be able to create instances you'll need a valid EC2 account. If you don't have an account so far, please sign sign up for an amazon account here:
http://aws.amazon.com/
Open up your EC2 ports
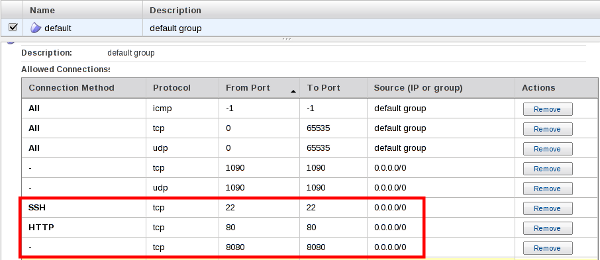
EC2 is very restrictive towards ports by default. It only allows connections to port 80. No SSH connection nor http connection to 8080 is available initially. To correct this you'll have to open up those ports in the security groups in your aws console. Add port 8080 and 22 to your security group so that we'll be able to access our web app and to ssh to our instance later on.
Install JBoss Deltacloud Tools
You will now have to install our Deltacloud tooling. You can achieve that by adding the following update site to your Eclipse software sites:
http://download.jboss.org/jbosstools/updates/JBossTools-3.2.0.GA/
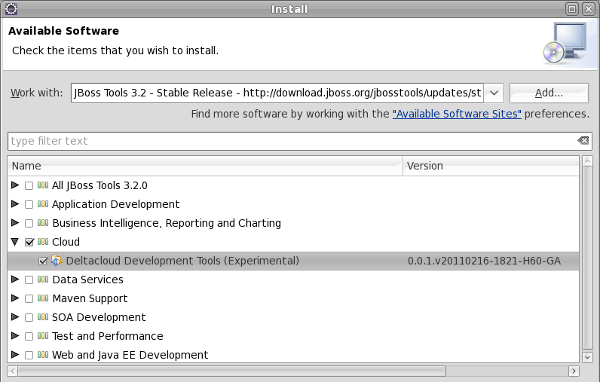
You'll then get a list of our tools. Our Deltacloud Development Tools are selectable in the cloud category.
Create a Dynamic Web Project
At JBoss we believe in community based approaches. We stick to the Eclipse WTP standard and provide tools that allow you to deploy Dynamic Web Projects. Please make sure that you have such a project ready or create a new one.
Create a connection to a Deltacloud server
You are now ready to work with a Deltacloud server. Please switch to the Deltacloud perspective and create a new cloud connection. You'll have to provide several sensible settings.
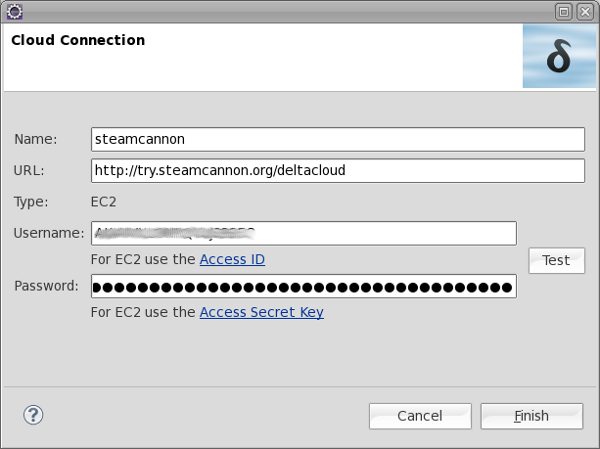
You first have to name your connection. You then have to provide the url of your Deltacloud server. You may install Deltacloud server locally and work against it. To skip this step we'll use the public Deltacloud server that is provided by the steamcannon project. It's URL is
http://try.steamcannon.org/deltacloud
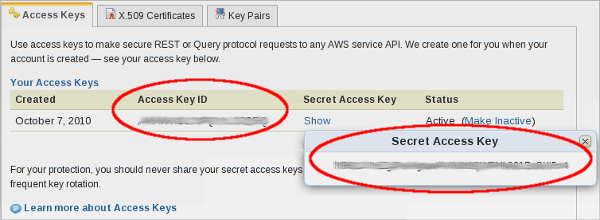
Since this Deltacloud server is backed by EC2, you'll have to provide your EC2 credentials (you may learn more about amazon access keys in their documentation). The wizard offers you links to look them up. Those 2 links are available below the appropriate fields in the connection wizard.
Our tooling of course stores passwords in an encrypted manner. You may therefore get asked to setup your Eclipse secure storage or to provide its existing password.
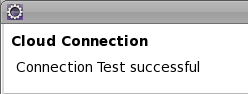
As soon as you filled in your credentials you may test them by hitting the Test button. The wizard will then inform you if access was granted...
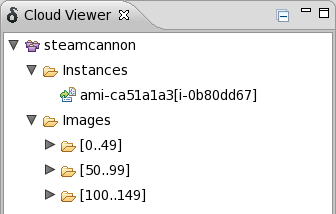
You'll have to hit Finish to create the cloud connection. The new cloud will then show up in the Cloud Viewer.
The cloud viewer will allow you to check the available images and to list the instances that you may have started already.
Launch a new instance
You may now launch a new instance on EC2. You'll find an appropriate entry Launch Instance in the context menu of your cloud. A new wizard will show up and allow you to configure your new instance.
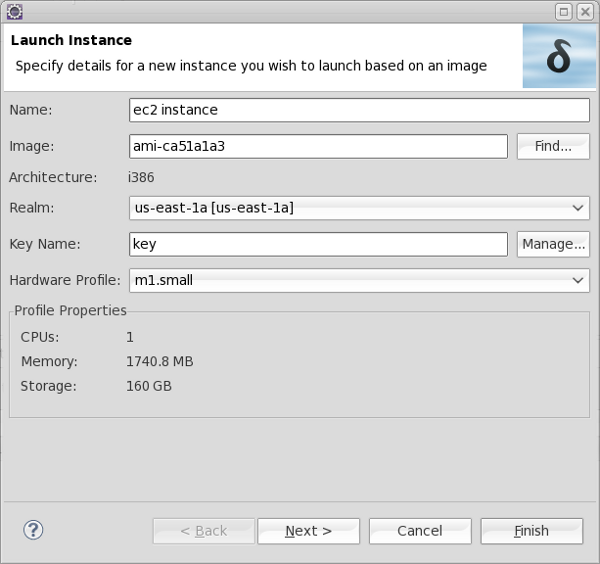
Choose an image
Give your new instance a name and choose an image. You may choose among the images that are listed by using Find. There is a large variety of images to choose from. We furthermore offer you a custom image that was created by the steamcannon project. It already has JBoss AS 6 installed to it and you'll be ready to deploy webapps to it. This custom image is unfortunately not listed (there's a bug in the current Deltacloud server that prevents all images from being listed). You'll have to type its name into the appropriate field:
ami-ca51a1a3 (32-bit)
ami-a651a1cf (64-bit)
The wizard will then look it up and remove the error marker.
Choose a geographic location
EC2 also needs to know about the geographic location it shall run your instance at. The so called Realm matches the data center that will run your instance. Choose a location at will.
Choose a key
You'll furthermore have to provide a key for your instance. This instance key is needed when launching and administering EC2 instances (you may read more about it in the documentation). Our tools allow you to pick the keys you may already have or enable you create new ones. Hit Manage for that sake...

Choose an existing key or hit New to create a new key in the upcoming dialog.
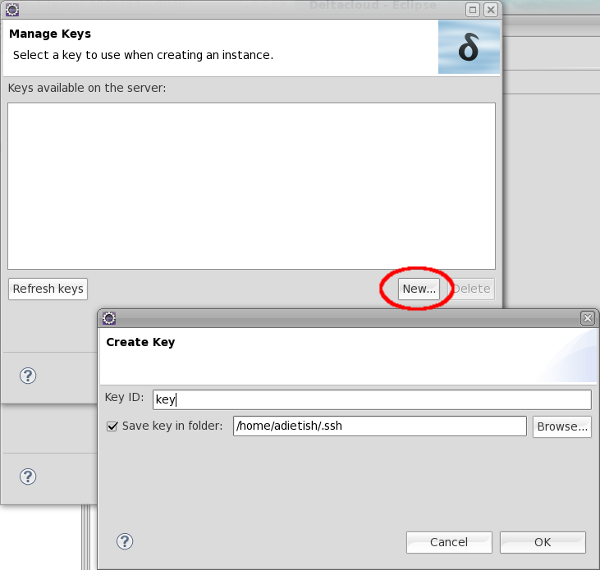
The image we use holds an SSH daemon that is configured in a way that spares you from creating additional keys for ssh-connections. It will look up your EC2 instance key and authenticate/authorize you on behalf of it. You'll therefore have to add this very same EC2 instance key to your SSH subsystem. The Deltacloud tools help you here and do that automatically for you when you create new keys. The tools therefore allow you to store the new key locally and add it to your SSH2 Private keys.
RSE (Eclipse Remote System Explorer) will then be able to pick your key and use it when the Eclipse WTP server adapter connects to your instance. RSE will also use your private key when you browse the filesystem of your instance or connect to it with the built-in terminal.
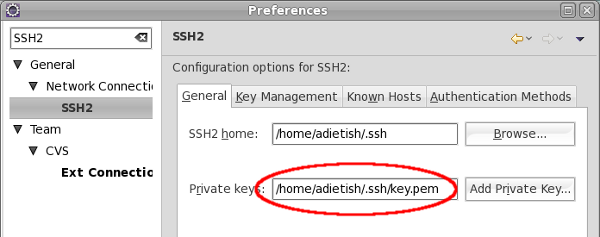
You may of course also create your key manually in the aws console (Web GUI provided by Amazon EC2). You'll then have to download your key and add it to your SSH preferences manually.
Select a hardware profile
The last step in configuring your instance involves choosing a hardware profile. The profiles differ in the hardware equipment that you'll get. The smallest one - t1.micro - is available free of charge. It wont cost you a single penny to run a micro instance on EC2. It unfortunately has not enough memory to run JBoss AS smoothly. You'll have to choose at least t1.small which has a fair amount of 1.7 GB memory.
Detailed informations about instance hardware staffing is available at amazon. Pricing is also listed in detailed manner.
Create RSE (Eclipse Remote System Explorer)
The second page then allows you to create further services for your instance. A first checkbox enables a Remote System Explorer (RSE) connection. The Remote System Explorer will allow you to connect to your instance.
![]()
Create a server adapter
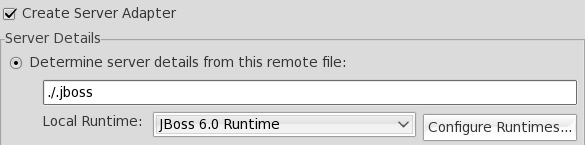
You may then choose to create an Eclipse WTP server adapter. It will allow you to deploy your web application in an Eclipse WTP compliant manner. It will offer you a nice and handy deployment facility that keeps your workspace project in sync to what is deployed to the JBoss AS on your instance.
There are 3 different options available when configuring your server adapter. The most automatic one will fetch all settings from a file on your instance. The correct file path is already filled in by default. It's content is as follows:
JBOSS_VERSION=6.0.0.Final
JBOSS_HOME=/opt/jboss-as6
JBOSS_IP=0.0.0.0
JBOSS_CONFIG=default
JBOSS_TMP=$JBOSS_HOME/tmp
The only thing you have to indicate is the runtime that is installed on your instance. Our image has a JBoss AS 6 prefconfigured.
You may not have created any runtime configuration so far. The runtime combo may therefore hold no option. You'll then have to download JBoss AS 6 from:
http://www.jboss.org/jbossas/downloads.html
...and configure an appropriate runtime locally.
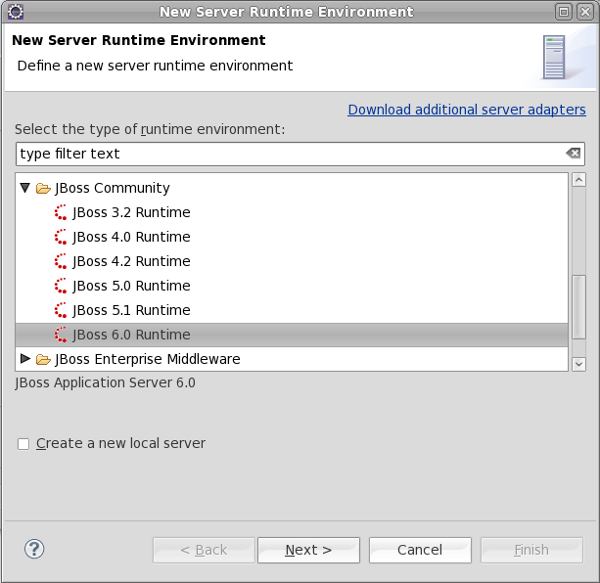
You may then choose it in the runtime-combo of the wizard page.
All systems up and running
If you hit Finish Deltacloud tools will launch a new instance, create an RSE connection and setup the server adapter we're looking for.
You may track the appropriate background job that does the work for you.
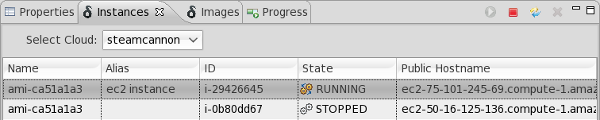
You'll spot a new instance in your instance view as soon as it was successfully launched. The instance will then be in a RUNNING state and it will have a public hostname.
RSE will then try to connect to it and ask you to store the identity key of your new host. It may also ask you to provide a username and a password. Our image is preconfigured to allow a jboss user to deploy to the JBoss AS that is installed to it. The dialog that you get presented, already has the correct jboss user id filled in. There's no need to indicate a password since we use keys for authentication.
There are more users that you may find helpful when connecting with a SSH shell to your instance:
- jboss: may deploy to the JBoss AS 6 that is running on the instance
- ec2-user: may be used to gain root privileges (sudo) when connecting with a shell
root is not allowed to connect to your instance.
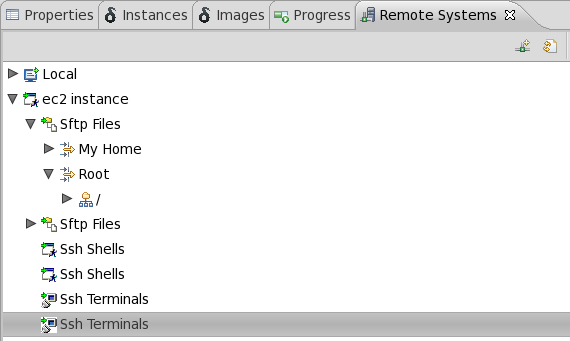
You may eventually want to have a look at the new RSE connection by choosing "Show in remote system explorer" from the context menu of your instance. RSE allows you to browse the filesystem on your instance and to launch a terminal to it.
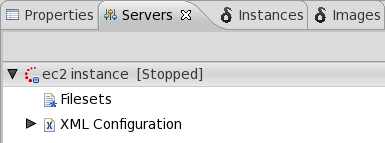
If everything went smoothly you'll finally spot a new WTP server adapter in the servers view (Ctrl+3 and type "server"):
Now, deploy your app!
We now have a server adapter that will allow us to deploy Dynamic Web Projects. You are now able to deploy to your cloud instance in the same as you're used to in a classic setup with a remote host.
Switch back to your Java EE perspective and start your server adapter. You will find the appropriate option in the context menu of your server adapter. It will then switch from Stopped to Started. Now Drag and drop your project to the server adapter and wait until the adapter shows a Synchronized state. You'll know that the deployment finished successfully as soon as your adapter turns synchronized.

All further steps are now identical to what you're used to in classic Eclipse WTP development. To access your webapp you'll have to pick Run on Server in the context menu of your web project.

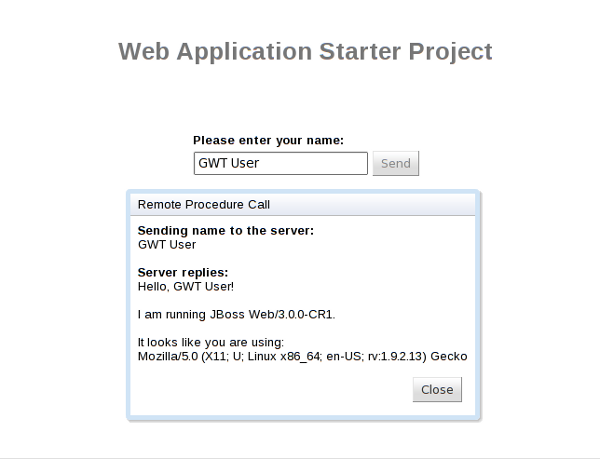
The internal browser will pop up and show you your webapp running on your EC2 instance.
gwt