Since WildFly 9.0.0.Final was just released, the OpenShift WildFly cartridge has been updated as well. Getting started on OpenShift is simple, the first thing you need to do is pick your favourite tool:
Getting started from the Web Console
Just click here.
Getting started from the command line
- Follow the instructions here to install the RHC client tools.
- Create your WildFly 9 application using the following command:
rhc app create <WILDFLY_APP_NAME> jboss-wildfly-9
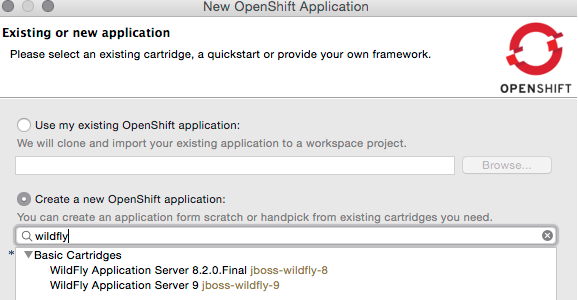
Getting started from Eclipse
- Follow the instructions here to install the OpenShift JBoss Tools package from the Eclipse marketplace.
- Create your WildFly 9 application directly from Eclipse using the New OpenShift Application Wizard:
Similarly, you can also create your application using JBoss Developer Studio which comes with the OpenShift plugin installed.
Accessing and managing your app
Once you've created your application, it will be available at the following URL:
http://{WILDFLY_APP_NAME}-{NAMESPACE}-rhcloud.com
To ssh into your OpenShift instance, the following command can be used:
rhc ssh <WILDFLY_APP_NAME>
You can then use the JBoss CLI to connect to WildFly:
jboss-cli.sh -c --controller=$OPENSHIFT_WILDFLY_IP:$OPENSHIFT_WILDFLY_MANAGEMENT_HTTP_PORT
To access the WildFly Admin Console, you'll need to use port forwarding:
> rhc port-forward <WILDFLY_APP_NAME>
Checking available ports ... done
Forwarding ports ...

To connect to a service running on OpenShift, use the Local address

Service Local OpenShift
------- -------------- ---- -------------------
java 127.0.0.1:8080 => 127.13.118.129:8080
java 127.0.0.1:9990 => 127.13.118.129:9990
java 127.0.0.1:9999 => 127.13.118.129:9999
In the example shown above, the Admin Console would then be available on your local machine at http://localhost:9990/console. To log into the Admin Console, you can use the username/password the WildFly cartridge automatically created for you. To find these values, simply ssh into your OpenShift instance and execute the following commands:
echo $OPENSHIFT_WILDFLY_USERNAME
echo $OPENSHIFT_WILDFLY_PASSWORD
Tips for migrating an existing OpenShift application to WildFly 9 Final
Migrating from WildFly 9 Alpha/Beta/CR
If you already have an existing WildFly 9 Alpha/Beta/CR OpenShift app, you can create a new WildFly 9 app based on the existing one using the following command:
rhc app create <NEW_WILDFLY_APP> --from-app <OLD_WILDFLY_APP>
This results in a new WildFly 9 Final application that's a clone of your existing one - same gear size, scaling configuration, environment variables, git repository, deployments, etc.
Migrating from WildFly 8 or AS 7
If you have an existing WildFly 8 or AS 7 OpenShift app, you can create a new WildFly 9 app using your existing app's git repo, as shown below. You'll want to first replace the standalone.xml file in your git repo's .openshift/config directory with the WildFly 9 standalone.xml file from here.
rhc app create <NEW_WILDFLY_APP> jboss-wildfly-9 --from-code http://url/to/git_repo.git
Alternatively, you can leave off the --from-code option above and manually copy the contents of your old git repo to your new app's git repo once the new app has been created.
Couple more steps when migrating from AS 7
When migrating from AS 7, there are a few more things to keep in mind:
- Any action hook scripts in your app's git repo (i.e., in .openshift/action_hooks) that end with "_jbossas" will need to be renamed to end with "_wildfly".
- Any action hook scripts with references to OpenShift environment variables that start with "OPENSHIFT_JBOSSAS_" will need to be updated to reference "OPENSHIFT_WILDFLY_" instead.
Fire up an OpenShift instance!
Getting WildFly 9 running on OpenShift is easy, try it out now, it only takes a few minutes. For more information about the WildFly cartridge, check out the documentation.
Comments