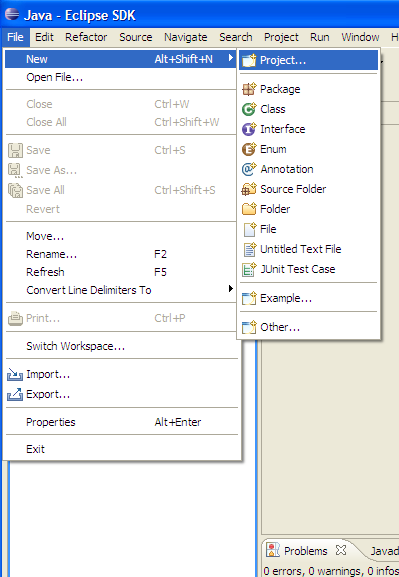
Step 4 - Create and Publish a New Sample EAR Application to JBossAS
Although, seam-gen is quite useful, Seam still lacks robust IDE support. You have to create a new EAR using Eclipse' new project wizard.
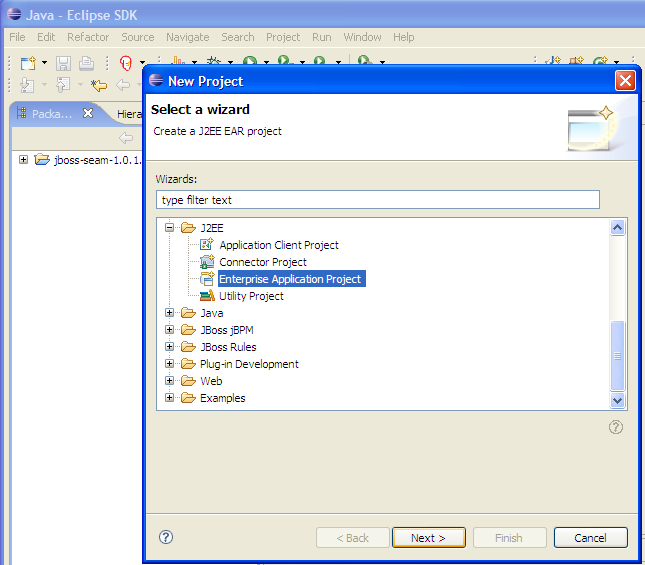
Specify a project name of "sample".

Don't change the J2EE support level from 1.4, even though the project will be a Java EE 5 EAR file not a J2EE 1.4 EAR file. Seam gen will change the descriptors appropriately and eclipse will not complain.
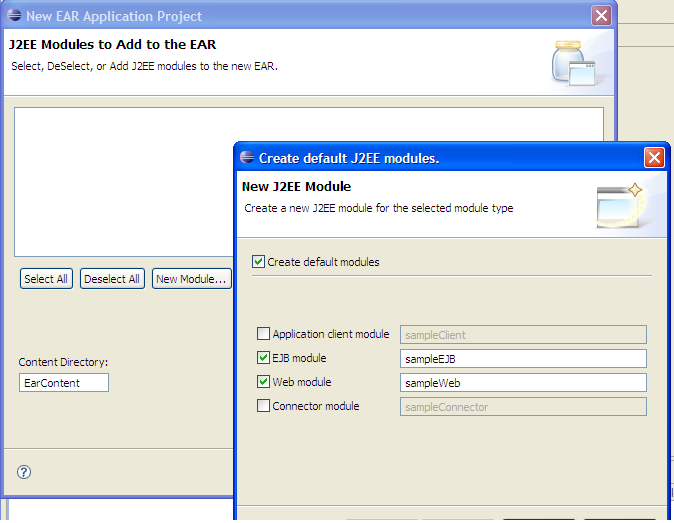
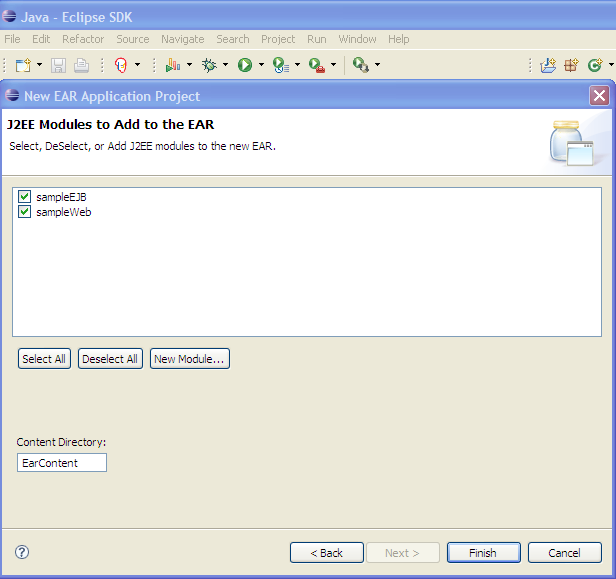
Add a "New Module...", and select the "EJB module" and "Web module", but DO NOT CHANGE THE NAMES. Seam gen will leverage eclipse' project naming conventions when generating code.
Eclipse will make you accept yet another license agreement, then you be asked to associate the project with the "J2EE Perspective". You should accept the perspective suggestion.
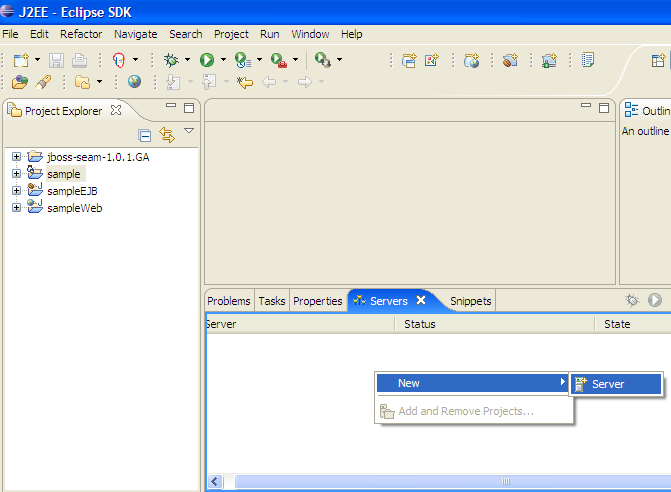
Now, it's time to setup a new JBoss Server to for application publishing. On the bottom of your eclipse screen, you should see a "Servers" tab. Right click on it and add a new server.
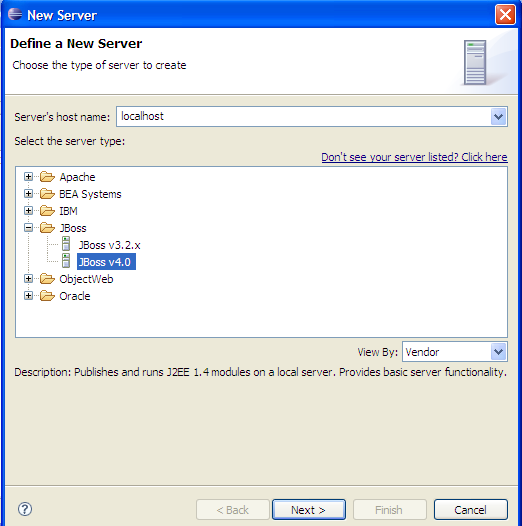
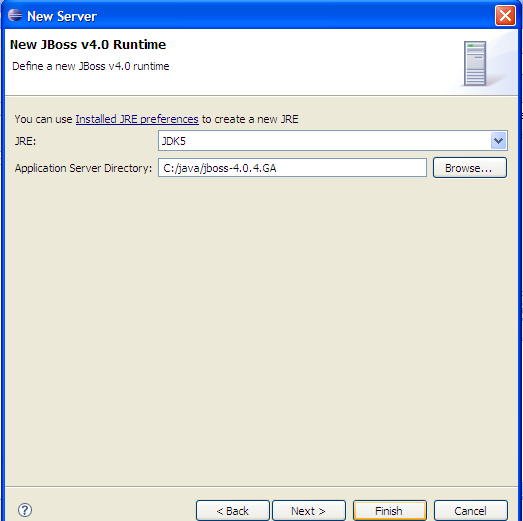
You want to define a new JBoss v4.0 server that points to the JBoss AS server you created in Step 1.
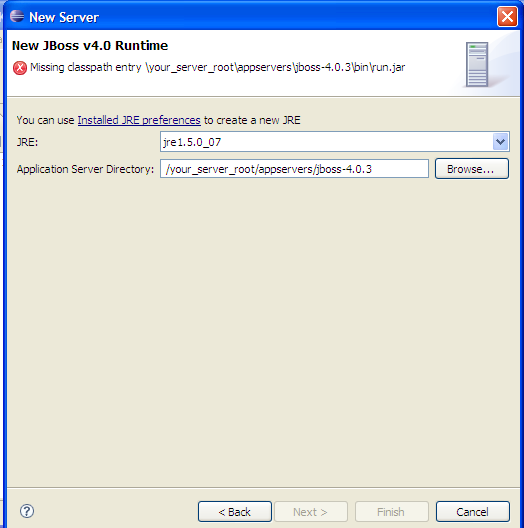
Unfortunately, JBoss needs a JDK to run, not just the JRE embedded in eclipse. If you have JDK 5.0, then click "Installed JRE Preferences" and point eclipse to it. If you don't have JDK 5.0, then get it from http://java.sun.com/javase/downloads/index.jsp.
Click "Add"
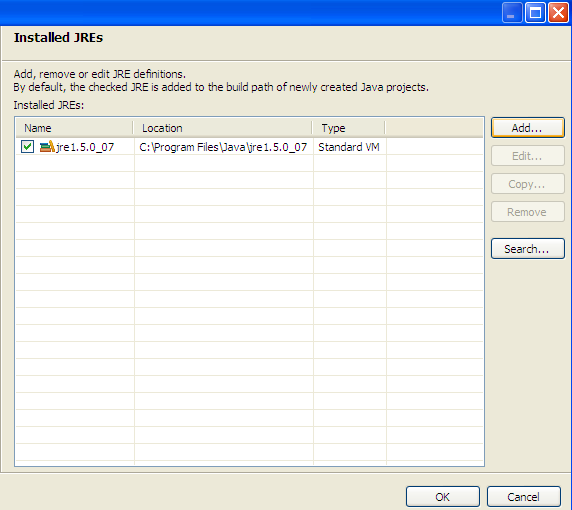
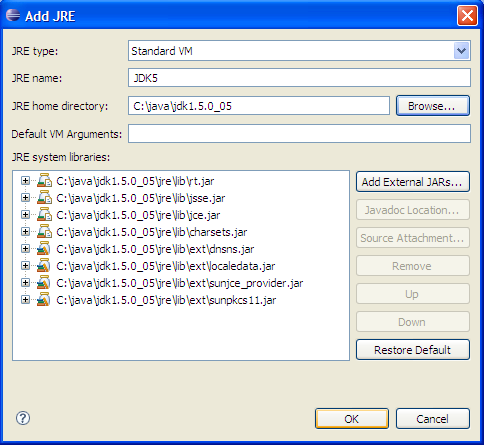
Type in a "JRE Name" and provide a "JRE Home Directory".
Assign the new "JRE" to your JBoss runtime and specify an "Application Server Directory".
Right click on your new JBoss server.
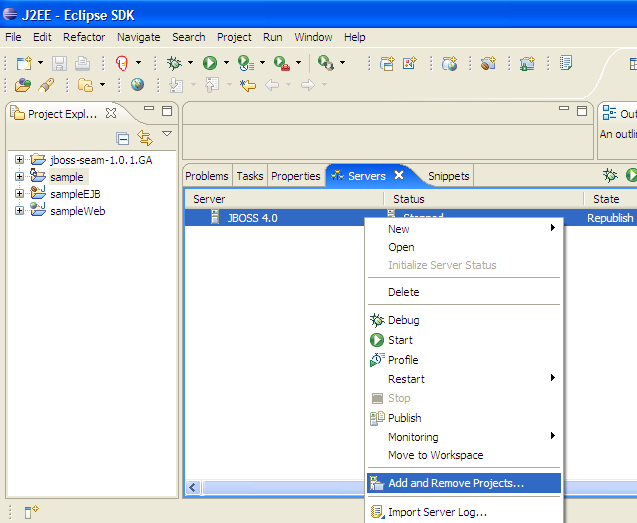
Lastly, add your "sample" project.


Comments