Gate In Device Detection and Site Redirection for performing redirection based on Use Agent has been available since version 3.5.0.Final but configuration was only possible through manual editing of a XML file, it’s modification would not affect the portal at runtime and even after restarting the server it would only be reloaded after deleting some data generated at startup. But that’s history, Gate In 3.6.0.Final introduces the “Site Redirects and Import/Export Portlet” to solve all these details for Site Redirection while also integrating the previous “Import/Export Site” portlet behavior in a more modern way, thanks to the fabulous work on the UI/UXP by Gabriel Cardoso and making use of the cool Richfaces Bootstrap Components!
You can find this portlet when logged as an Administrator under Group > Administration > Site Redirects and Import/Export on the top menu.
Configuring Site Redirects
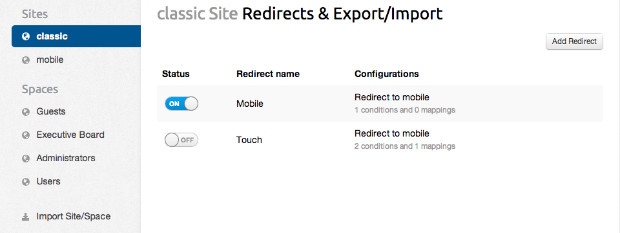
Once on the portlet the list of available Sites is presented on the left side menu. Spaces are also present but they are not available for Redirects, only for Exporting.
Selecting a site will present the available Redirect conditions, which can be ordered by using drag and drop. These should be ordered in a way that most specific Redirects are on top (e.g.: “iOS”, “Touch”, “Mobile”).
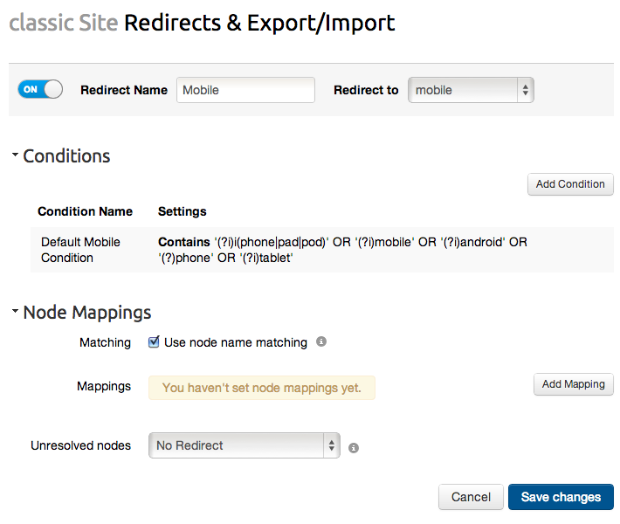
A Redirect can be configured by clicking the “Configure” wrench icon, which shall present the following screen for its configuration:
In the top section, it is possible to toggle the redirect on or off, change it’s name and select to which site it should redirect to.
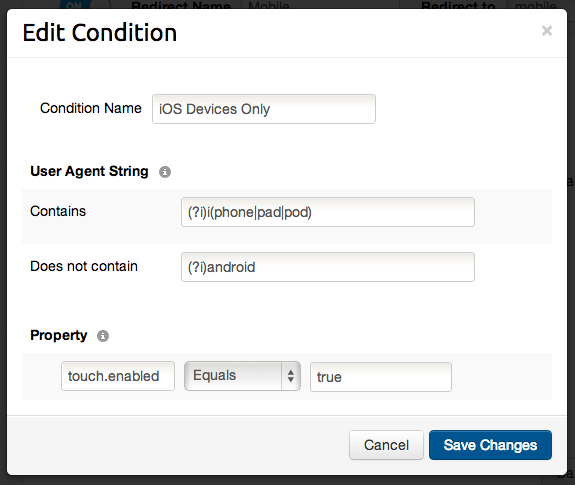
The “Conditions” section is where it is possible to define the conditions to evaluate in order to know if this redirect should be activated. These conditions are composed by valid Java regular expressions, can be checked for its presence or absence and are evaluated against the User Agent String. It is also possible to evaluate against custom defined properties (such as width, height, number of colors, etc), which should be configured at detection.jsp. See more detailed information on this at GateIn Developer Guide - Site Redirection.
At the “Node Mappings” section there’s the possibility to define where to redirect when the use is heading for a particular portal node, by either using node name matching where he’s redirected to the node with the same name or to define a custom node mapping, such as “classic/flash” redirecting to “ios/flash-not-available”. In case no mapping is defined and a node with the same name is not available (when node name mapping is enabled), the default action to perform should be defined in the unresolved nodes select.
More detailed information about how to configure redirects can be found at the User Guide.
Export a Site or Space
This same portlet allows exporting a site or space to be used in a different portal instalation or for backup purposes.
To do so, click the small arrow that shows on the right side of each site or space and click on the export option from the dropdown menu and a download of a zip containing the relevant files will start.
Import a Site
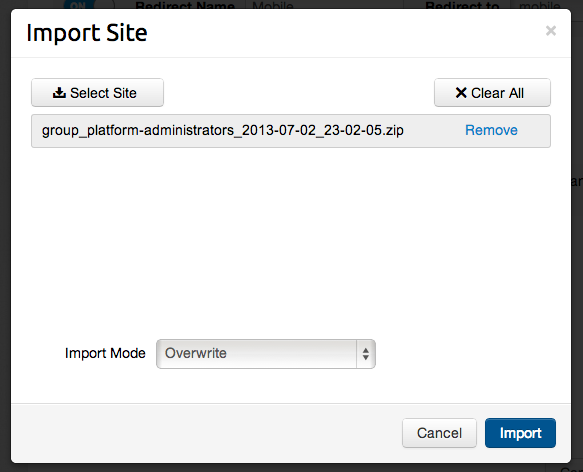
Importing a site is as easy, simply select the option to import from the left side menu and from the popup window, select the files to import (up to 5 at a time), select the desired import mode and voilá.


