WildFly 13 (released in May 2018) includes a major upgrade to its admin console, with improved UI representation and added functionality. In this post, I will show how this upgrade has benefited JBeret batch subsystem, and how batch application developers perform common tasks in WildFly 13 admin console.
Configure Batch Subsystem
To configure batch subsystem, click the Configuration tab on the top of the page, and then choose Batch JBeret subsystem. If you need to access batch subsystem frequently, you may want to pin it by clicking the pin icon.

Clicking the View button brings up the batch subsystem configuration page, which shows the current top-level configuration, along with three clickable links:
- Edit: changes the current batch subsystem top-level configuration, such as changing default job repository from in-memory to jdbc type;
- Reset: resets all non-required fields to their initial or default values;
- Help: clicking it will open a light-green text field below that explains each configuration items

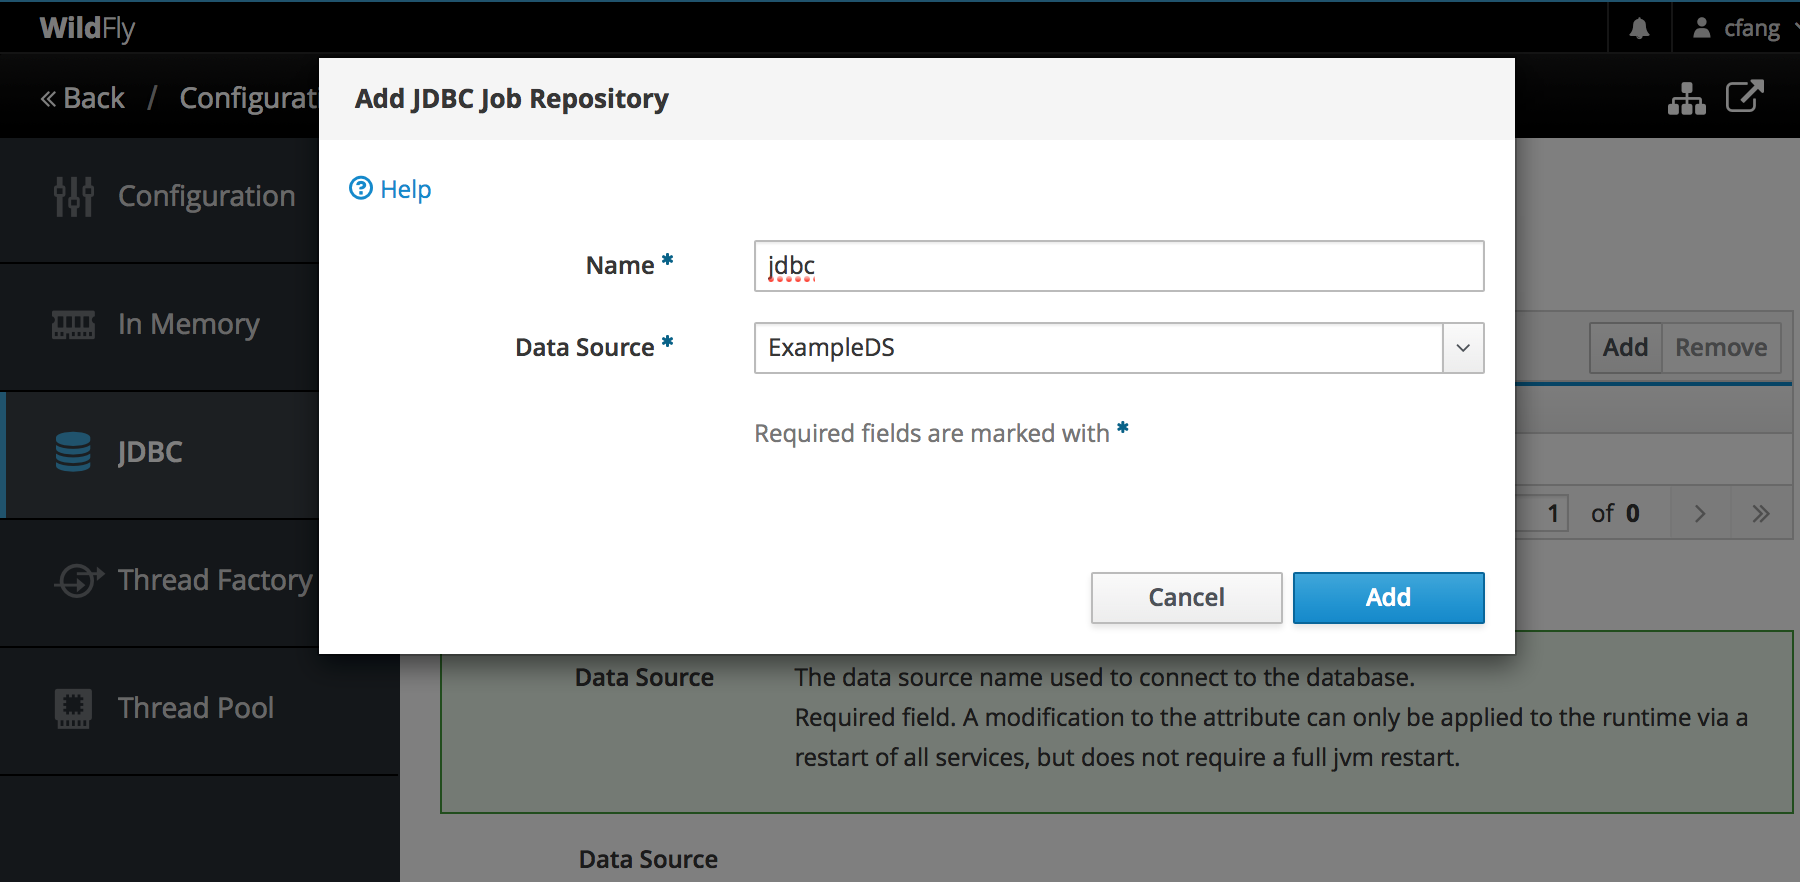
The left panel lists all sub-elements of batch subsystem configuration, i.e., In-Memory Job Repository, JDBC job repository, Thread Factory, and Thread Pool. The most commonly used sub-element is JDBC Job Repository, which stores all batch job execution data in the backing database. The following page shows how to create a new JDBC Job Repository. ExampleDS is the default data source name in WildFly and is used here for illustration purpose only. Typically you need to configuring your own JDBC driver and data source based on your DBMS product.
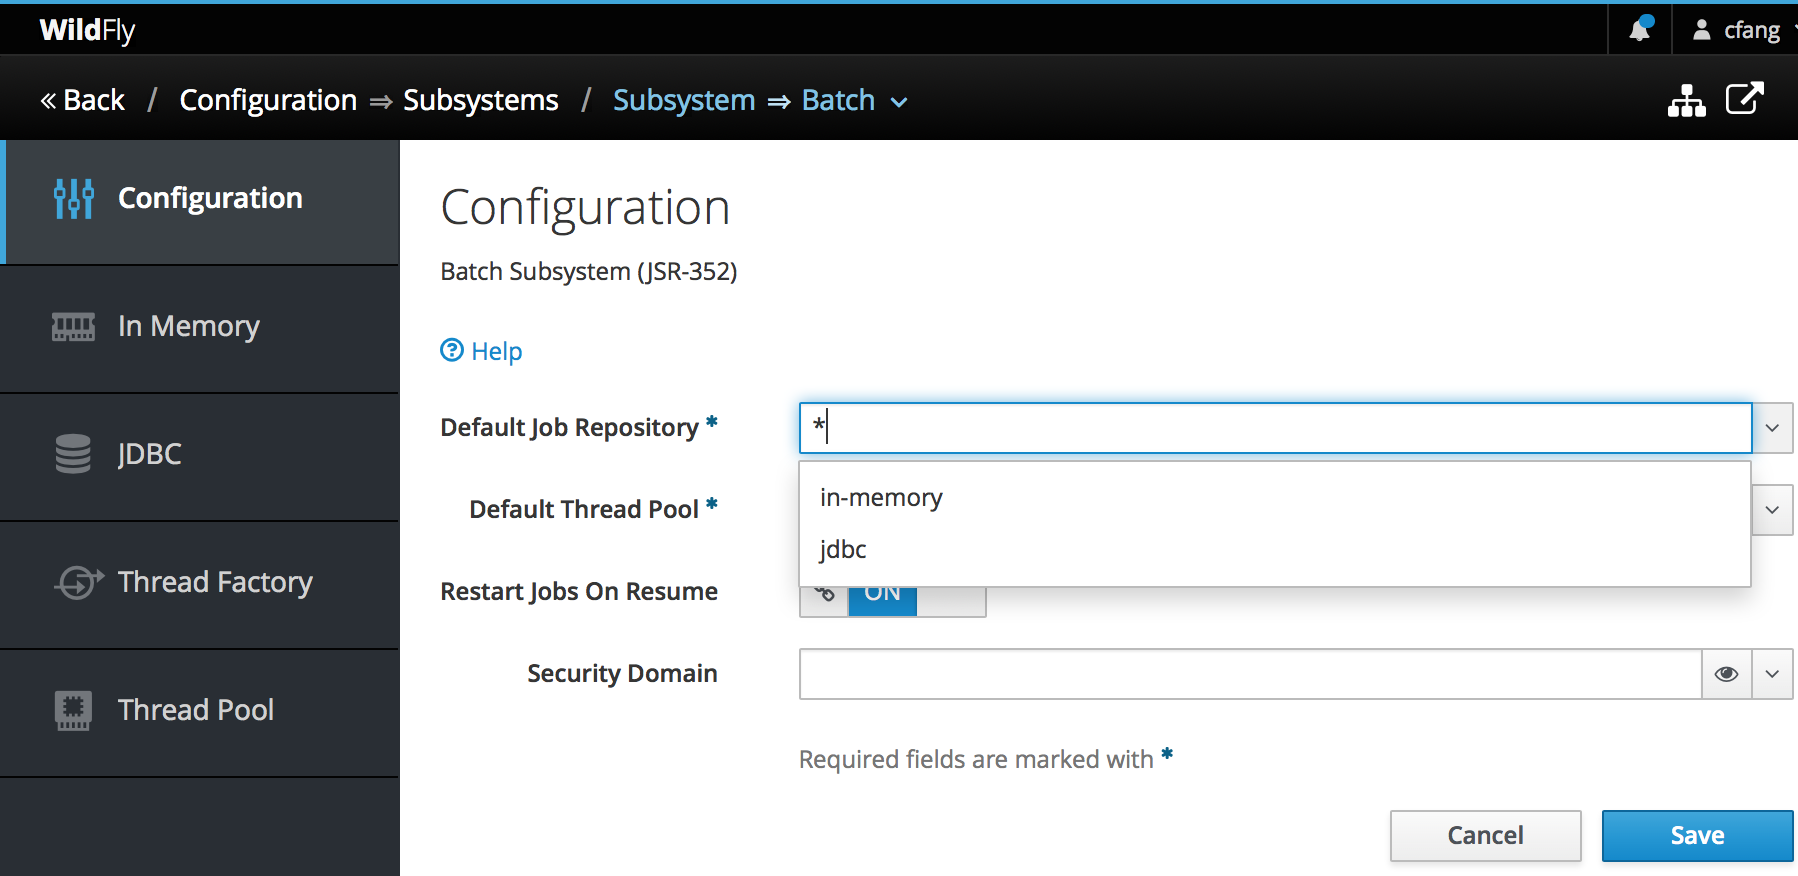
You may repeat the above procedure to create multiple JDBC Job Repositories for different applications or purposes. To use a JDBC Job Repository as the default job repository, remember to set it in the batch subsystem Configuration overview page:
Deploy Batch Applications
Deployment task is so common that it appears in the first section on the admon console landing page, where you can click the Start button to deploy a batch application and enable it. Alternatively, you can click the Deployments tab on the top of the page to bring up the deployment wizard:
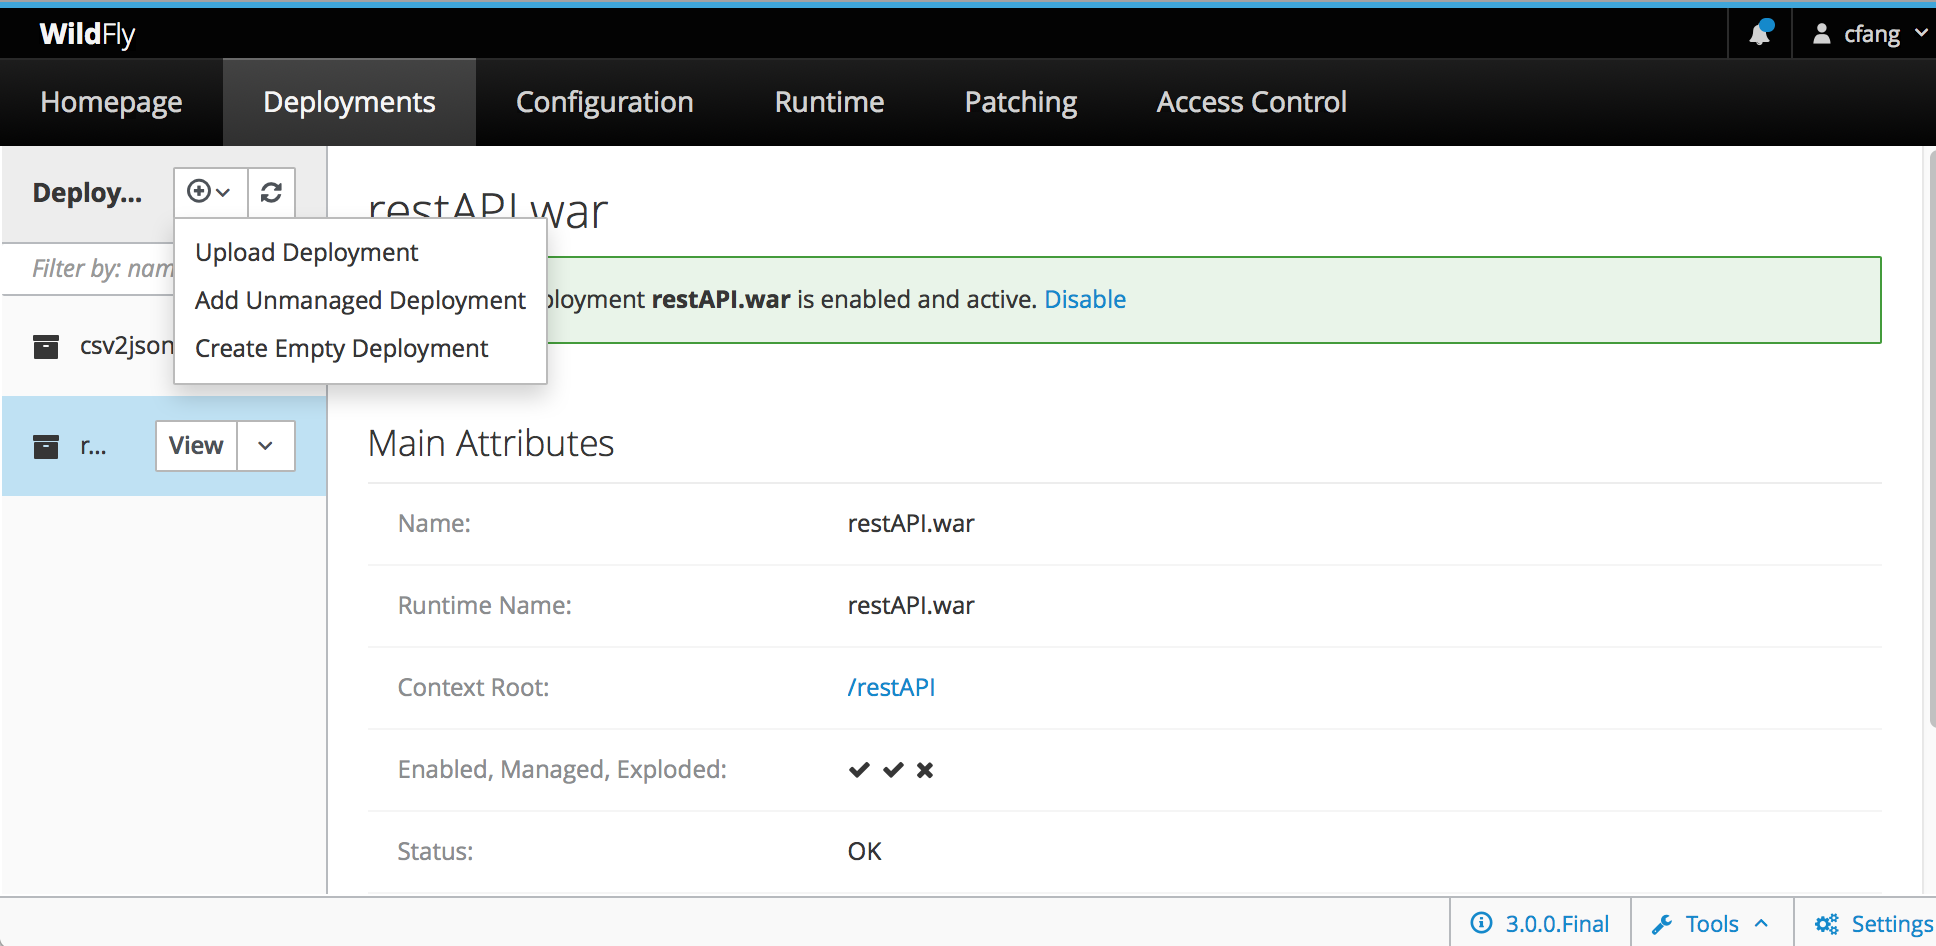
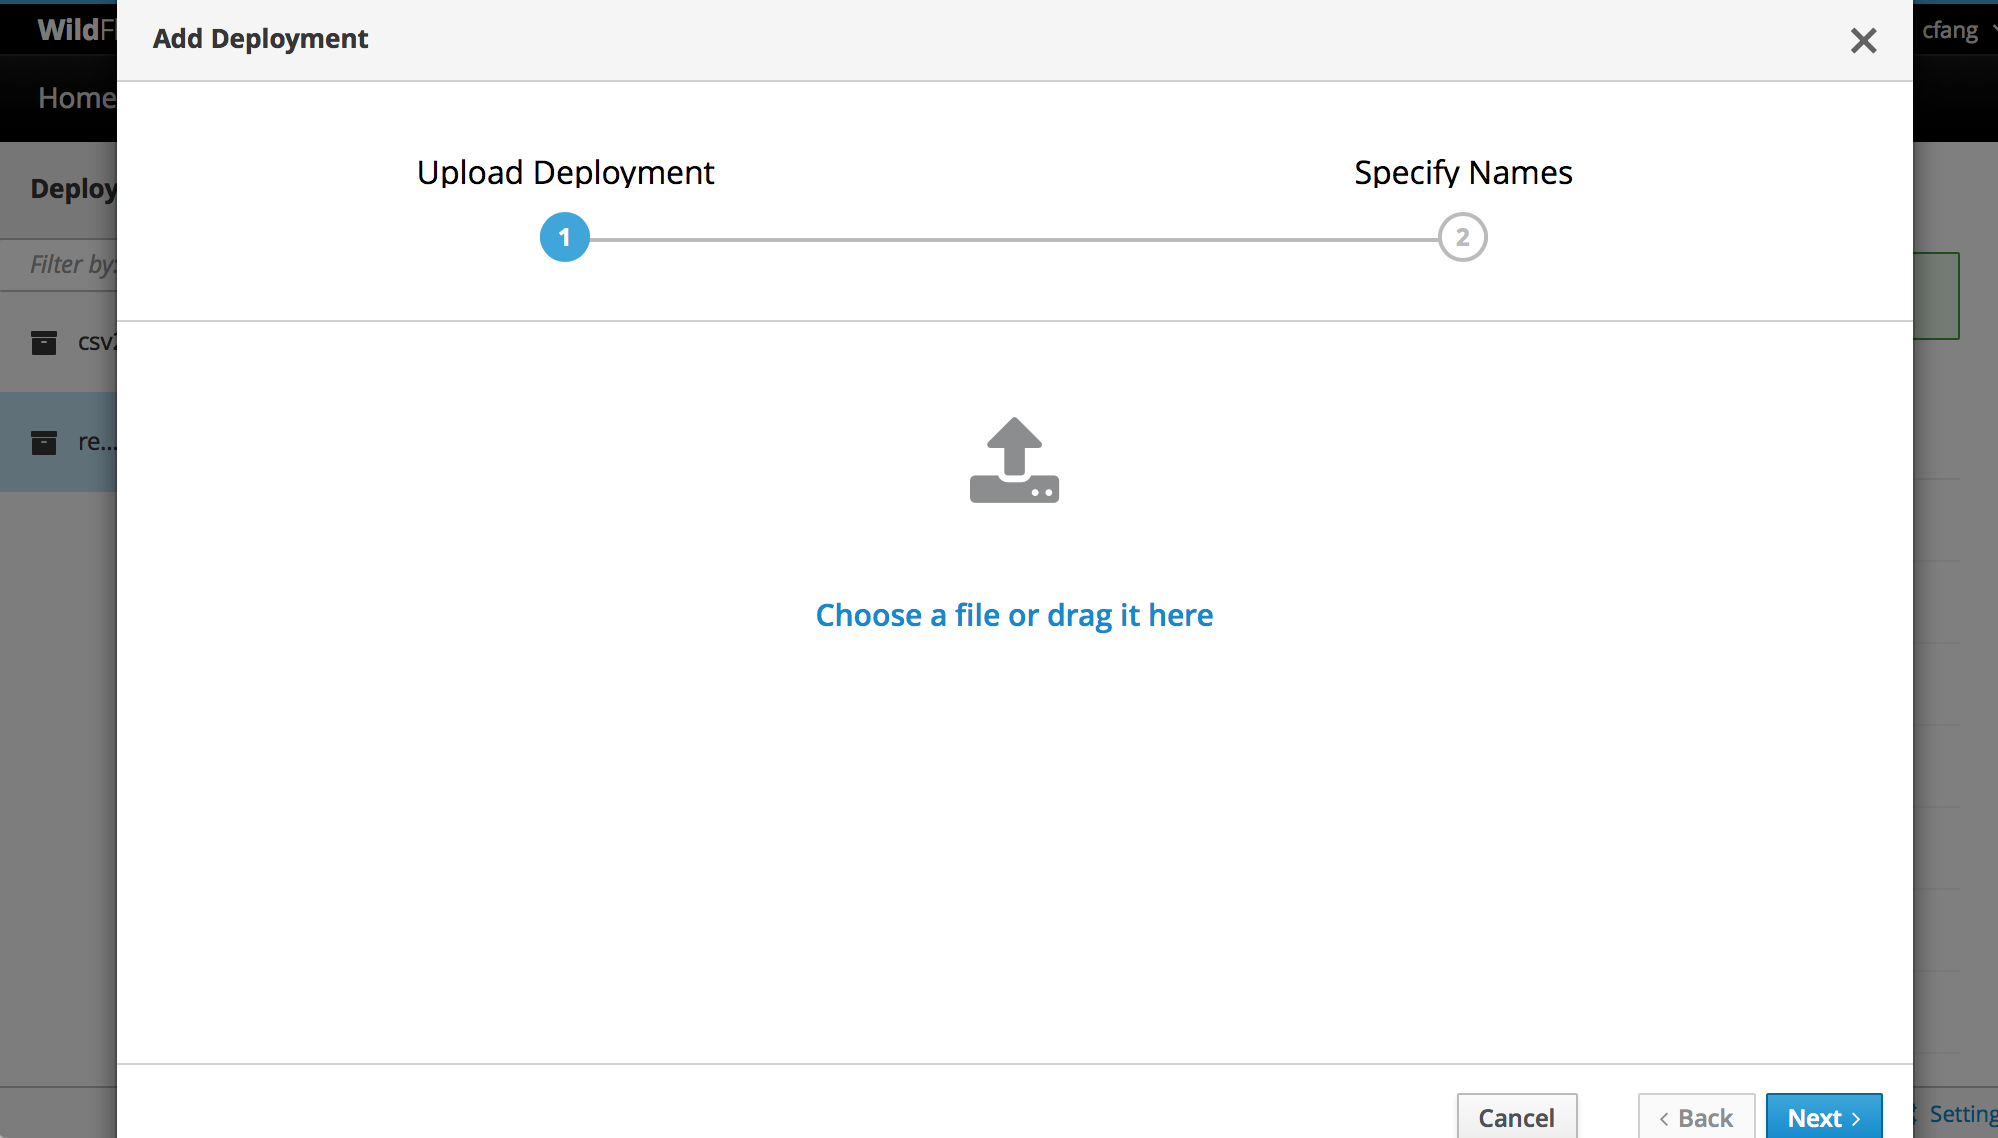
Clicking Upload Deployment in the pull-down list, and you will be able to choose the application to deploy from local file system:
As a short-cut, you can also directly drag-and-drop your application archive to the left panel in Deployments page:
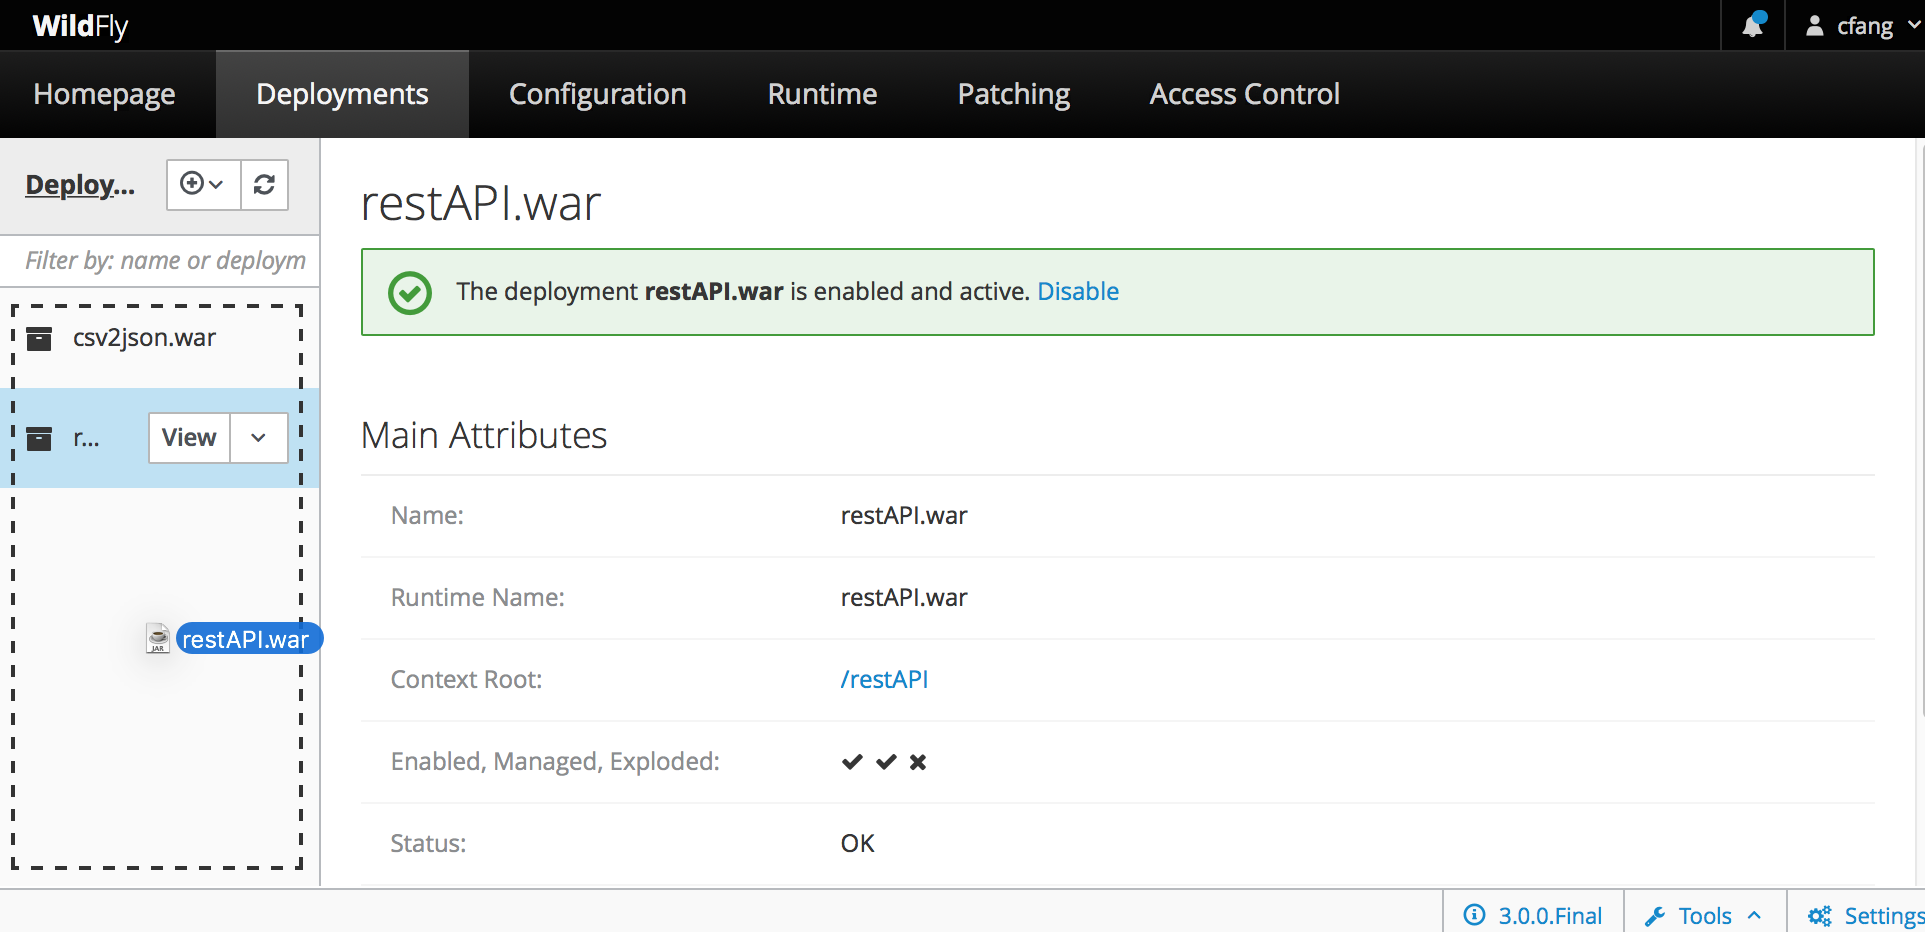
Notice the dashed border as a visual cue as you drag the application and enter the left deployments panel. Batch applications deployed this way are enabled and active immediately. Any existing applications with the same name will be replaced (i.e., redeployed).
To disable and remove (undeploy) an application, simply expand the pull-down menu to the right of the View button, and choose the appropriate action.
Oftentimes an application developer or administrator wants to view the application content, especially configuration, in order to better understand the application behavior. This is easily done in WildFly 13 admin console. You can follow the application View button in Deployments page to visit the application details page:
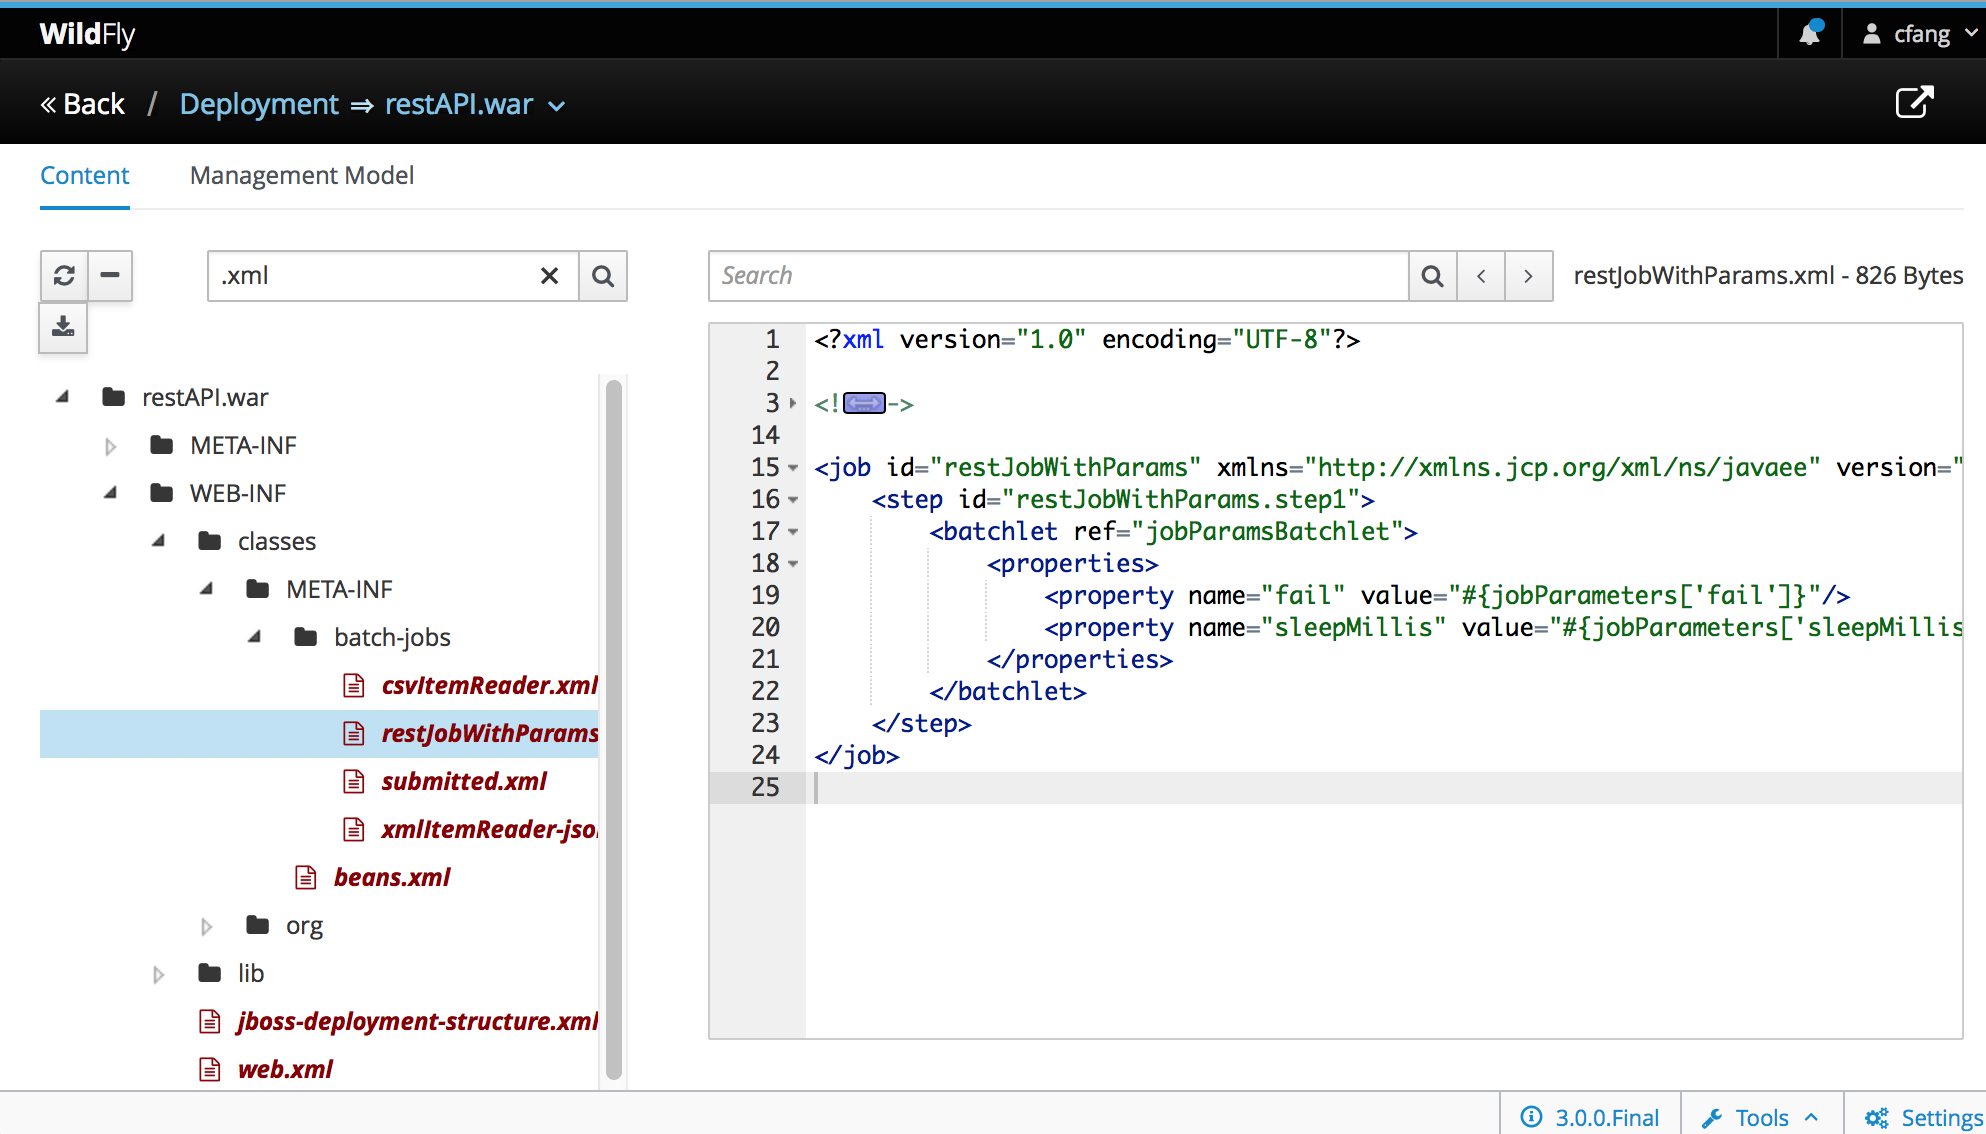
The breadcrum on the top of the page and the pull-down arrow allows you to easily switch between all deployed applications. I found the easiest way to locate a file within the deployment is searching by partial file name. In the above screenshot, I searched with ".xml" to quickly locate all XML configuration files including batch job files and deployment descriptors.
The right panel displays the content for supported file types, with syntax hightlighting and elements expanding/collapsing. For batch applications, it comes handy to be able to view batch job definitions in server admin console.
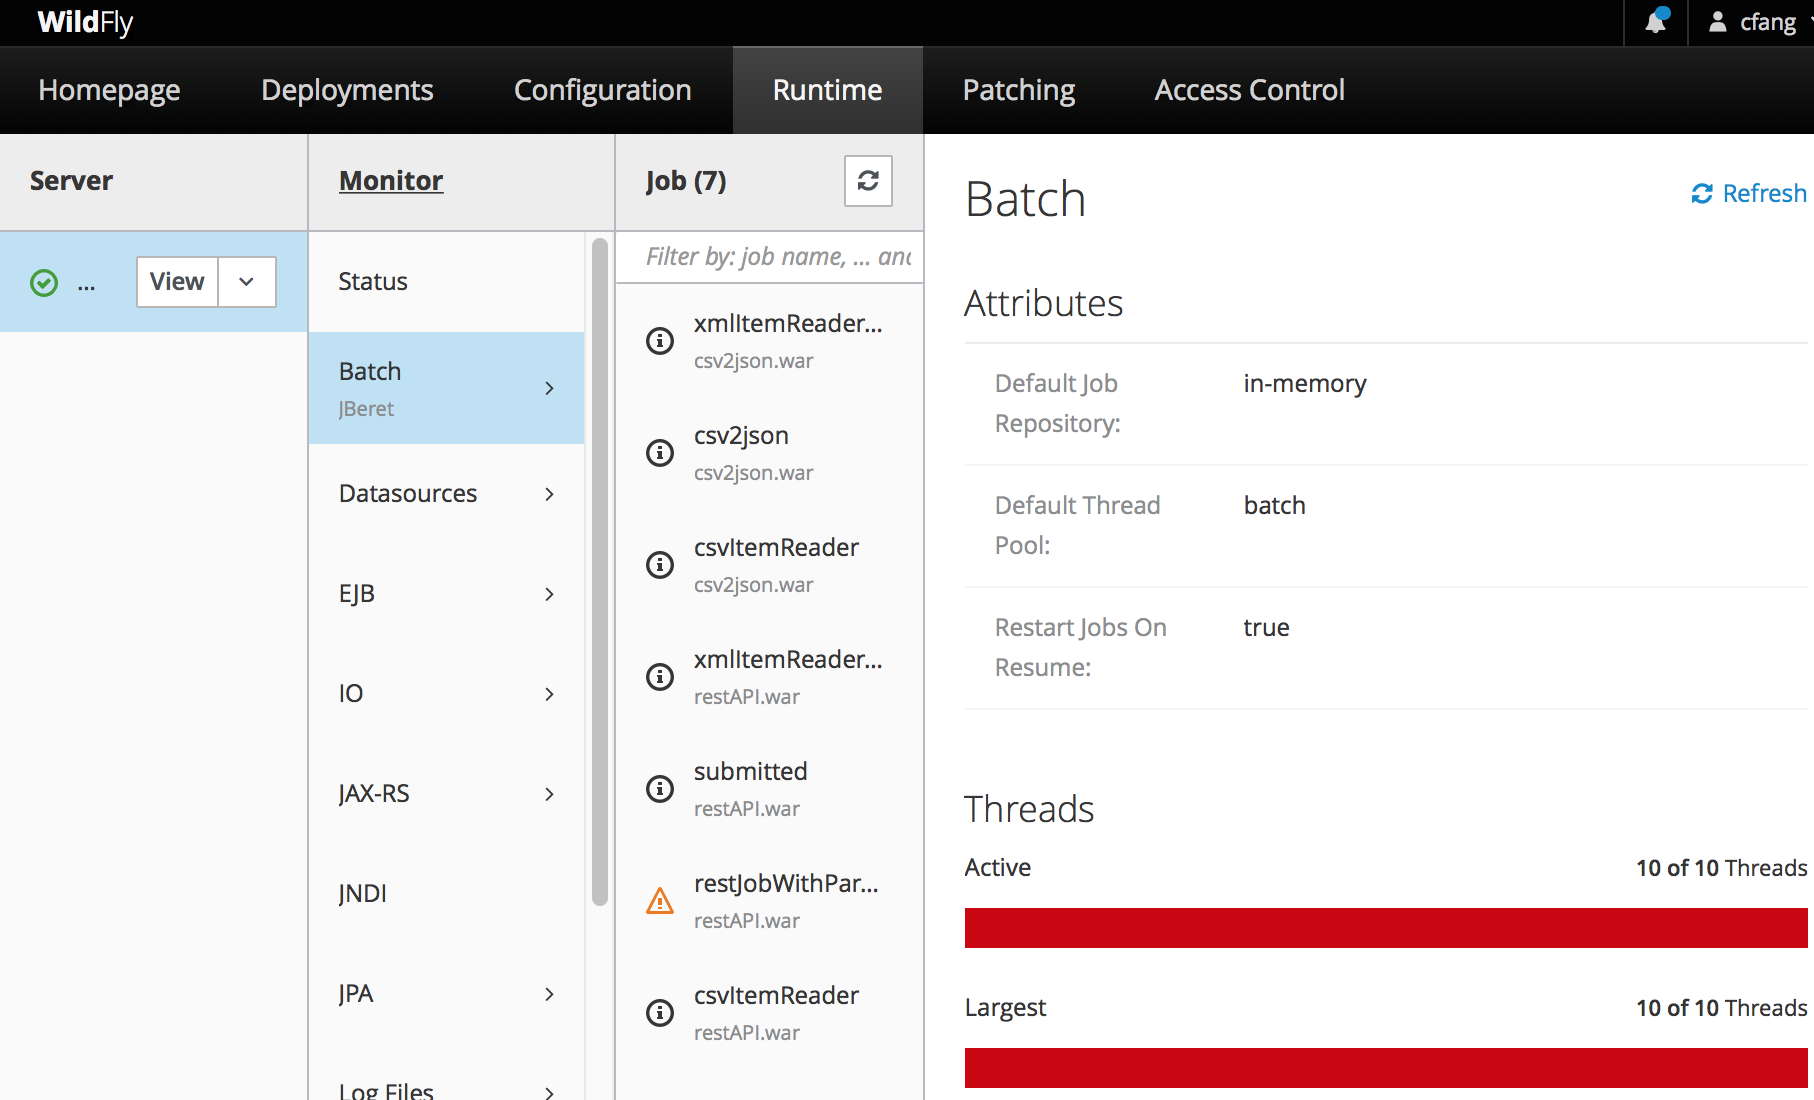
Monitor Batch Runtime and Start Jobs
To monitor batch runtime, click Runtime tab on the top of the page, and then choose to monitor batch jberet. Here you can view batch runtime stats, all batch jobs known to the batch runtime and their associated application.
After selecting a job in the jobs list, the right panel will display the number of job executions for this job and their batch status:
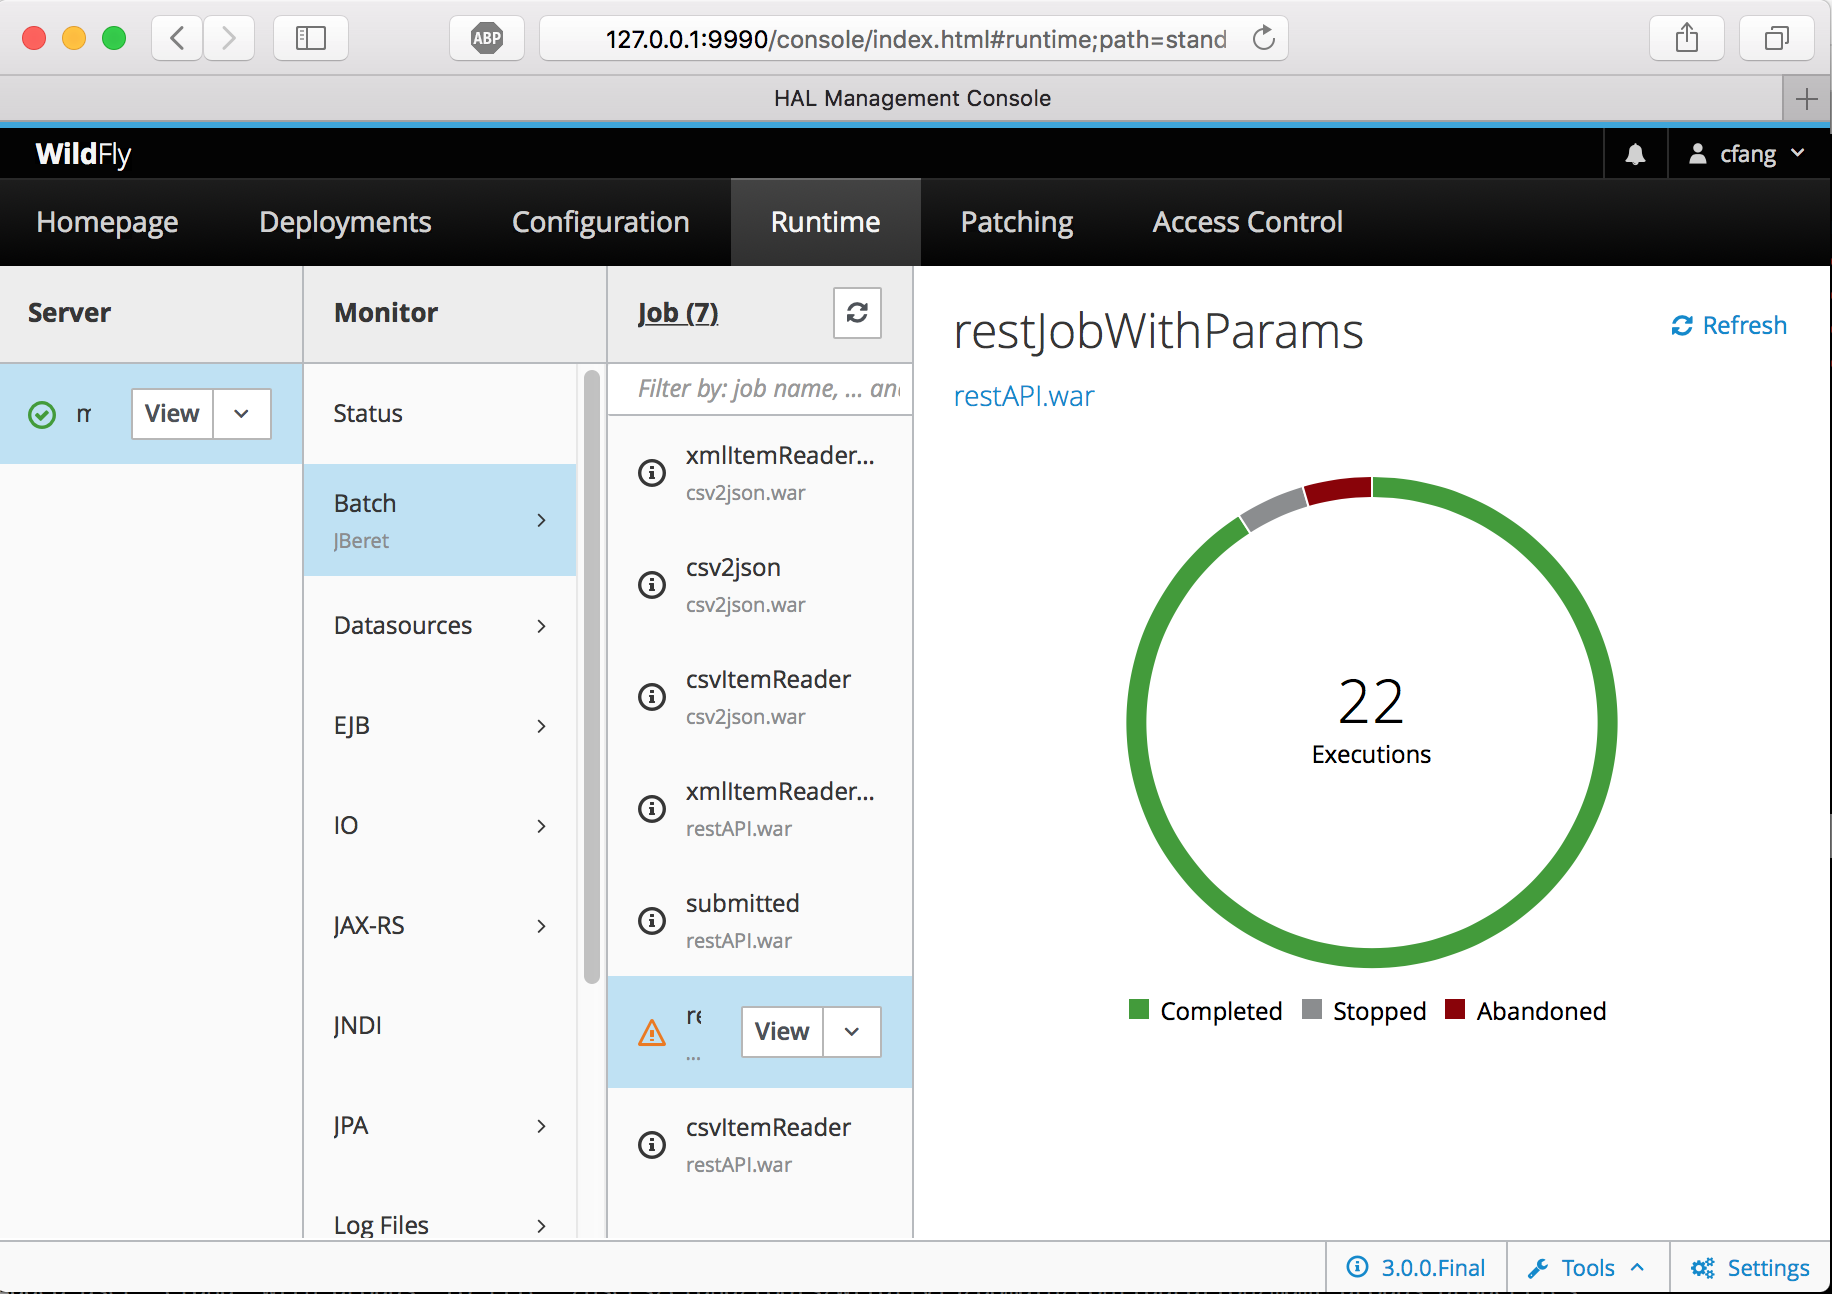
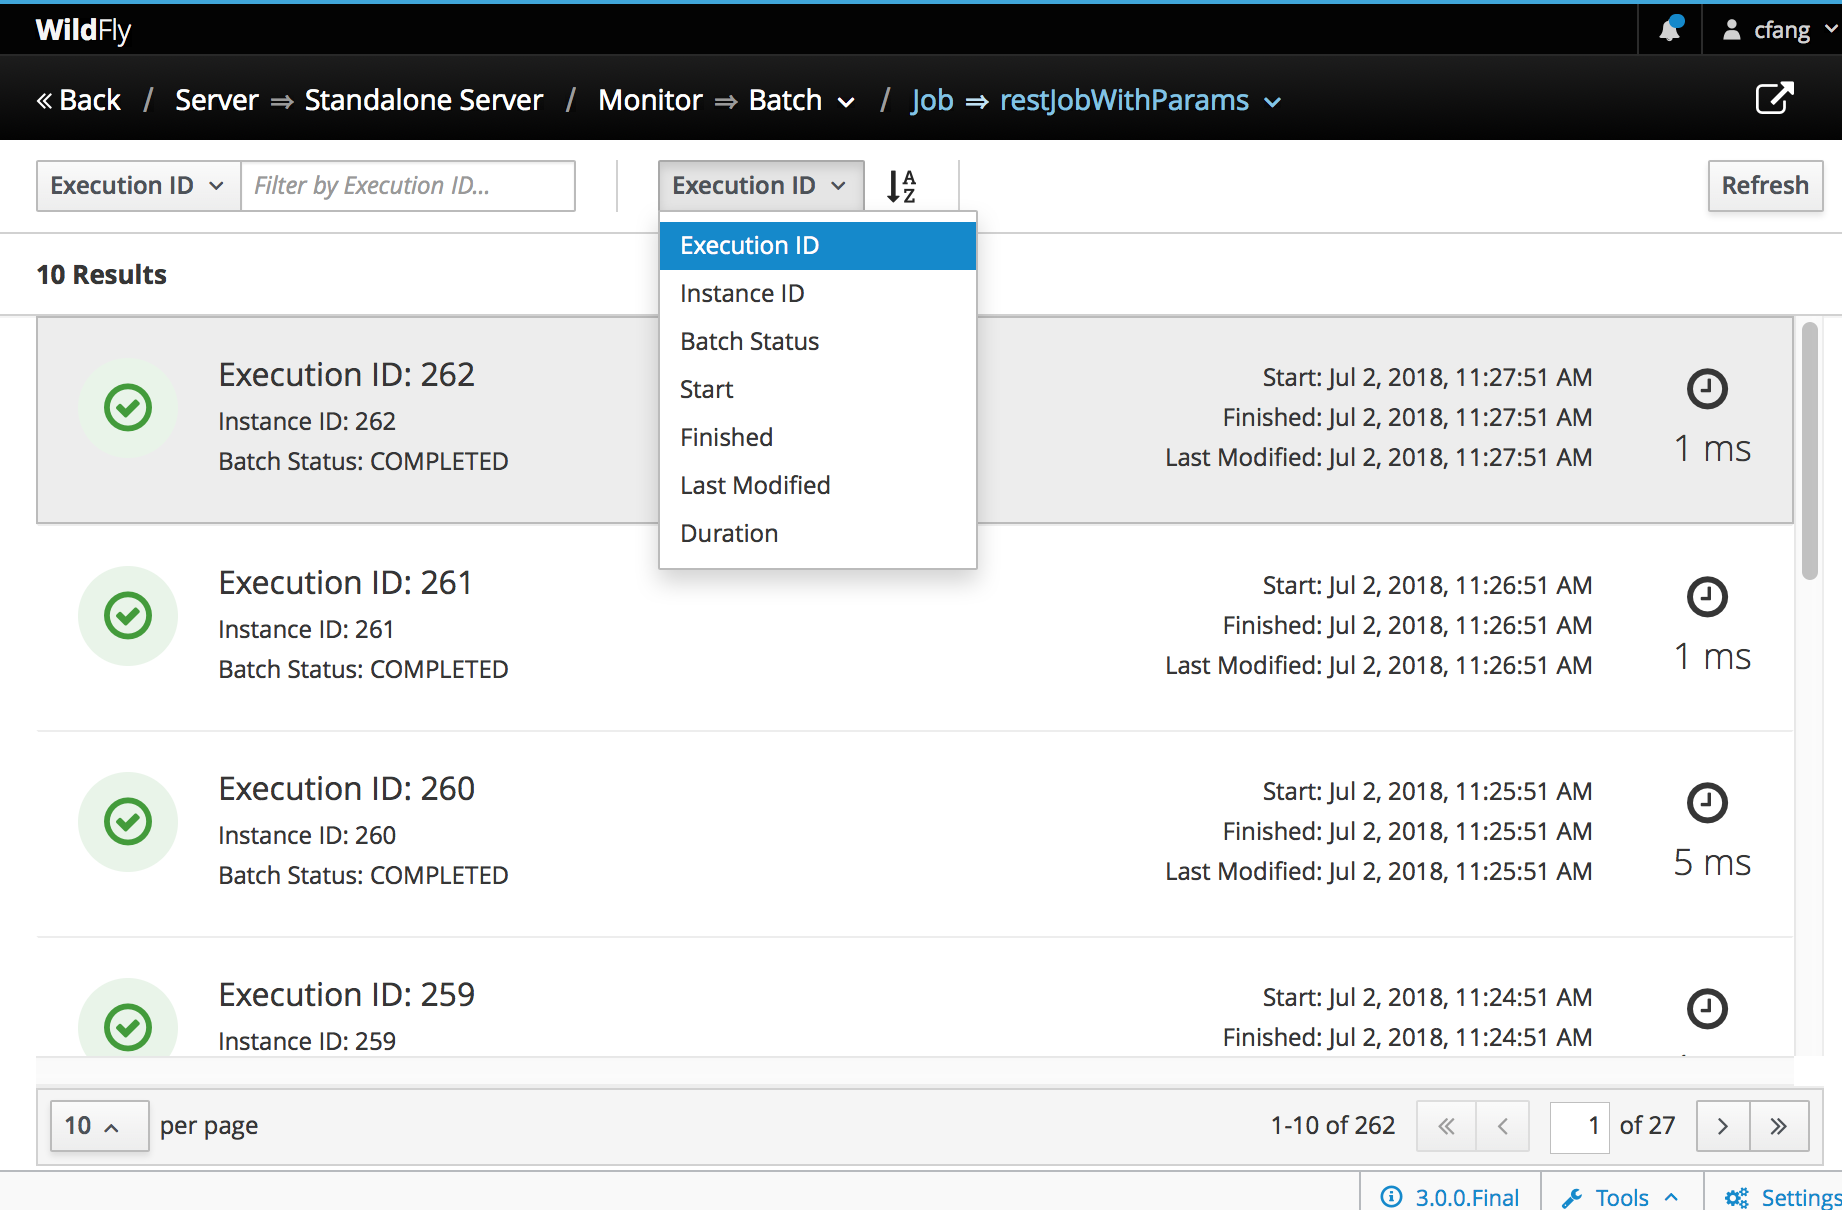
Click View button to display details of all job executions belonging to this job. The page supports pagination, sorting and filtering with various attributes. For example, you can view all failed job executions by filtering with Batch Status "FAILED".
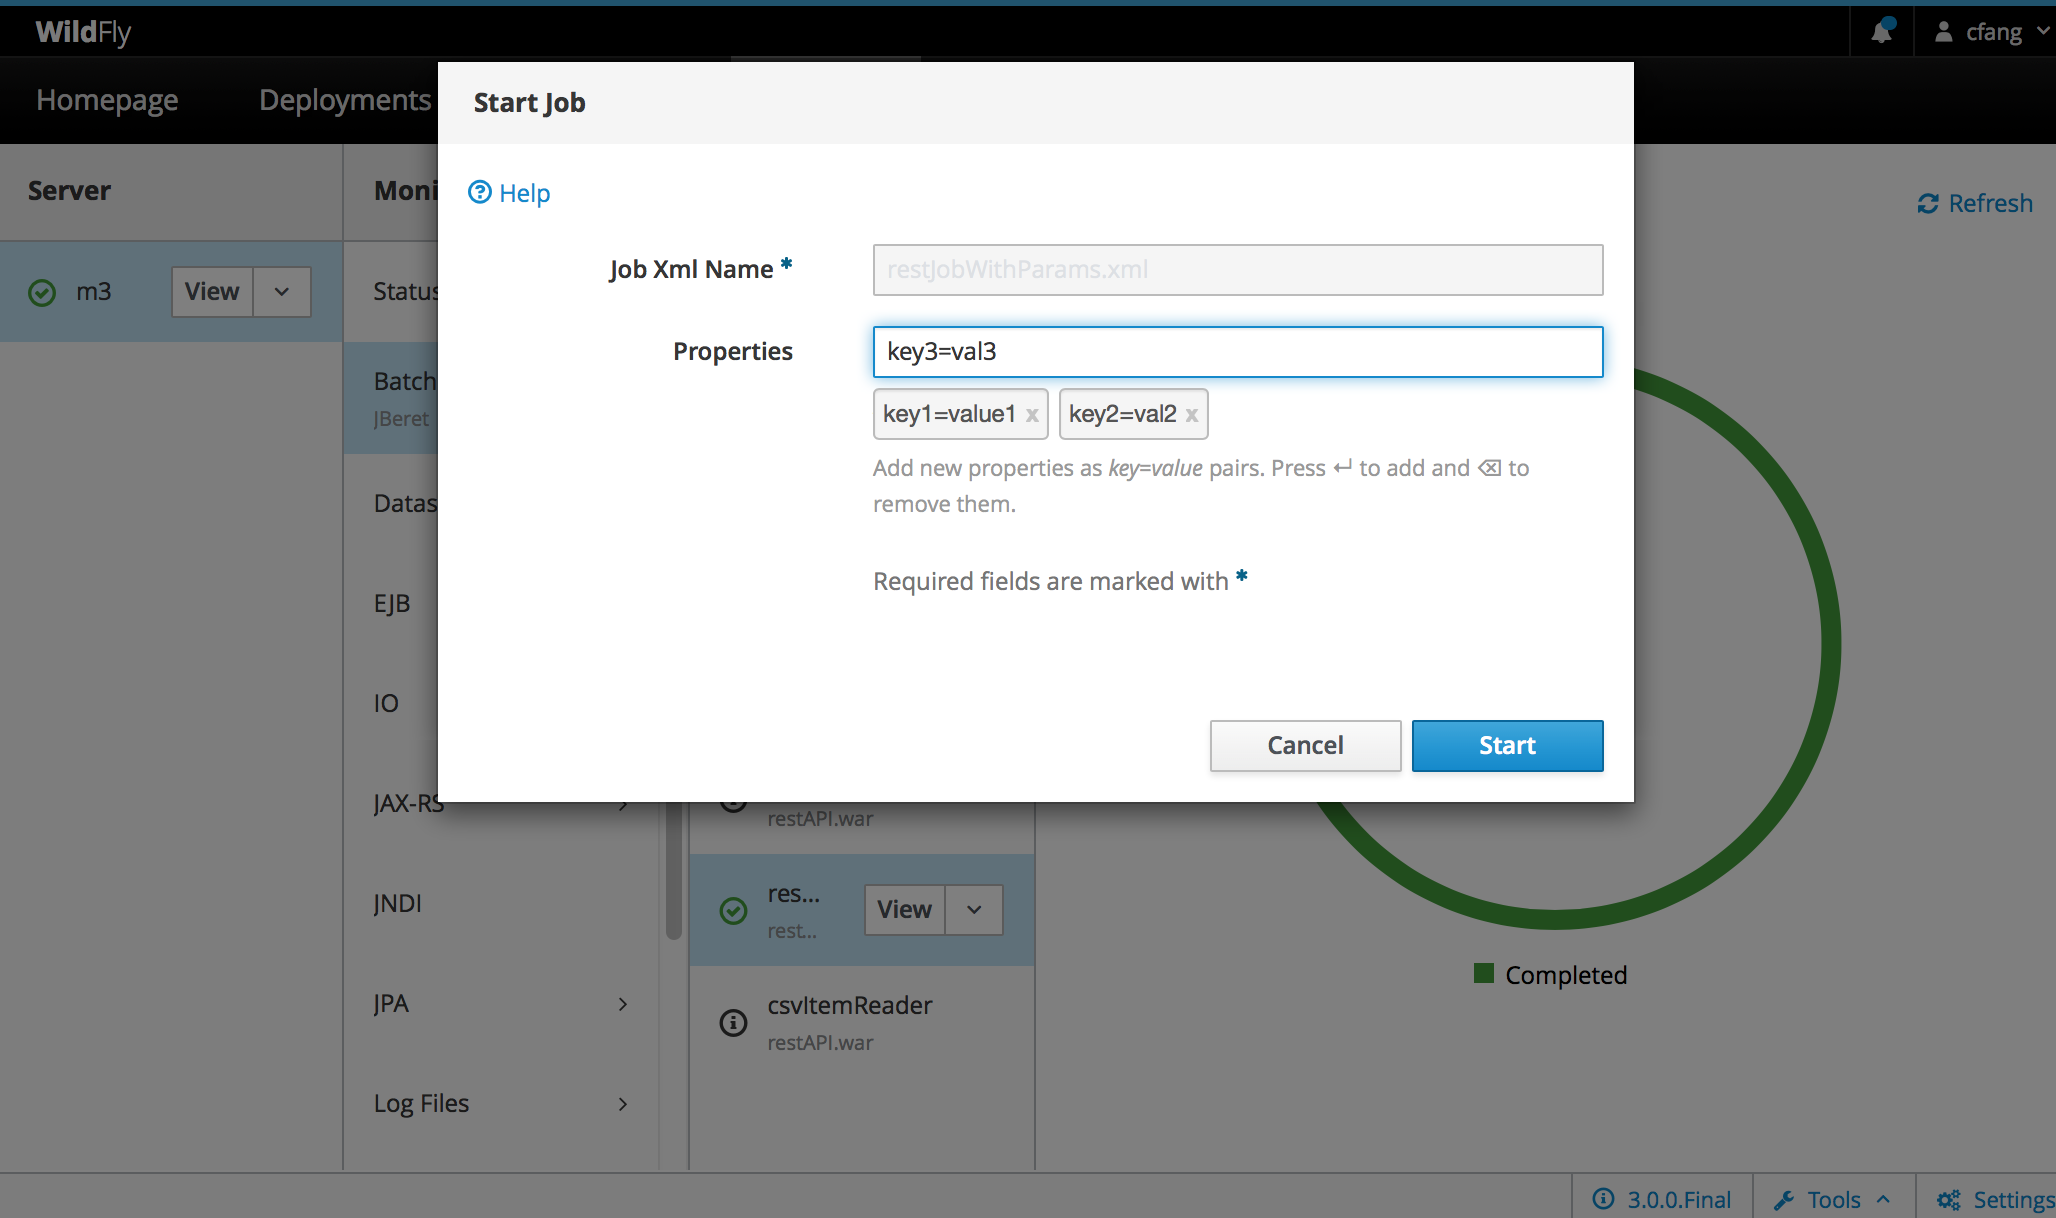
To start running a batch job, click the pull-down arrow next to the View button, and choose Start. The ensuing pop-up window allows you to add job parameters to be used for this job execution, before clicking the Start button to start it.
Summary
In this post, we explored various batch subsystem configuration and common tasks in deploying and managing a batch application. I hope you find it useful and I would also encourage batch application developers to leverage these features in WildFly admin console, and get involved in WildFly. Last but not least, kudos to upstream project HAL Management Console for implementing all these features.
Comments