Over the past few weeks, I have started the integration of Seam Forge into JBoss Tools. Today I am happy to present the first results of this work.
Installation
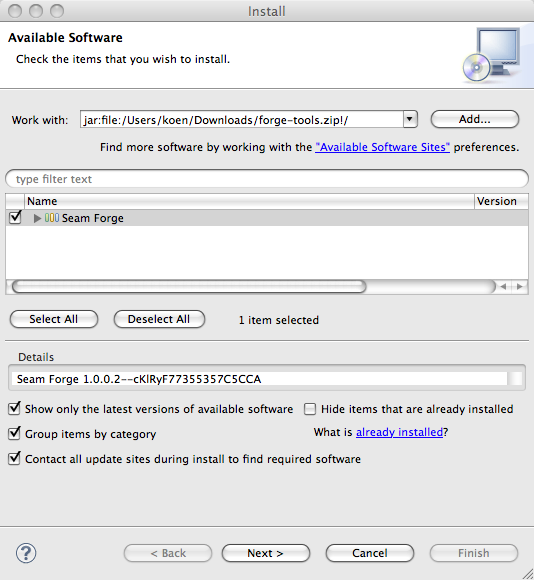
If you are familiar with the Eclipse platform the installation should be a breeze for you. The easiest way is to download a recent Eclipse version and use the 'Help->Install New Software...' wizard to install the latest and greatest JBoss Tools from the update site. Don't forget to include the Maven integration for Eclipse as we will need it later on. After this, use the same mechanism to install the forge tools from this update archive. Restart Eclipse and you should be set to go.
Starting and Stopping
Now that the installation is dealt with, let's have a look whether everything went ok. You can bring up the "Forge Console View" by selecting 'Window->Show View->Other...' and then 'Seam Forge->Forge Console'.
 As you can see the Forge Console View has a toolbar and a dropdown menu that allow you to start and stop Forge. The initial message pane indicates that Forge is not running. Let's get going and push the 'Start Forge' button.
After a while, the Forge welcome banner appears and you are invited to enter forge commands. The very convenient tab completion suggesting the list or possible commands does not work yet, but you can get the suggestions anyway by pressing tab followed by a return. Also, the coloring is not yet enabled like when using Forge directly in a terminal window. When you're done working you can stop Forge by pushing the 'Stop Forge' button.
Create a Project
To make things a bit more interesting, let's try the tutorial from Lincoln's blog. We create a new project called 'foo' with top level package 'org.foo':
[no project] workspace $ new-project --named foo --topLevelPackage org.foo
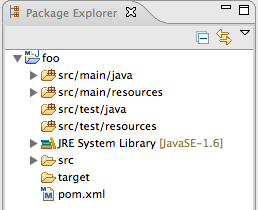
 Now the project is created but unfortunately, we cannot see it in our workspace. This is one of the obvious features that need to be added. For now, we have to import the project in the workspace. Here is where the Maven plugins come into play. For Forge projects are indeed Maven projects too. Select 'File->Import...' and then 'Maven->Existing Maven Project'. Point the wizard at the workspace root and the 'foo' project should show up in the list of projects to import. After importing the project shows up in the package explorer.
 We enter the next few commands from the tutorial:
[foo] foo $ install forge.scaffold
[foo] foo $ new-entity --named Person
[foo] Person.java $ new-field string --fieldName firstName
[foo] Person.java $ new-field string --fieldName lastName
[foo] Person.java $ cd ..
[foo] domain $ scaffold generate-metawidget-jsf *.java
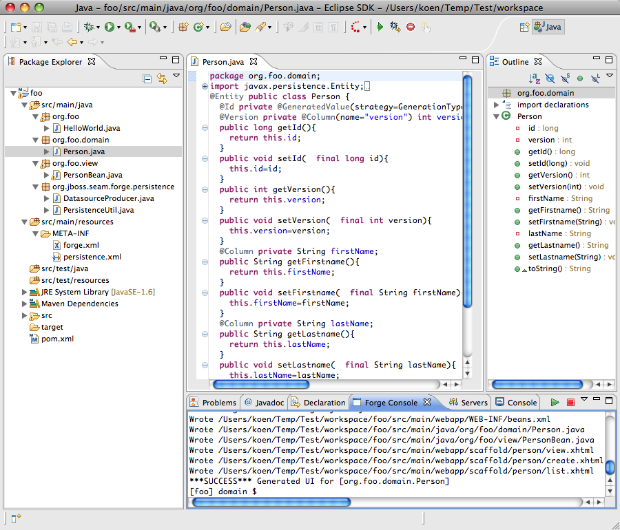
To see which changes are performed in the project by these commands we need to refresh the project.
Again, it would be good if after issuing each command the relevant changes would be highlighted by setting the relevant folder, file or file element selected. This is more work for the future.
The Future
As suggested, a lot more work is waiting... Some of the features that are on the list are:
- Adding a preference page to be able to add and select Forge runtimes.
- Support for tab completion suggesting the list of possible commands.
- Support for command history.
- Support for colors in the Eclipse Forge Console.
- Show appropriate feedback after each command.
- etc.
If you are interested in helping out implementing some of these features or if you just want to view the code implementing the current console, you can find the sources in the JBoss Tools SVN.
Happy forging!
Koen


Comments